Why Ribbon Wedding Decor Is The Secret To A Dreamy Low Budget Celebration
The Timeless Appeal Of Ribbon As A Wedding Decoration Material
Ribbon serves as a primary tool for adding motion and texture to wedding venues. Design movements like the Bohemian and Hippie styles rely on satin and grosgrain strips to create vertical interest. These materials catch even slight air currents to provide kinetic energy that static decor lacks. Professionals choose ribbon because it scales easily. It fills large volumes of space without requiring heavy structural support or expensive hardware.
The history of ribbon in celebrations dates back centuries through Maypole traditions and bridal finery. Modern ribbon wedding decor utilizes high-quality weaves like velvet, organza, and recycled silk. These materials reflect light differently to create depth in your wedding mood board. Using varied widths and lengths creates a sense of luxury. It bridges the gap between raw construction and finished design. Ribbon remains a staple because it is durable and reusable.
How Ribbon Compares To Other Budget Friendly Wedding Decor Options
Standard budget decor often involves paper or plastic. These materials lack the durability and movement of textiles. Ribbon wedding decorations outperform paper because they do not wilt or tear in outdoor conditions. Compared to fresh florals, ribbon costs significantly less per square foot of coverage. You can cover an entire ribbon wedding arch for a fraction of the price of a floral installation. This allows for massive visual impact on a tight budget.
Fabric draping often requires professional rigging and expensive yardage. Ribbon achieves a similar aesthetic with far less weight and complexity. You can install a ribbon arch wedding backdrop using simple tension rods or existing branches. For the ribbon send off, using a wedding ribbon wand replaces messy confetti or expensive sparklers. This choice minimizes cleanup costs and environmental impact. Ribbon provides a clean, tactical advantage for couples who prioritize high visual ROI.
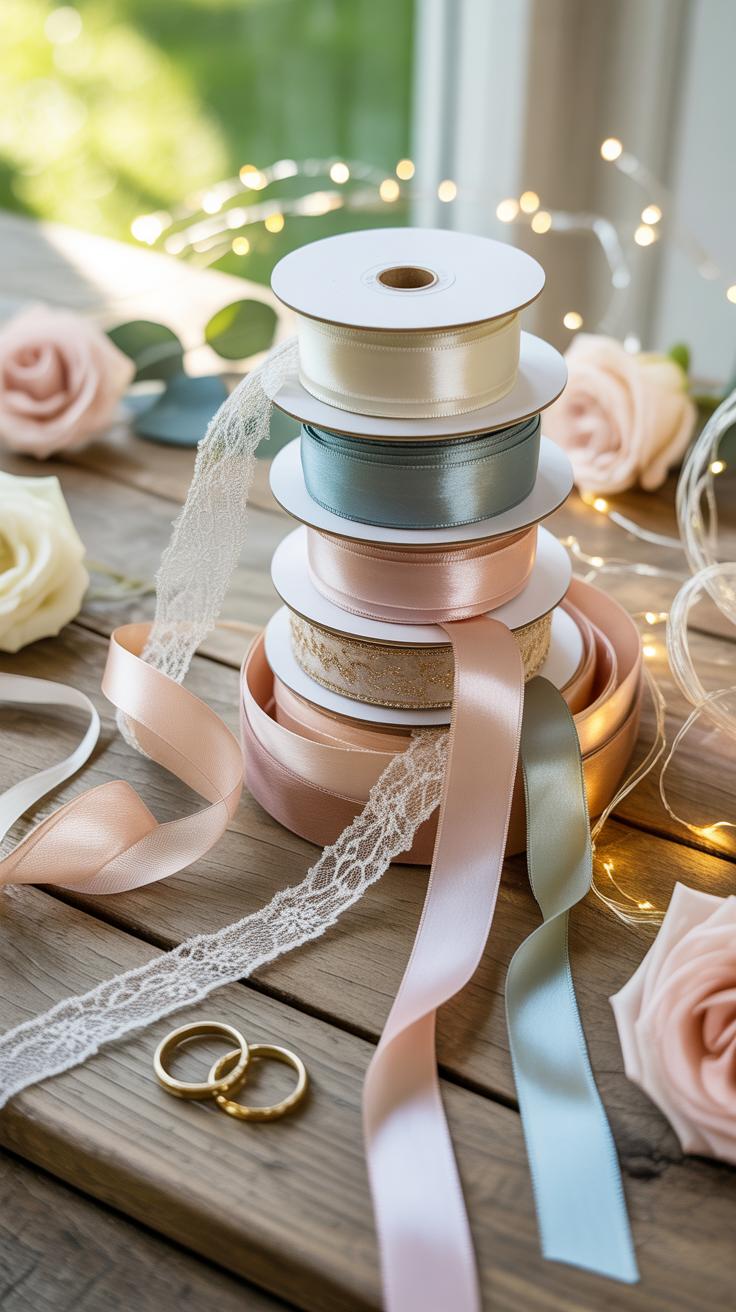
Planning Your Wedding Mood Board Around A Ribbon Color Palette
How To Build A Wedding Mood Board That Centers Ribbon Textures And Tones
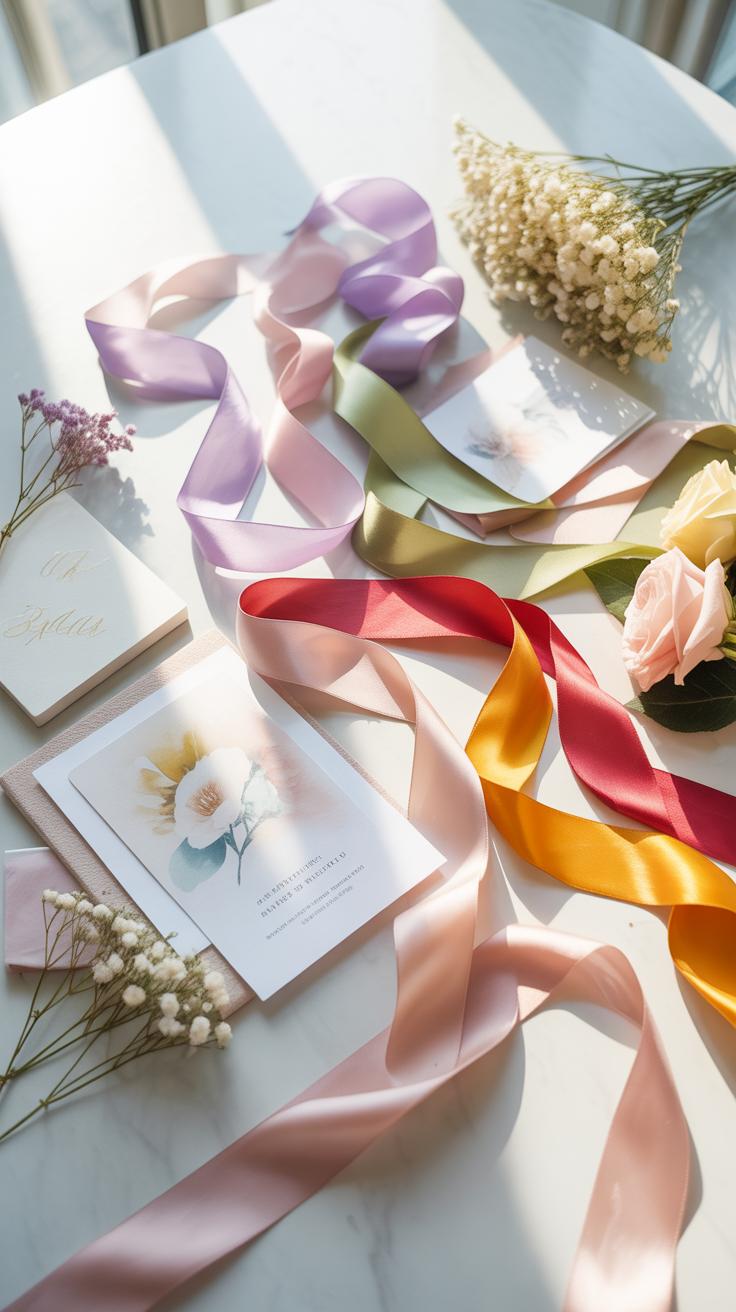
Start your mood board with physical swatches rather than digital images. Ribbon wedding decor depends on how light interacts with material. Silk reflects light softly while polyester satin has a high shine. Grosgrain offers a matte finish with ribbed texture. Collect samples of velvet, organza, and cotton cord. These tactile elements dictate the visual weight of your installations. Physical boards ensure color accuracy that screens cannot provide.
Overlay your ribbon samples onto photos of your primary floral choices. Observe how the ribbon drape matches the flower shape. Fine silk ribbons suit delicate blooms like sweet peas. Heavy velvet ribbons anchor large flowers like protea or garden roses. Your mood board must show the movement of the material. Pin ribbons at one end to see how they hang. This process defines the structural limits of your design.
Choosing Ribbon Colors That Complement Your Venue And Season
Select ribbon colors based on the fixed tones of your venue. Industrial spaces with gray concrete benefit from high-contrast jewel tones. Outdoor garden settings require organic shades like sage or champagne to blend with greenery. Use dark, heavy tones for winter events to create a sense of warmth. Light, sheer ribbons work best for summer or beach settings. Match the ribbon weight to the seasonal atmospheric conditions.
Traditional color theory dictates your palette choices. Analogous colors create a calm look suitable for hippie wedding decorations. Use complementary colors for high-energy areas like a ribbon send off. Check your palette against the venue lighting. Artificial yellow light shifts blue ribbons toward green. Daylight brings out the true pigment in natural dyes. Test every color under the specific lighting conditions of your wedding day to avoid clashing.
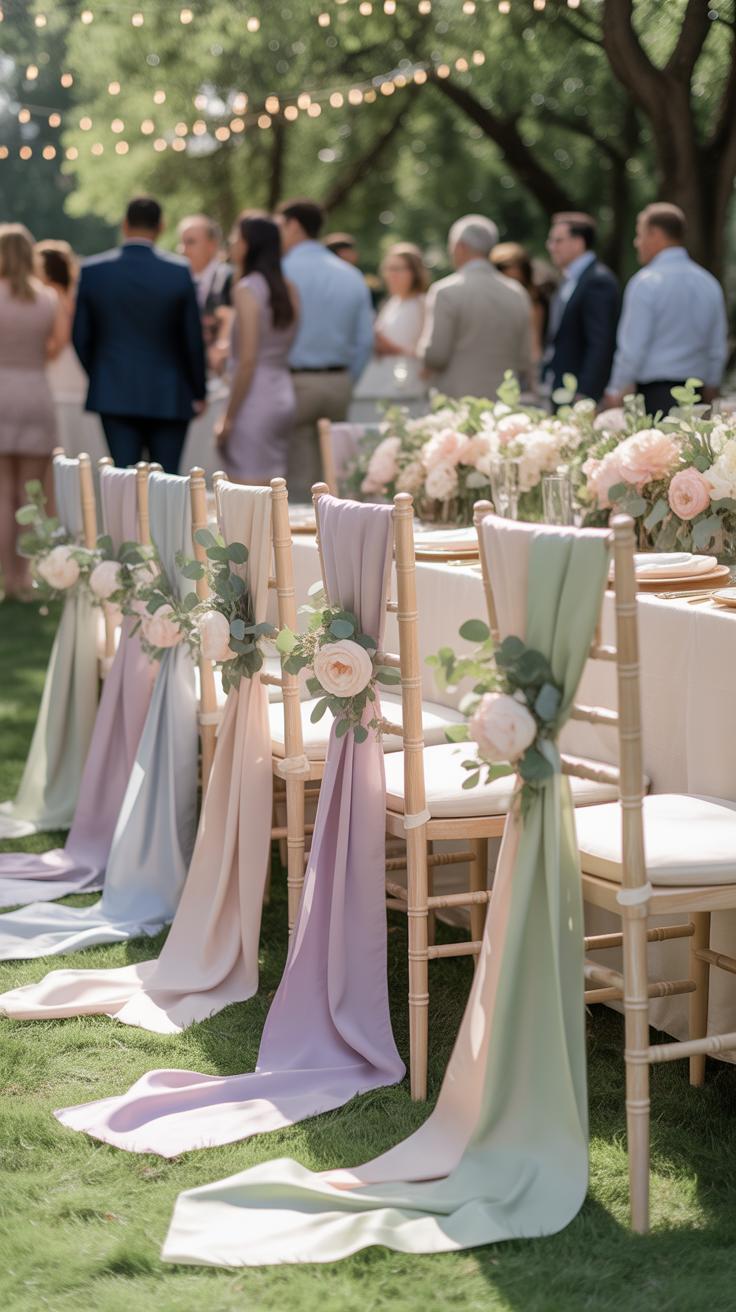
Transforming Your Ceremony With Wedding Aisle Ribbon Decor
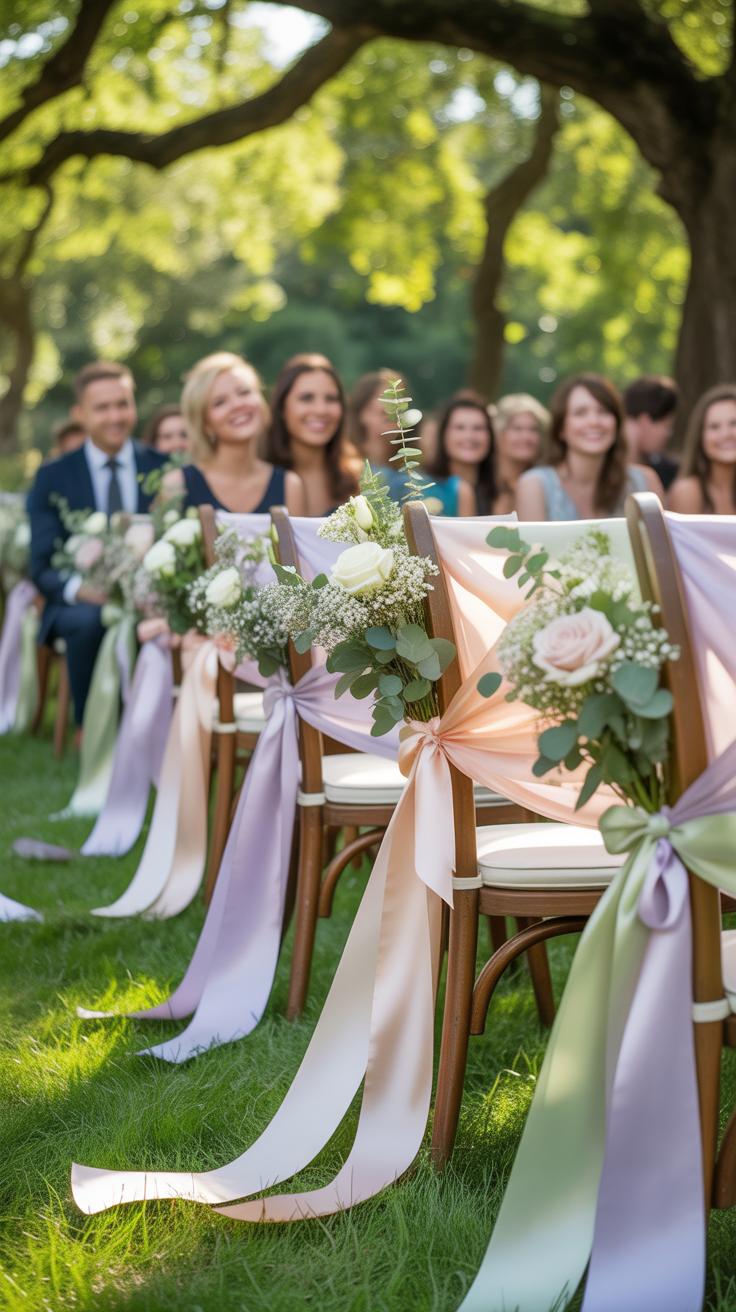
Draping Ribbon Along Pew Ends And Chairs For An Elegant Aisle Look
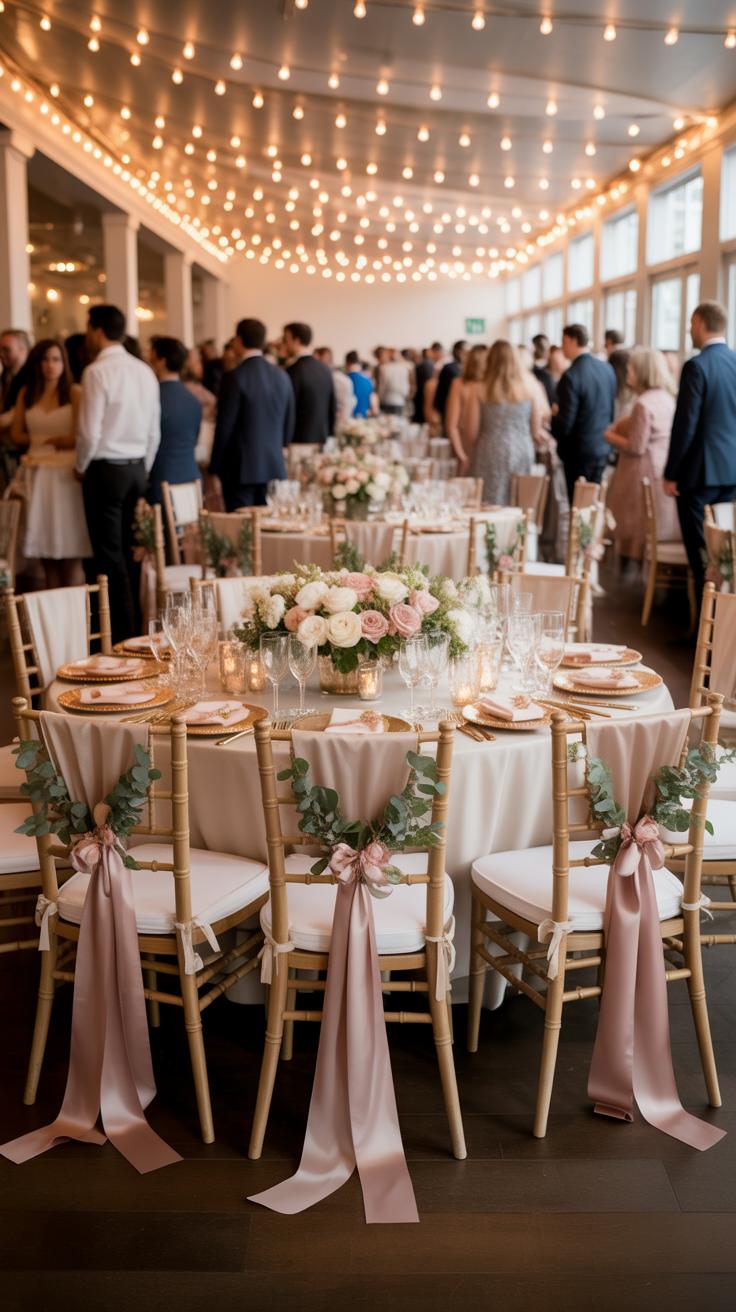
Secure ribbons to the inner aisle chairs using a girth hitch or simple slip knot. This technique prevents the fabric from sliding during the processional. Use high quality double faced satin or heavy grosgrain for vertical stability. These materials hold their shape against drafts and guest movement. Measure the distance from the seat back to the floor to ensure uniform lengths across every single row.
Standard 1.5 inch widths provide enough surface area to catch the light without blocking the view of the floor. Match the ribbon weight to your chair type. Folding metal chairs require thinner ties to avoid bulk. Heavy wooden pews can support wider bands or layered textures. Use sharp fabric shears to prevent fraying at the tail ends. Angle the cuts at forty five degrees for a professional finish.
True elegance is not about the price tag but the love woven into every detail, as even a simple ribbon can carry the weight of a thousand memories.
— Vera Wang
Using Ribbon Streamers And Swags To Define The Ceremony Aisle On A Budget
Create a continuous visual border by sagging ribbon between aisle markers or stanchions. This method uses less material than individual chair ties while covering more distance. Use lightweight chiffon or organza for long spans to reduce tension on the anchors. Keep the arc depth consistent at every interval to maintain a clean line. This approach effectively guides foot traffic and keeps the aisle clear during seating.
Fasten the ribbon at the top of each aisle chair using clear adhesive dots or thin wire. Tension must be loose enough to create a natural curve but tight enough to stay off the floor. Incorporate multiple colors to build depth without spending extra on floral arrangements. This tactic works well for outdoor settings where wind adds natural movement. Ensure the final knot is hidden on the side facing away from the cameras.
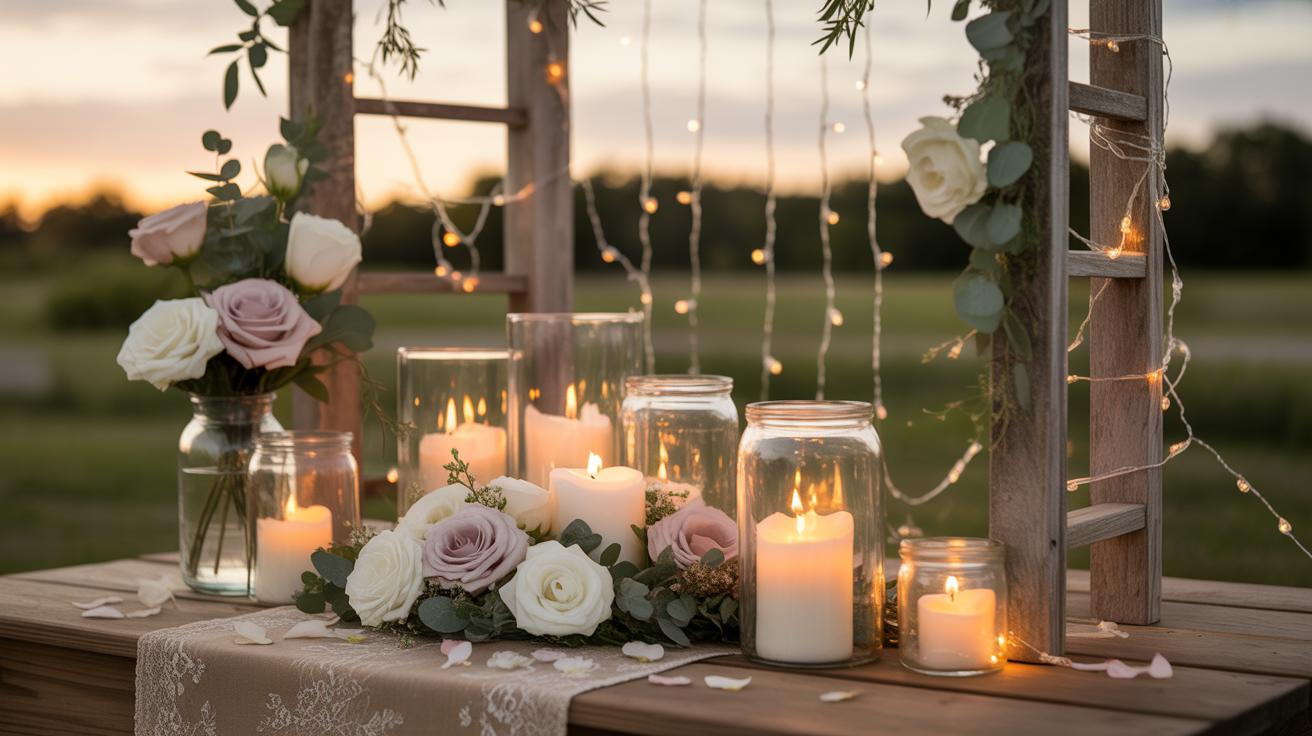
Creating A Showstopping Ribbon Wedding Arch For Your Ceremony Backdrop
Step By Step Tips For Building A DIY Ribbon Arch Wedding Couples Will Love
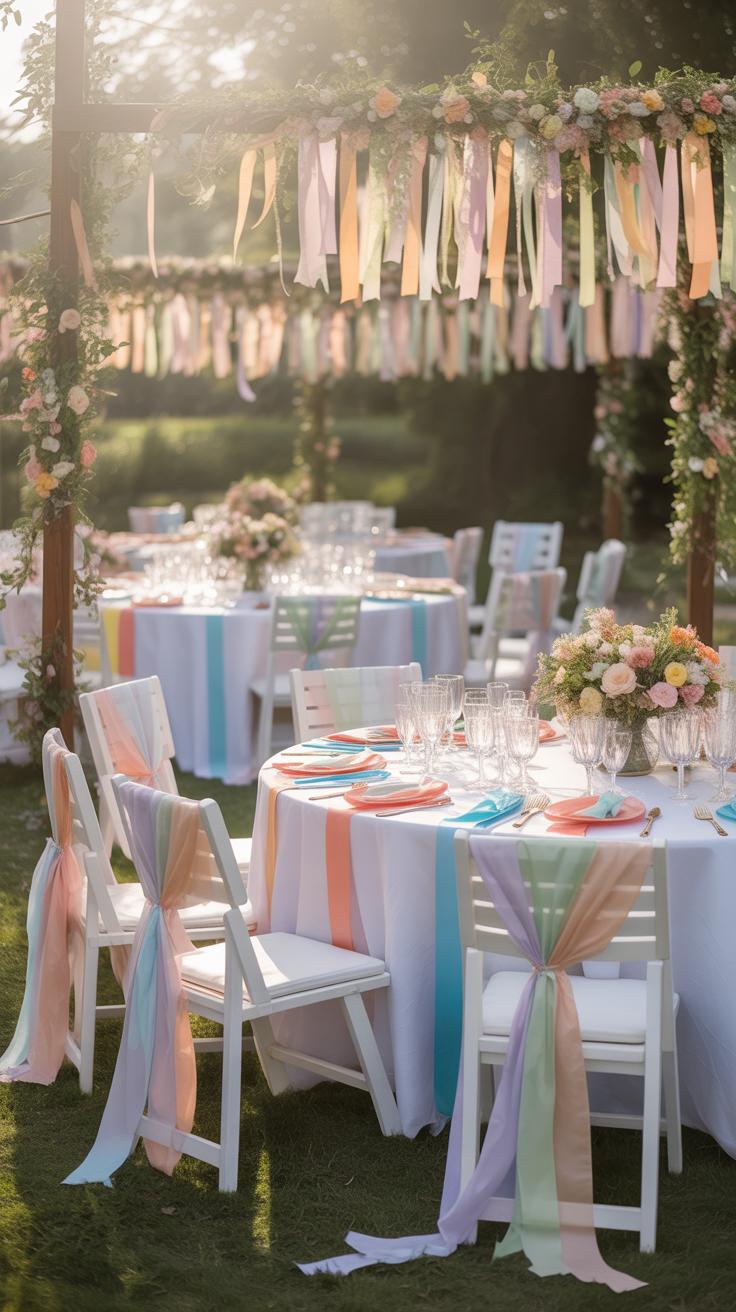
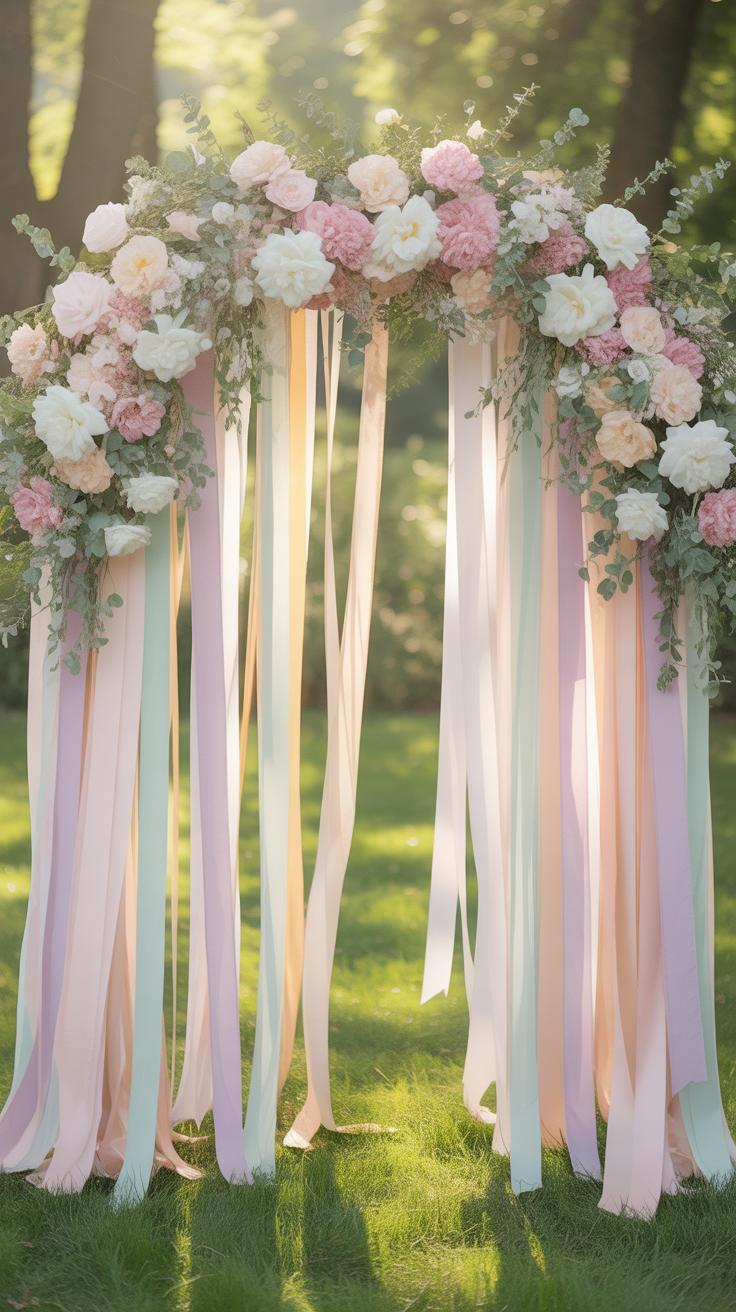
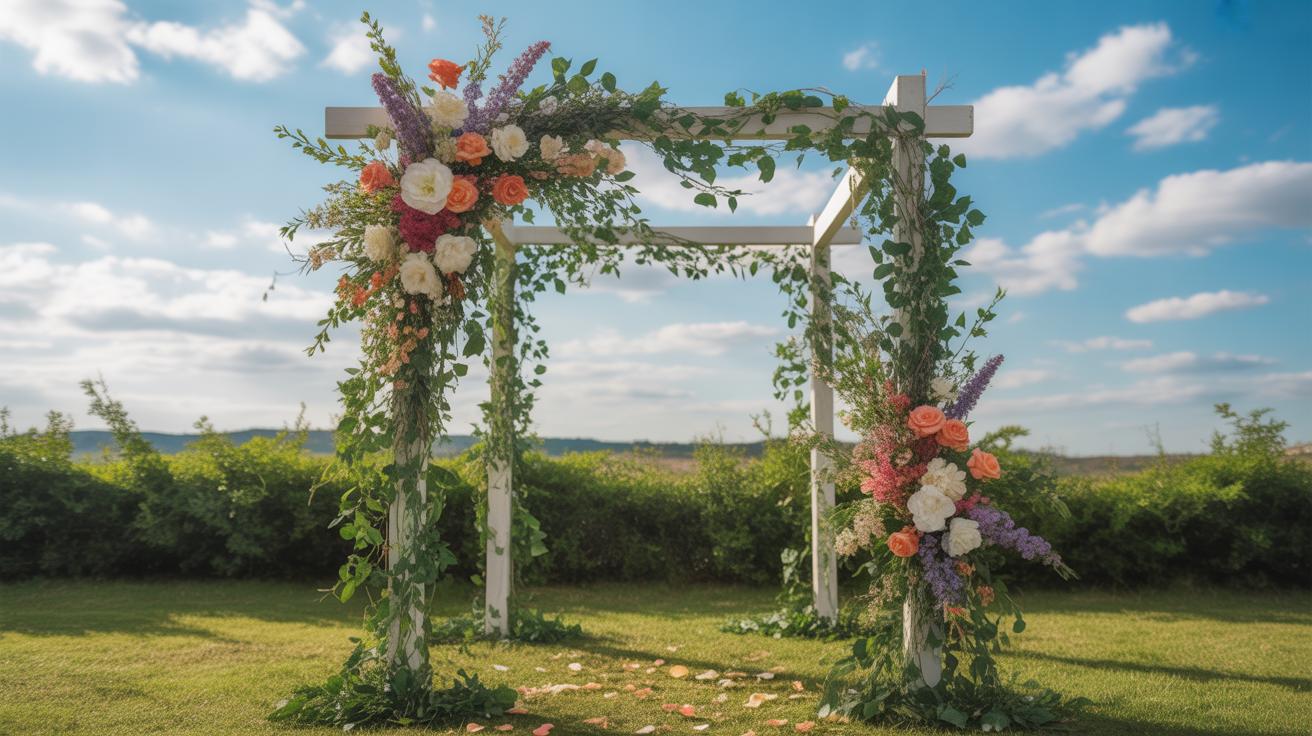
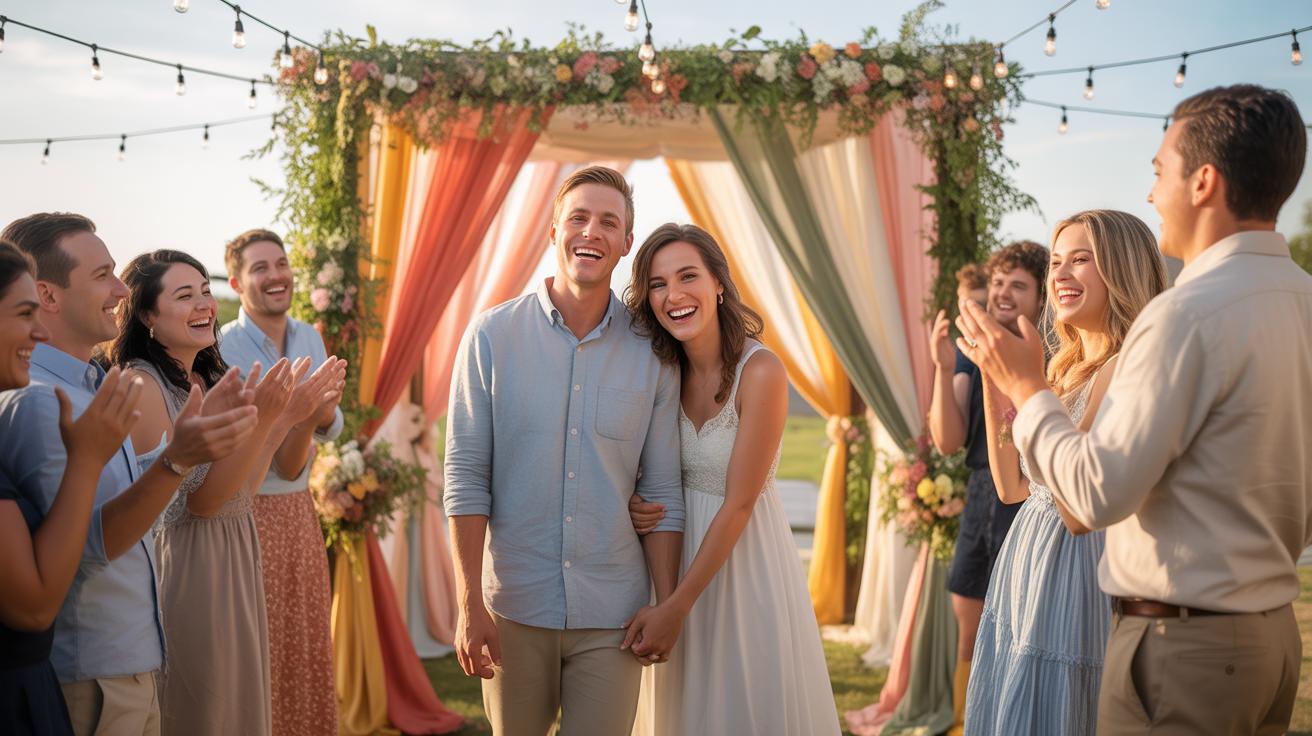
Building a ribbon arch requires a solid base frame and precise measuring. Most designers use a wood or metal arbor as the foundation. You must calculate the height from the top crossbar to the ground before buying materials. Add two feet to every strip to allow for knots and wind movement. Secure the frame to the ground so it does not tip during the ceremony.
- Uniform Cutting: Measure a single piece of ribbon to your desired length and use it as a template for every subsequent cut. This ensures a consistent bottom edge. Uneven lengths look messy and decrease the professional quality of the final installation.
- Slip Knot Technique: Fold each ribbon strip in half and loop it over the crossbar. Pull the ends through the loop to create a secure lark’s head knot. This method prevents the ribbon from sliding or falling off during outdoor gusty conditions.
- Layering Depth: Start by tying your base colors directly to the frame. Add a second layer of thinner ribbons or different textures on top of the first row. Layering creates density so the background behind the arch does not bleed through your photos.
- Weighting the Ends: Attach small decorative weights or clear glass beads to the bottom of the ribbons if the wedding is outdoors. This prevents the fabric from tangling or blowing into the couple during the vows. Stable ribbons provide a much cleaner visual line.
- Color Blocking: Group ribbons of the same shade together in sections rather than mixing them randomly. This technique creates a modern ombre effect or a bold graphic look. It mimics professional design standards and makes the arch a clear focal point.
Organize your materials by color and texture before you start the tying process. This saves time and ensures an even distribution across the width of the frame. Testing the arch against the light is vital. Look for gaps where the sun shines through and fill them with extra strands. A dense wall of ribbon provides the best contrast for the wedding party.
Ribbon Types And Widths That Work Best For A Wedding Ribbon Arch
Select ribbons based on weight and light reflectivity. Satin and grosgrain provide a heavy drape that hangs straight. Chiffon and organza offer a sheer look that catches the light but moves easily in the breeze. Use different widths to create visual interest and texture. Thick ribbons between two and four inches wide fill space quickly. Narrow ribbons add fine detail and movement.
Mixing materials creates a professional finish for any ceremony backdrop. Double-faced satin is ideal because the color looks identical on both sides. This is important if the arch is visible from the back. Avoid cheap plastic ribbons which look stiff and reflect light poorly in photography. Natural cotton or linen ribbons work best for boho or hippie wedding themes. High quality materials ensure the arch stays straight and beautiful.
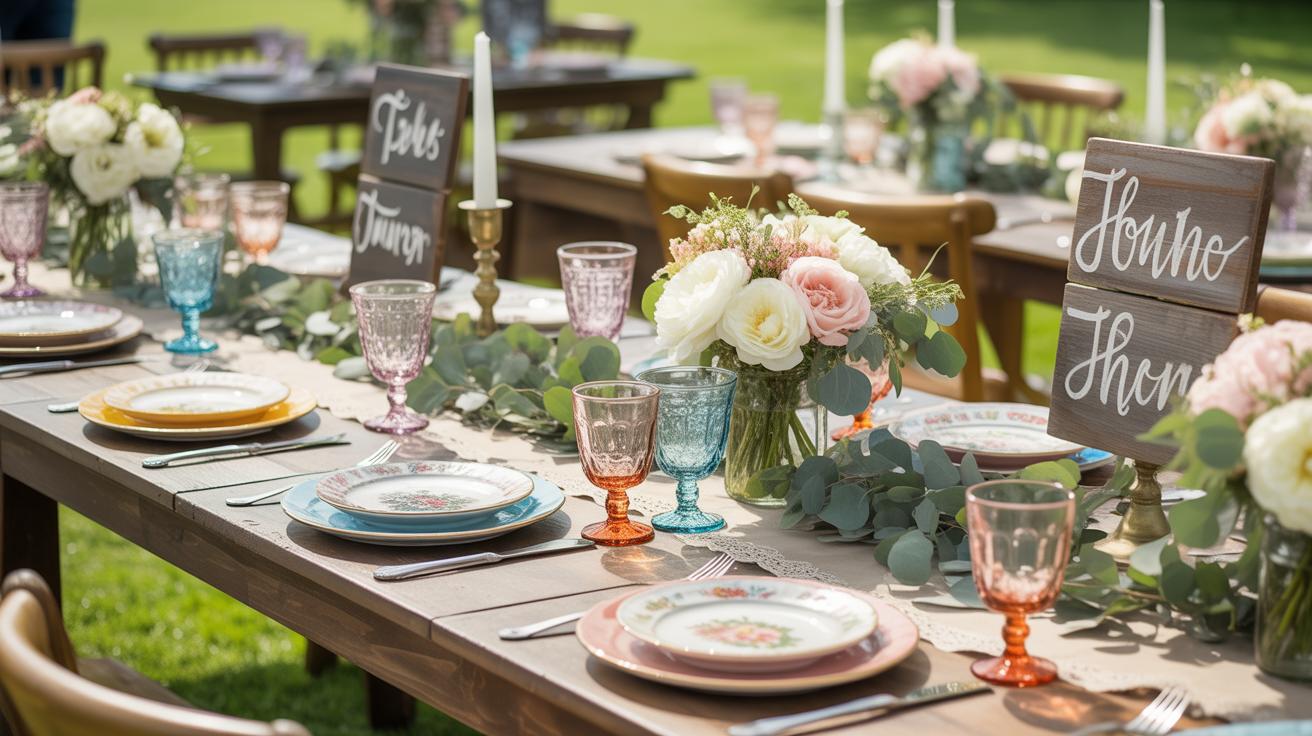
Budget Friendly Ribbon Wedding Decorations For Tables And Reception Spaces
How To Style Centerpieces And Table Runners Using Ribbon Wedding Decor
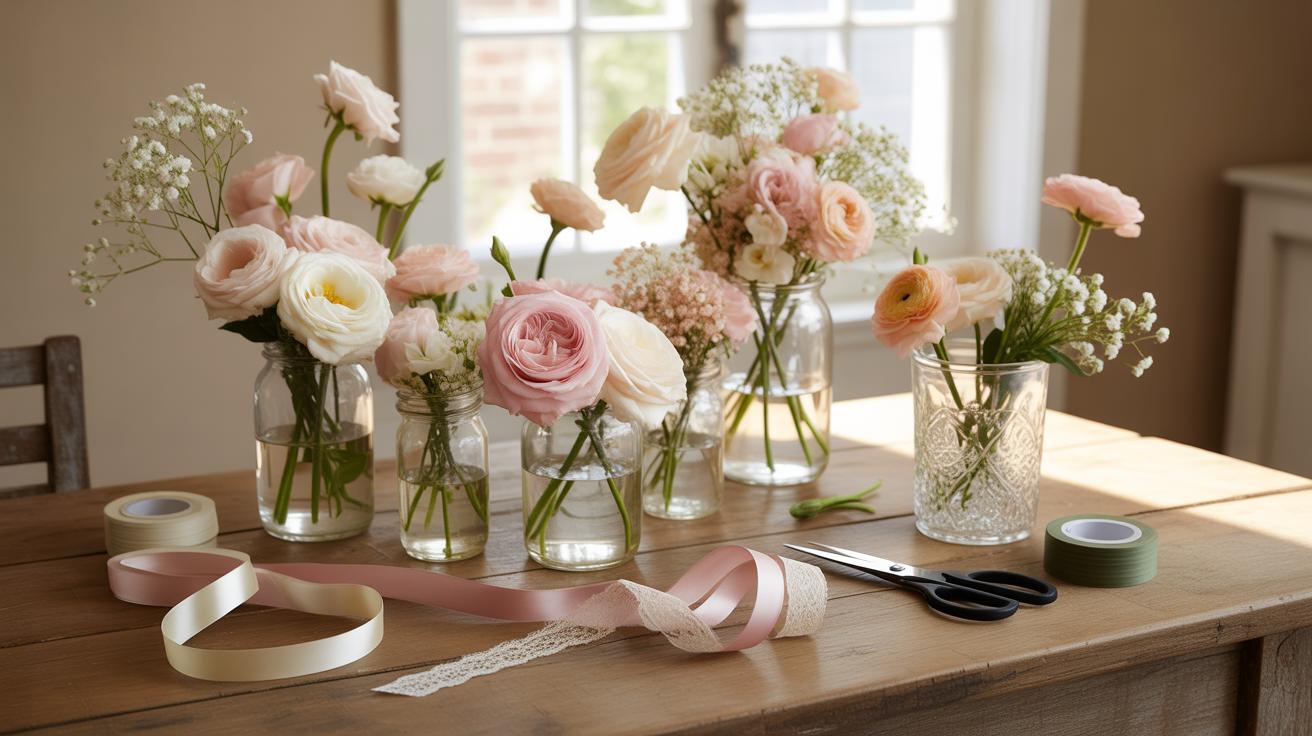
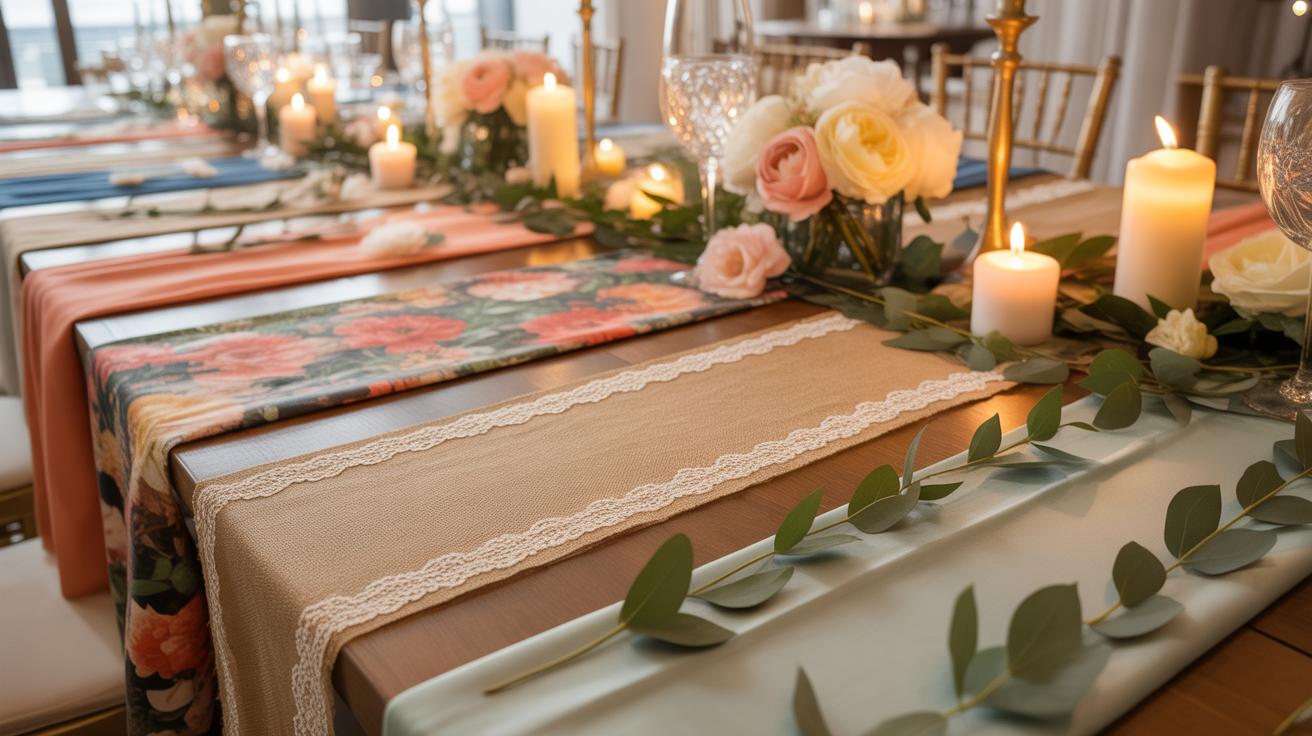
Standard table runners cost money and require professional laundering. You can achieve a high-end look by layering varying widths of ribbon wedding decor across the table width. Grosgrain or velvet materials provide structural weight. These fabrics stay in place better than lightweight nylon. Start at one end and pull the material taut. Secure the ends under the table edge with heavy-duty adhesive or pins.
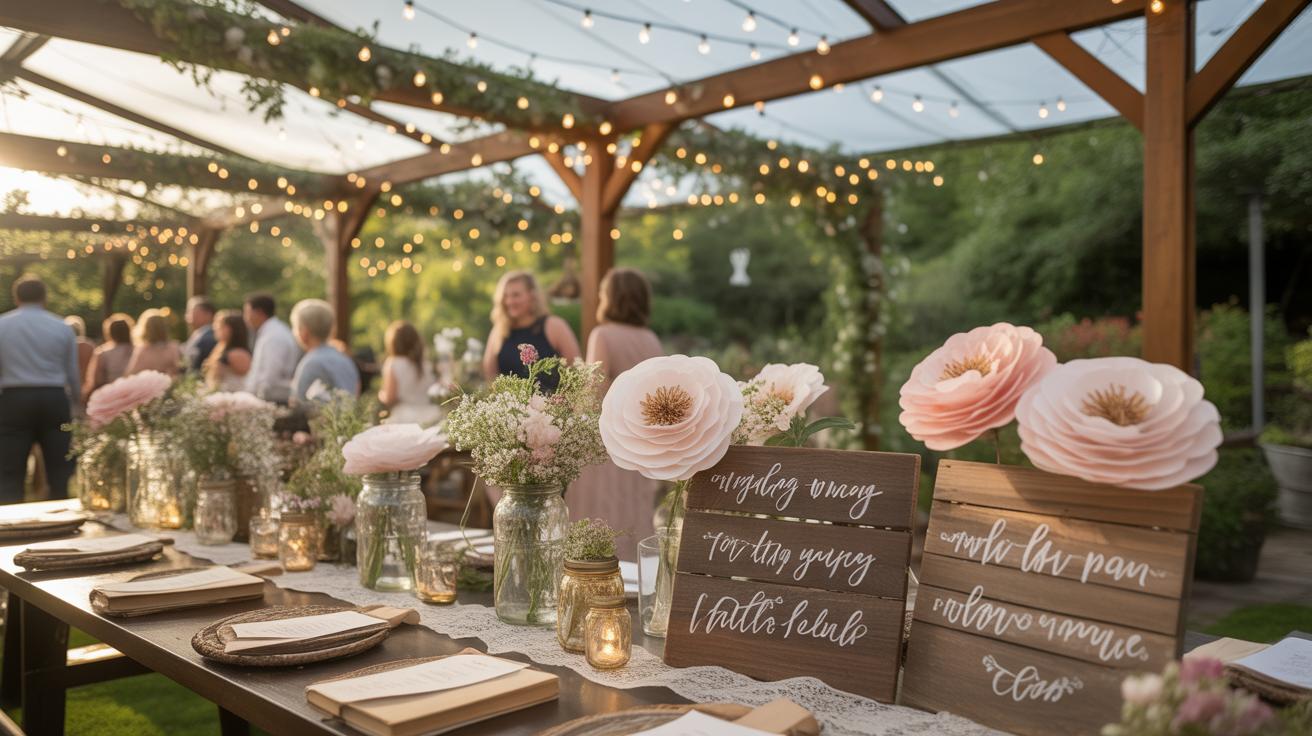
Centerpieces benefit from texture rather than expensive floral volume. Wrap glass cylinders or ceramic vases with silk or cotton ribbon to hide stems. Use a simple flat lay technique or a traditional French pleat for historical accuracy. This method mimics the Neoclassical style often seen in formal European event design. It creates a cohesive wedding mood board without the cost of custom vessels or high-end stones.
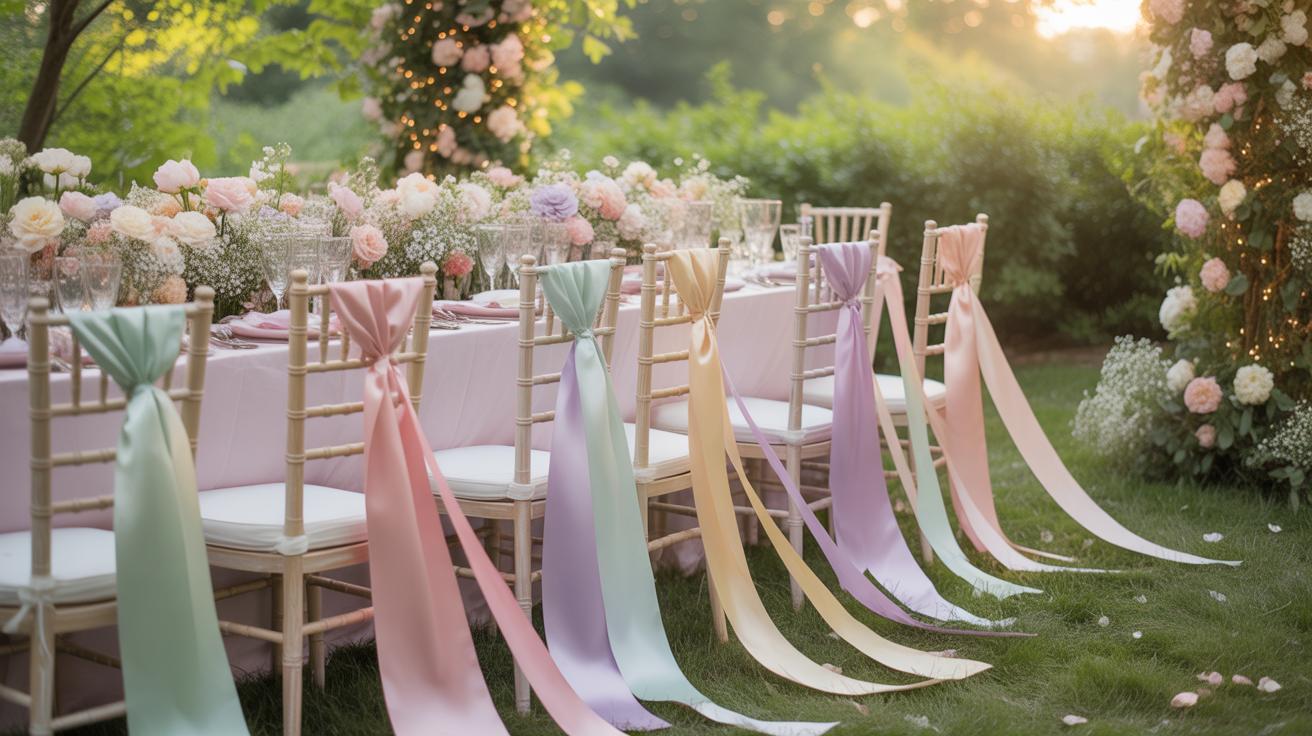
Decorating Chairs, Napkins, And Place Settings With Coordinating Ribbons
Chair decor often relies on expensive polyester covers that look cheap. Replace them with vertical ribbon drops tied to the top rail. Use satin or chiffon for a soft drape that moves with the air. This technique works best on Chivari or folding chairs. It creates a ribbon wedding arch effect for the seating area. Ensure the lengths reach the floor to maintain visual consistency across the entire reception hall.
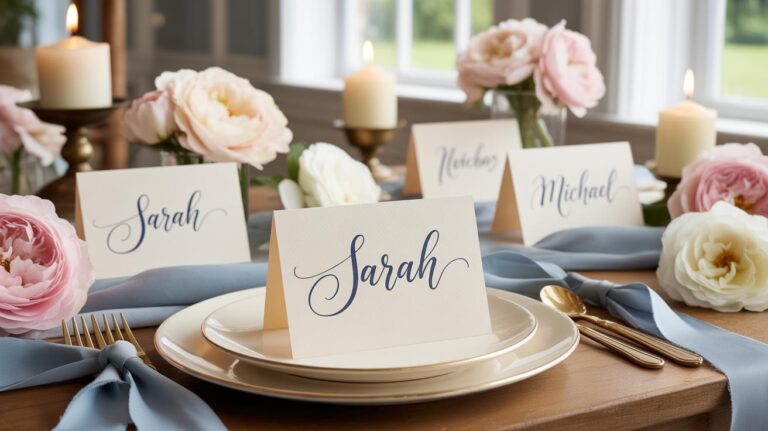
Place settings offer a tactical opportunity to reinforce your color palette. Tie linen napkins with a simple knot using narrow velvet ribbon. This replaces the need for rented metal napkin rings. You can also attach printed name cards directly to the ribbon. This method keeps the table organized and cuts down on paper waste. It provides a clean finish that fits a hippie wedding decorations theme or a modern minimalist aesthetic.
Making Magical Wedding Ribbon Wands For Your Guests
What Are Wedding Ribbon Wands And Why Guests Absolutely Love Them
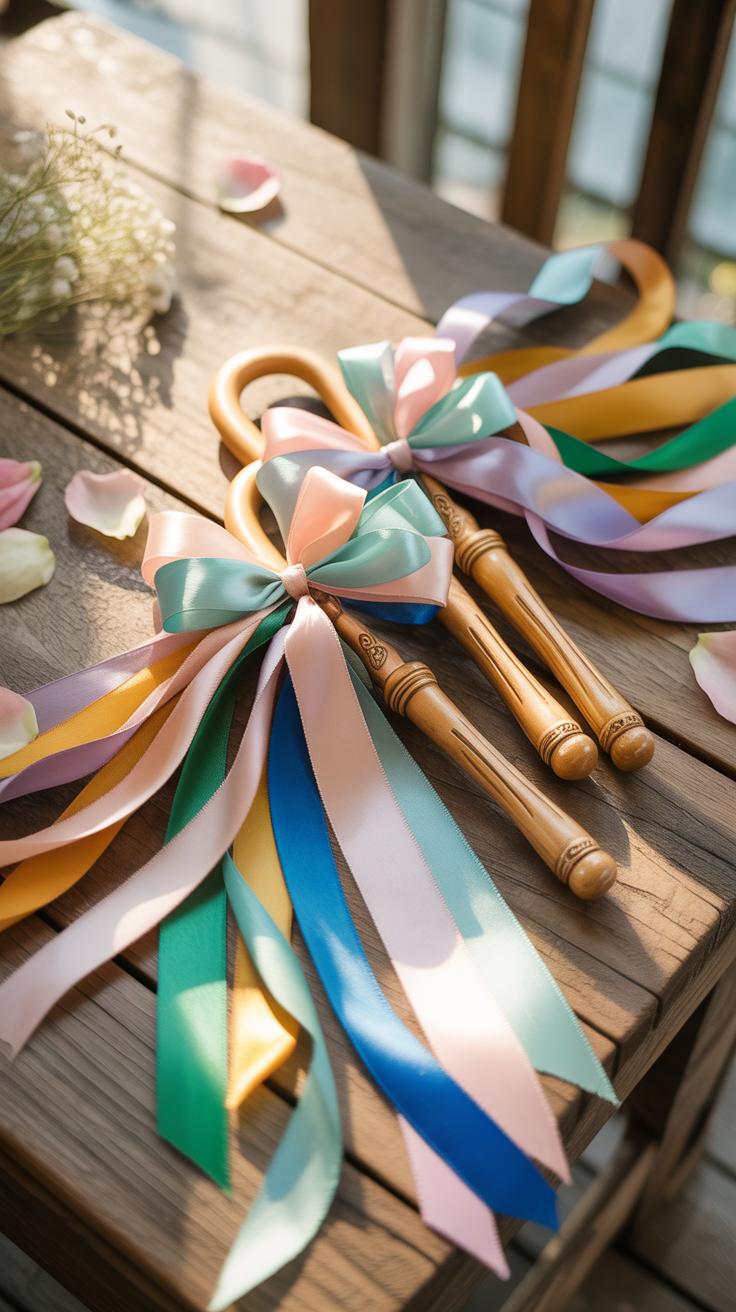
Wedding ribbon wands consist of a wooden dowel with strands of colorful ribbon attached to the top. Modern couples use them as a clean alternative to rice or birdseed during the exit. These tools allow guests to participate in the celebration without creating a mess on the ground. Venue managers prefer them because they require zero cleanup time after the ceremony ends.
Guests enjoy ribbon wands because they provide a safe way to celebrate. Unlike sparklers, these wands do not present a fire hazard or burn risk. Small children can handle them easily during the Ribbon Send Off. Historically, waving fabric streamers traces back to folk festivals and celebrations across various cultures. This simple motion creates high visual impact for wedding photography without any heavy equipment or high costs.
How To Assemble DIY Wedding Ribbon Wands At A Fraction Of The Cost
Building these wands requires basic materials found at any hardware or craft store. Purchase twelve-inch wooden dowels in bulk to save money. Cut satin or grosgrain ribbons into twenty-four inch lengths. Use a screw eye hook or high-strength adhesive to secure the ribbon to the wood. Selecting three different colors adds depth to the Wedding Ribbon Decorations and ensures they look professional in photos.
Scale your production by setting up an assembly line. Seal the ends of synthetic ribbons with a lighter to prevent fraying over time. This technique keeps the edges sharp and clean. Attach a small bell to the top if you want an audible element during the walk. Keep the design simple to maintain a Hippie Wedding Decorations aesthetic. These handmade items cost significantly less than pre-made versions sold by luxury wedding retailers.
Planning A Picture Perfect Ribbon Send Off For The Newlyweds
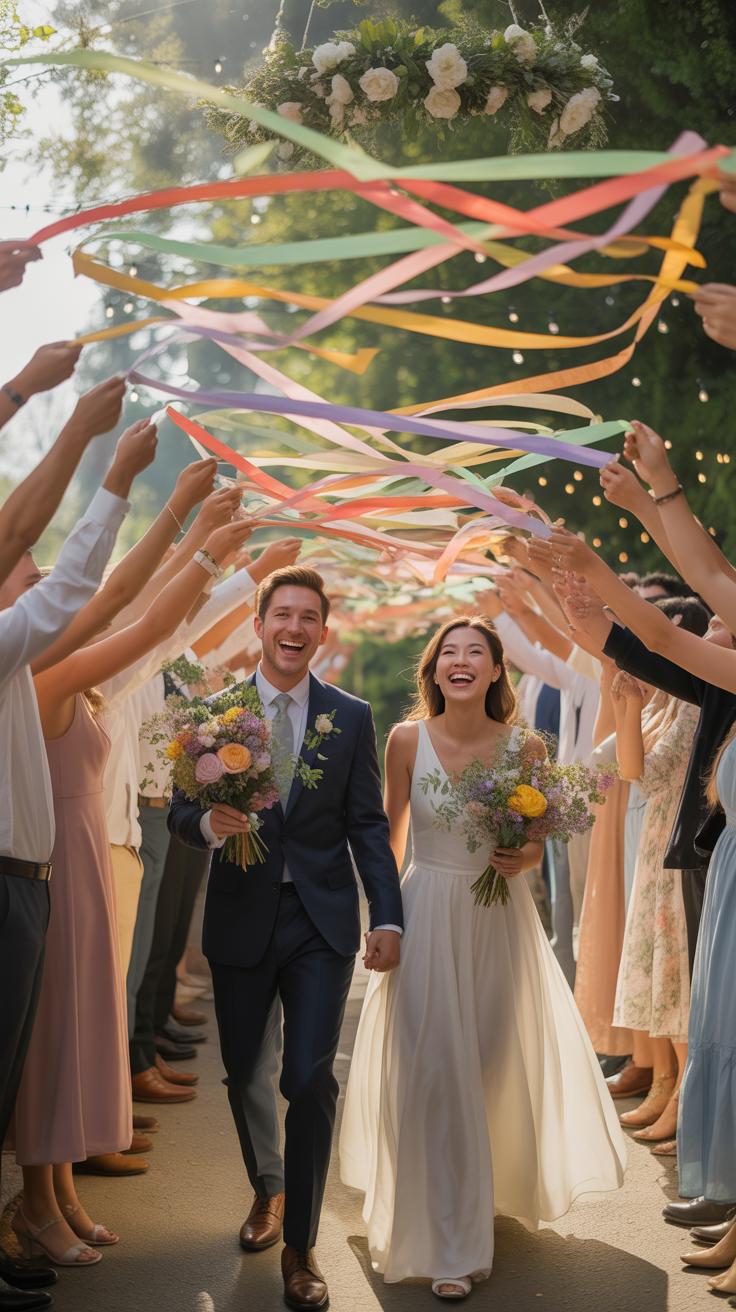
Why A Ribbon Send Off Creates Unforgettable Wedding Exit Photos
A ribbon send off provides a clean alternative to traditional birdseed or sparklers. High-speed cameras capture the linear movement of the fabric clearly. This technique creates a sense of motion in still photography without the mess of glitter or petals. Venues often prefer this method because it requires zero cleanup time. It eliminates the risk of fire hazards during late-night exits.
The rhythmic waving of wands creates a texture that frames the couple. Photographers utilize the vertical and horizontal lines of the ribbons to lead the eye toward the center of the frame. This method works well in both daylight and low-light settings. It provides a consistent visual element that busy backgrounds often lack. Tactical placement of guests ensures the ribbons fill the entire photographic composition.
Best Ribbon Colors And Lengths To Use For A Dreamy Wedding Send Off Moment
Select ribbon lengths between twenty-four and thirty-six inches for maximum visual impact. Shorter ribbons lack the fluid movement needed for the camera to track. Use stiff wooden dowels to prevent the fabric from tangling during the wave motion. Satin or grosgrain materials provide the necessary weight to catch the wind effectively. Avoid thin nylon strings that disappear in bright sunlight or flash photography.
Color selection must contrast with the background of the venue. Use white or cream ribbons against dark wood or brick for high visibility. Incorporate metallic gold or silver to catch the light during evening exits. Match the ribbon shades to your primary wedding mood board to maintain visual consistency. High-contrast colors ensure the individual strands remain distinct in the final wedding exit photos.
Bohemian And Hippie Wedding Decorations Using Ribbon And Natural Elements
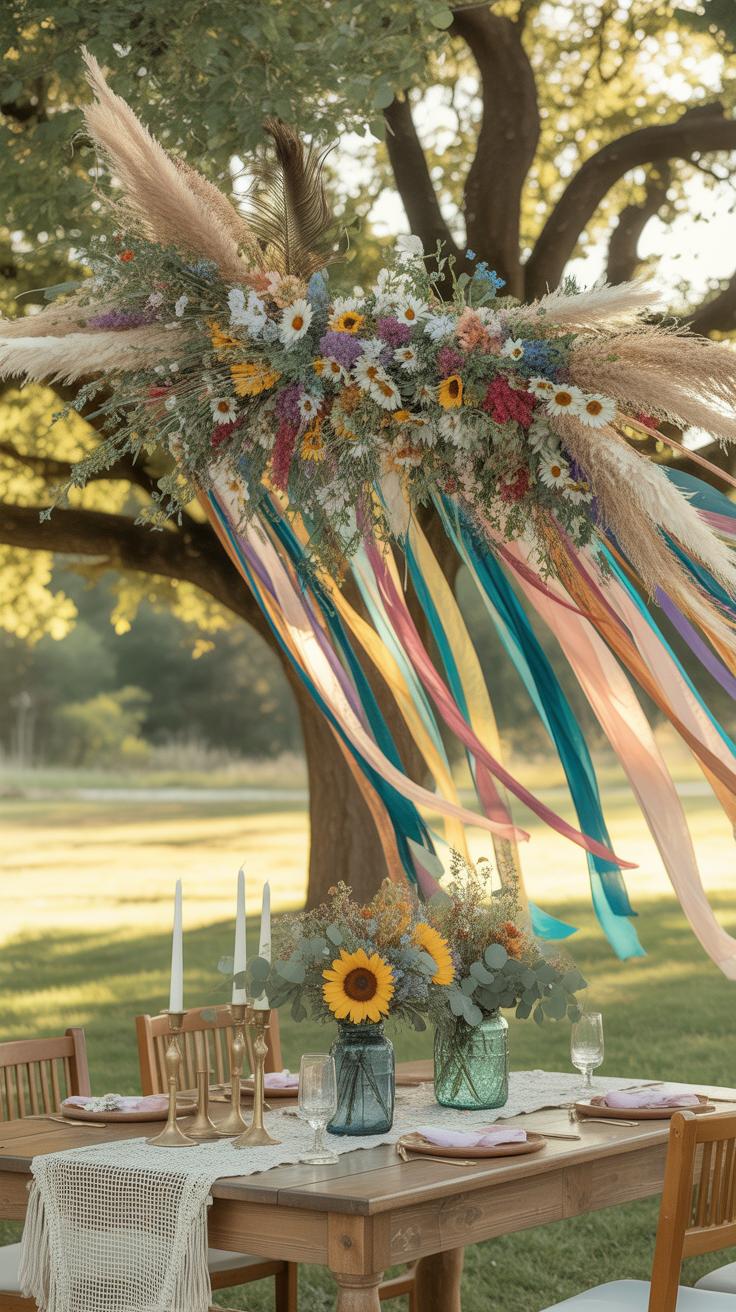
How Ribbon Fits Naturally Into Hippie Wedding Decorations And Boho Aesthetics
Bohemian design prioritizes movement and texture over rigid structure. Ribbon serves as a versatile tool for creating fluid lines and soft transitions. This aesthetic draws from the 1960s counterculture movement which valued hand-made elements and organic shapes. Using long velvet or silk strands allows for natural swaying in outdoor settings. This dynamic movement matches the relaxed nature of hippie wedding themes.
Designers use ribbon to break up the harsh lines of traditional venues. You can hang thin strips from tree branches or ceiling beams to define a space without walls. These installations create a visual layer that feels lived in rather than manufactured. Ribbons provide a low-cost way to unify a color palette across different textures. Use frayed edges to mimic the rustic feel of natural fibers.
Combining Earthy Ribbon Tones With Wildflowers, Macramé, And Wood Accents
Effective boho styling relies on a mix of materials. You must balance the sheen of ribbon with the matte finish of natural wood and raw cotton macramé. Deep ochre, terracotta, and moss green ribbons anchor the visual field. These colors mirror the natural environment and bridge the gap between floral arrangements and hard furniture. Tactile contrast is the goal of this strategy.
- Velvet Ribbon on Wood: Drape heavy velvet ribbons over reclaimed wood chairs or tables. The contrast between plush fabric and rough grain creates an immediate high-low aesthetic. This technique adds warmth to outdoor settings without needing expensive linens or heavy upholstery.
- Hand-Dyed Silk and Wildflowers: Tie loosely gathered wildflowers with hand-dyed silk ribbons. Silk moves easily in the wind and reflects light softly. This combination emphasizes the delicate nature of local flora. Use long tails on bouquets to add vertical visual interest during the ceremony.
- Macramé and Ribbon Backdrops: Integrate thin ribbons into cotton macramé wall hangings. Weaving colored strands through the knots adds depth to monochromatic fiber art. This creates a focal point for the ceremony. It allows you to customize standard macramé pieces to fit your specific wedding color scheme quickly.
- Twine and Ribbon Layering: Wrap glass jars in a mix of jute twine and satin ribbon. Layering these dissimilar materials creates a sophisticated rustic look for table centers. The twine provides grip and texture while the ribbon adds a touch of necessary formality. This is a fast, scalable DIY tactic.
- Leather Strips and Chiffon: Combine thin leather cords with wide chiffon ribbons for a rugged hippie vibe. Use these to wrap the handles of bridal party bouquets. The leather adds a masculine edge to the feminine fabric. This mix of materials is a staple of authentic bohemian fashion and design.
Ribbon serves as the connective tissue between disparate organic elements. Secure loose greenery to a wooden arch using discreet wire, then cover the mechanics with wide ribbons. This hiding technique ensures the installation looks intentional and polished. Always choose matte or low-sheen finishes to maintain the earthy feel. High-gloss ribbons often clash with the raw surfaces found in hippie wedding decor.
Where To Buy Affordable Ribbons For Wedding Ribbon Decorations
Top Retail And Online Sources For Buying Bulk Ribbon At Budget Friendly Prices
Industrial floral supply houses offer the lowest prices for bulk ribbon purchases. These wholesalers sell large spools that reduce the cost per yard significantly. Look for vendors that cater to the florist trade to find high yardage rolls. Purchasing from specialized textile importers ensures you get consistent dye lots. This prevents color mismatches across your ceremony aisle and reception decor.
Online marketplaces and liquidators provide deep discounts on overstock materials. Check sites that focus on garment industry leftovers for unique textures at fractioned costs. Many craft retailers offer tiered pricing models for volume buyers. Use warehouse clubs for basic satin or grossgrain styles. Buying in bulk from these sources eliminates the retail markup found at boutique stationary stores or high end fabric shops.
What To Look For When Choosing Ribbon Quality For Long Lasting Wedding Decor
Material composition dictates how the ribbon hangs and reacts to weather. Double faced satin provides the same finish on both sides. This is essential for hanging installations that spin in the wind. Polyester blends resist fraying better than natural silk in outdoor settings. Check the thread count and edge finish to ensure the material will not unravel during a long outdoor ceremony or reception.
Edge construction determines the structural integrity of your decorations. Woven edges are superior to cut edges because they prevent tattering. Wire edged ribbons allow for precise shaping in bows and arches but lack the fluid motion needed for wands. Test the colorfastness of the dye if you plan to use the ribbon near white linens. High quality dyes prevent bleeding if the material gets wet from rain or humidity.
Pro Tips To Make All Your Ribbon Wedding Decor Look Expensive And Cohesive
Styling Tricks That Elevate Simple Ribbon Into High End Looking Wedding Decor
Texture creates visual value in ribbon design. Cheap satin looks shiny and plastic under flash photography. Upgrade your look by mixing silk, velvet, and frayed edge chiffon. This layering mimics high-end floral design techniques. Use tonal variations of one color instead of a flat match. This creates depth and makes the ribbon appear like custom textile work rather than craft store leftovers.
Finish every raw edge to prevent fraying and sloppy lines. Use professional fabric shears for clean 45-degree angles or swallowtail notches. For a high-fashion look, seal synthetic edges with a heat tool. Length also dictates luxury. Short ribbons look like birthday party decor. Ensure ribbons on chairs or arches reach the ground. Long, flowing lines suggest a bespoke luxury event and provide better movement for photos.
How To Stay Organized And On Budget When DIYing Your Wedding Ribbon Decorations
Buy ribbon by the wholesale spool to lower costs. Retails shops charge a premium for small yardage. Measure every installation site before purchasing. Calculate the exact length needed for each chair or wand. Add ten percent for shrinkage and knotting. This precise math stops overspending. Stick to two main widths to keep the look consistent. Standard sizes are one inch and two and a half inches.
Batch produce all ribbon wands and aisle markers at once. Systematic assembly reduces waste and saves time. Store finished items on hangers or flat boards to avoid wrinkles. Crushed ribbon looks cheap and neglected on the wedding day. Use a portable steamer on site for installations like arches or backdrops. High heat removes fold lines and ensures the fabric hangs straight. Proper storage and prep work protect your financial investment.
Frequently Asked Questions

How can I use ribbon to enhance my wedding ceremony aesthetics?
Using ribbon wedding decor is a versatile way to add movement and color to your ceremony. You can tie long, flowing streamers to the chairs lining the aisle or create a stunning altar backdrop using mixed textures like satin and organza. These soft elements catch the breeze during outdoor ceremonies, creating a whimsical, high-end atmosphere that looks incredible in photographs without requiring a massive floral budget.
How do I create a DIY ribbon backdrop for my reception?
To craft a beautiful ribbon wedding decor backdrop, start with a wooden dowel or a copper pipe as your base. Cut various ribbons into lengths twice your desired height, then loop them over the rod using a simple cow hitch knot. Mix different widths and shades to add depth. This DIY project is a practical way to define your photo booth or sweetheart table area while maintaining a dreamy, cohesive look.
Which types of ribbon offer the most luxury for the lowest price?
To achieve an expensive look on a budget, opt for polyester satin or chiffon ribbons rather than genuine silk. Buying these materials in bulk spools online significantly reduces costs compared to craft store rolls. You can elevate the appearance by fraying the edges of chiffon for a textured, handmade feel. This approach allows you to implement extensive decor across your venue while keeping your overall wedding expenses incredibly manageable.