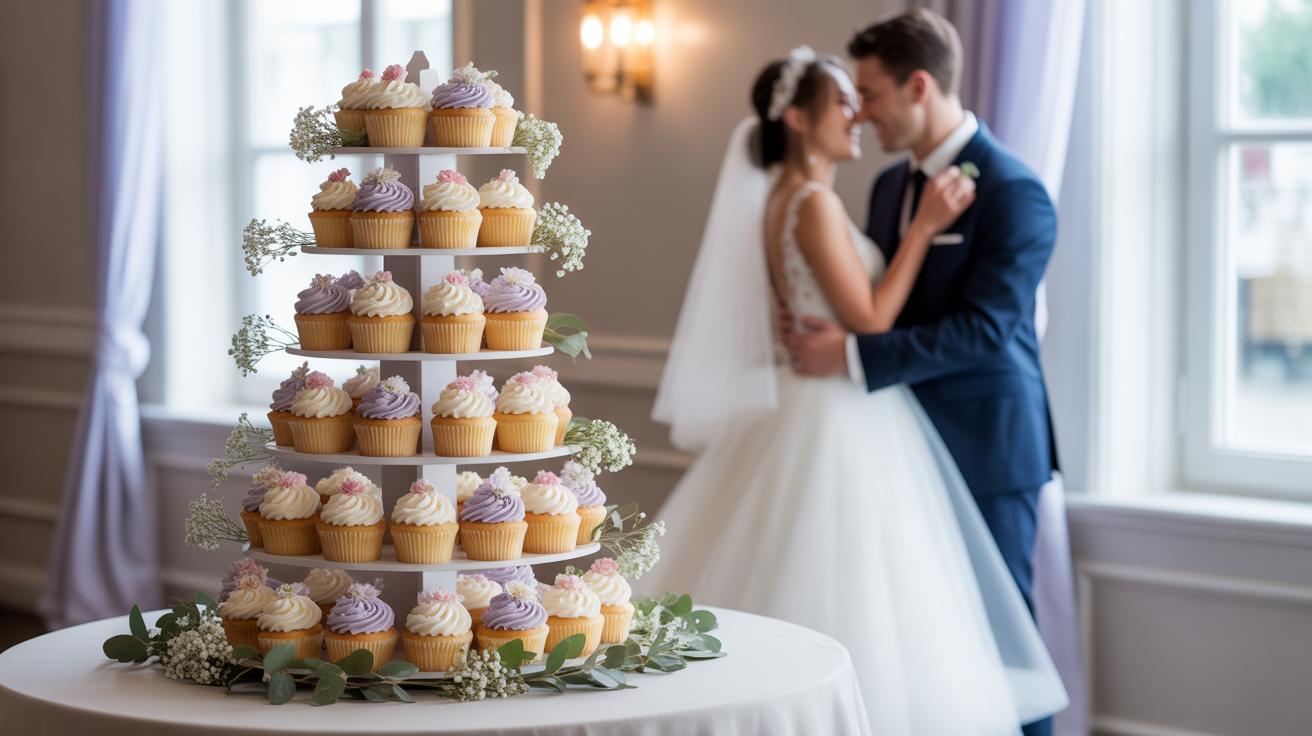
What Is A Cupcake Tower DIY And Why Is It Trending At Weddings
The Rise Of Cupcake Towers As A Wedding Dessert Centerpiece
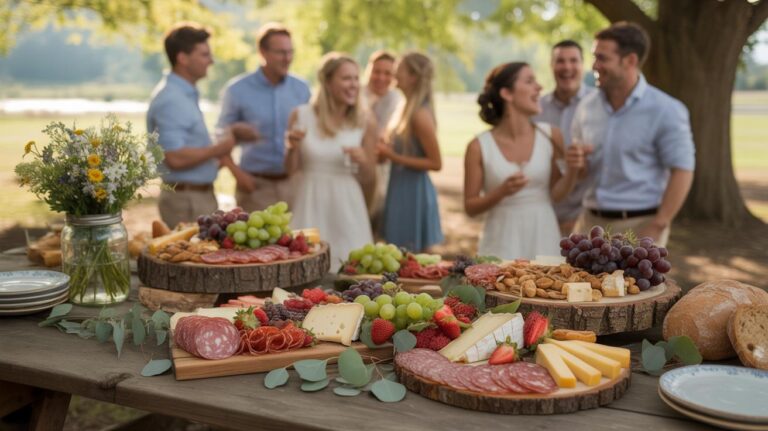
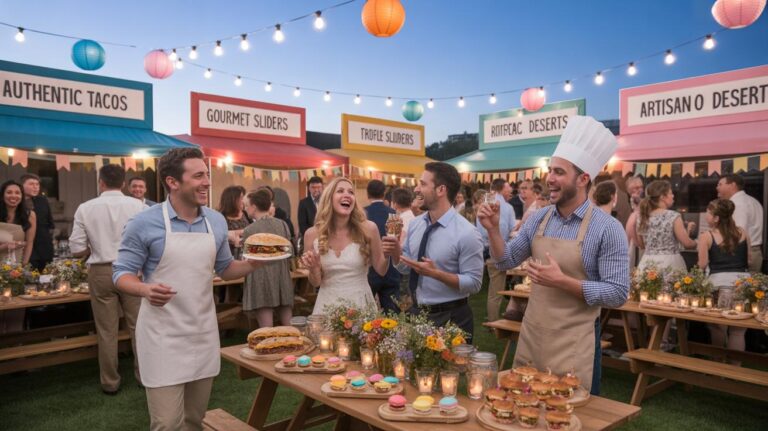
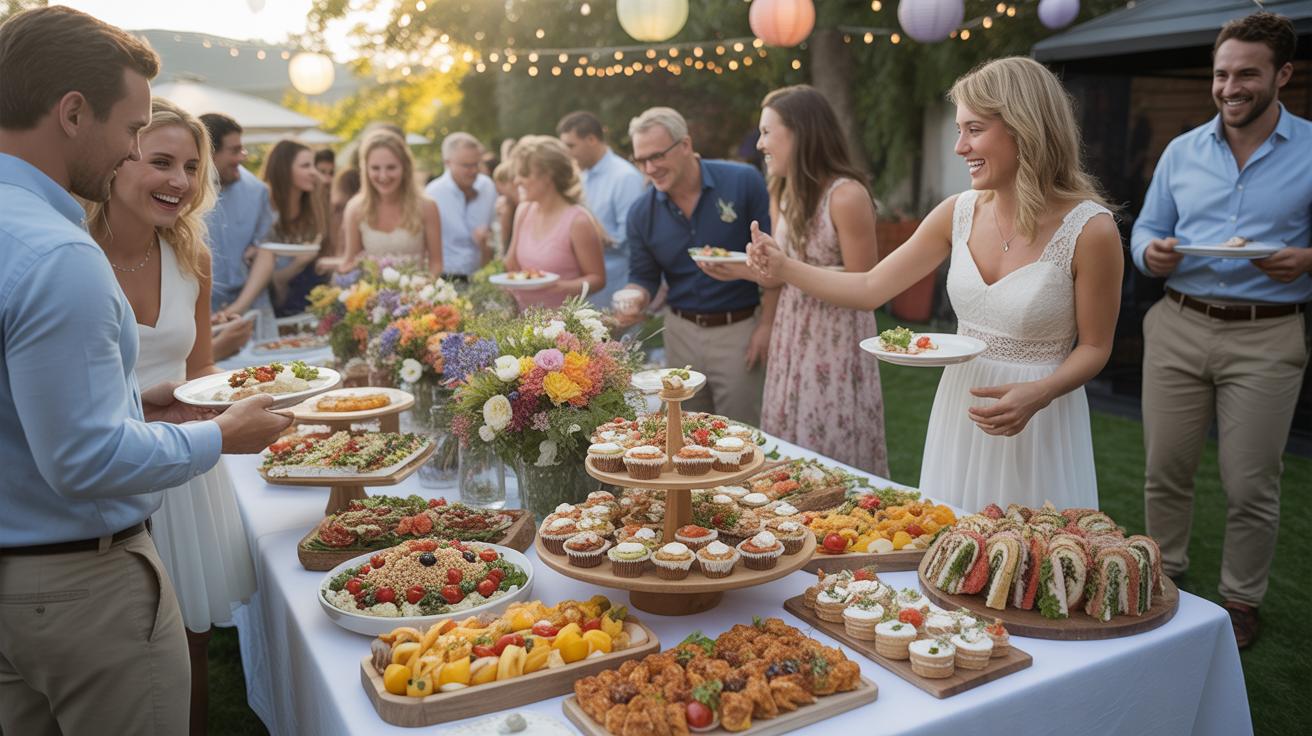
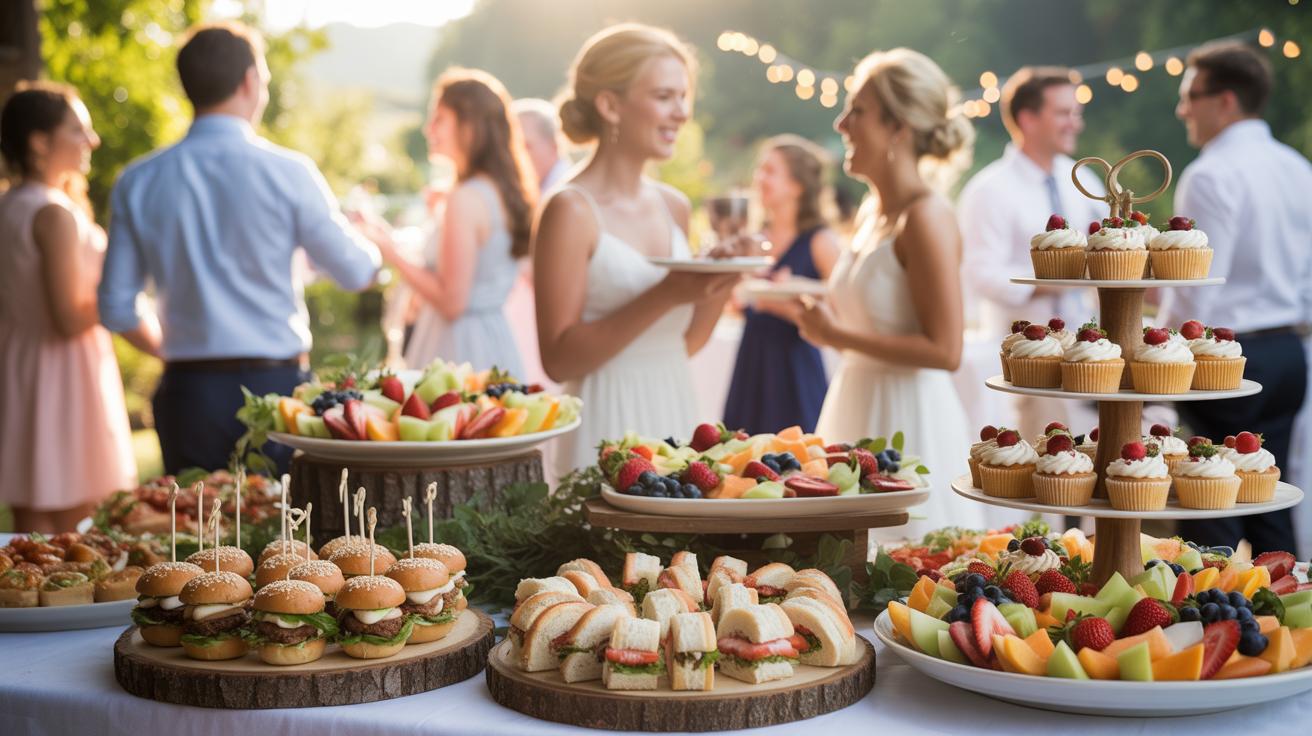
Wedding traditions are shifting away from massive tiered cakes toward flexible dessert displays. The cupcake tower serves as a high-impact focal point that utilizes vertical space to create visual drama. Couples now prioritize efficiency and variety over outdated customs. This transition reflects a move toward modern hospitality standards where guests want immediate access to food without waiting for a formal cake cutting.
The design mimics the classic silhouette of a high-end cake but offers superior logistical advantages. It allows for multiple flavors and dietary options within a single structure. Professional decorators use these towers to anchor the reception aesthetics. The vertical tiers draw the eye upward and make the dessert table appear more substantial. This practical shift started in the early 2000s and remains a dominant wedding trend.
How A DIY Approach Saves Money Without Sacrificing Style
Building your own cupcake stand eliminates the heavy markup charged by specialized rental companies and bakeries. A diy wedding cupcake tower allows for complete control over materials like plywood, acrylic, or sturdy cardboard. You avoid delivery fees and security deposits for fragile equipment. This hands-on method lets you match the stand perfectly to your specific wedding theme through custom paint or wrap finishes.
A DIY project also reduces food waste and labor costs. Professional cake cutting services can cost several dollars per person. Cupcakes are self-contained portions that require no plates or silverware. You save hundreds of dollars by sourcing your own materials and handling the assembly. Smart planning ensures equal visual impact for a fraction of the price. Tactical material selection ensures the final product looks professional and expensive.

Planning Your DIY Cupcake Tower Ideas Before You Build
How To Estimate The Number Of Cupcakes You Will Need For Your Guest Count
Calculate your total cupcake count based on your guest list and serving style. Do not assume every guest eats exactly one cupcake. Most wedding planners recommend a ratio of one point five cupcakes per adult guest. This covers people who want seconds or different flavors. If you serve multiple flavors, guests often take one of each. More variety requires a higher total quantity.
Account for display logistics in your final count. A sparse tower looks unfinished and cheap. You need enough units to fill every tier of your stand completely. If your guest count is small but your stand is large, use decorative fillers or flowers. Always round up your order to the nearest dozen. It is better to have extra cupcakes than a half empty display stand.
To bake a wedding cake is to bake a memory, and a tower of cupcakes allows your guests to share in the sweetness of your story, one little hand-held masterpiece at a time.
— Martha Stewart
Choosing A Theme, Color Palette, And Tower Shape That Matches Your Wedding DéCor
Identify the specific design movement of your wedding to select a tower shape. Round tiers offer a soft look common in traditional weddings. Square tiers fit modern or minimalist aesthetics. Match the material of the stand to your furniture. Use wood for rustic themes and acrylic for contemporary settings. The tower structure must support the weight of the cake and cupcakes without sagging.
Select your color palette for the wrappers and frosting based on your table linens. Use neutral liners like white or silver to keep the focus on the frosting design. Avoid clashing colors between the stand material and the cake decorations. If your wedding uses gold accents, choose a stand with gold trim. Consistency in these details creates a professional and high end appearance for the display.
Gathering Your Materials Everything You Need To How To Build A Cupcake Stand
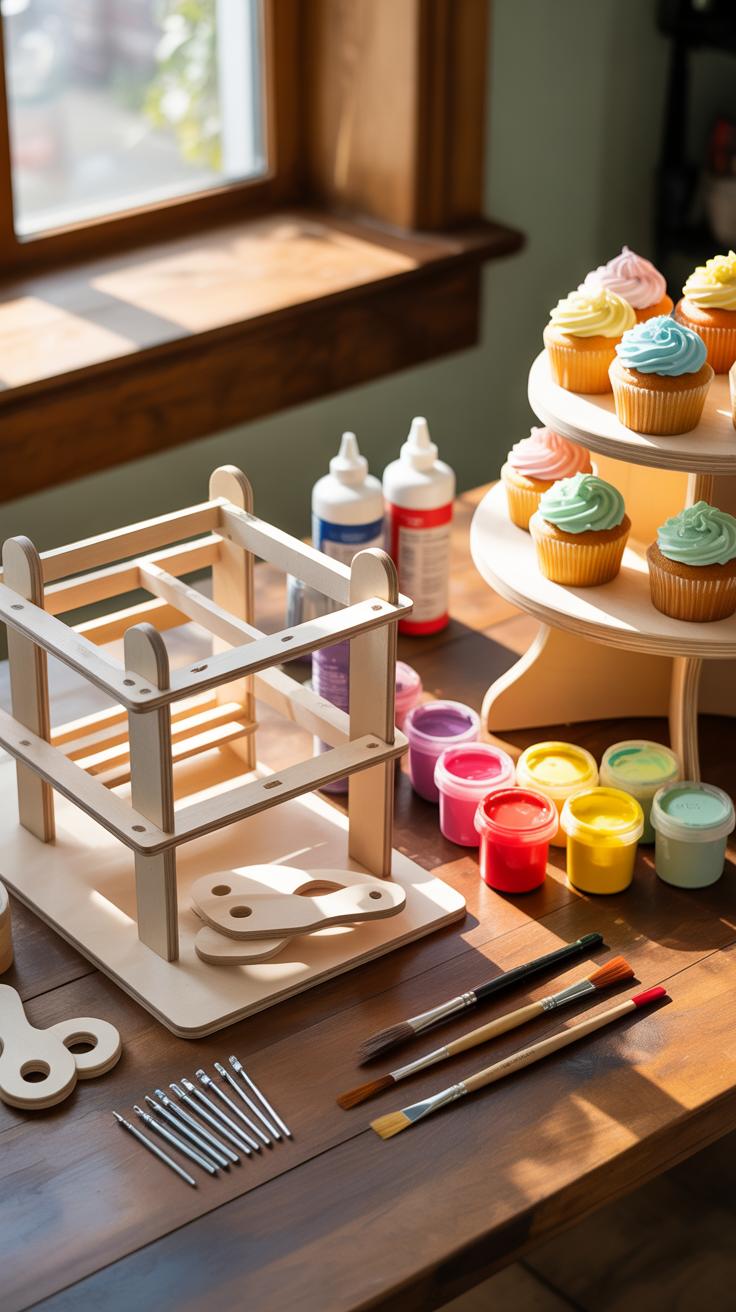
Core Structural Materials Needed To Build A Sturdy And Safe Cupcake Tower
Structural integrity prevents a collapse during the reception. Your base material must support the weight of dozens of cupcakes without bowing. Choose rigid substrates like medium density fiberboard or high density foam core. Cardboard works for small events but fails under heavy professional frosting. You need a central support axis to keep tiers aligned. Precision measurements ensure the finished tower stays level on the table.
- MDF or Plywood Discs: These provide the highest weight capacity for large towers. Use pre-cut rounds to save time and ensure perfect circles. Wood offers a permanent solution that you can sand and paint to match any wedding theme or color palette.
- PVC Pipe or Wooden Dowels: These serve as the central pillars between tiers. Cut these to equal lengths to prevent leaning. PVC is hollow, allowing you to run floral wire or lights through the center for a clean and professional look.
- Food Safe Sealant: Raw wood and foam can leach chemicals or absorb moisture from the cake. Apply a food-grade wax or polyurethane coating to every surface that touches food. This step is critical for health safety and prevents grease spots on the stand.
- Industrial Adhesive or Screws: Mechanical fasteners provide more security than hot glue. Use wood screws for permanent wooden stands or high-strength epoxy for acrylic components. A stable bond prevents the tiers from shifting when guests remove cupcakes from one side of the display.
- Sandpaper and Finishing Tools: Smooth edges prevent splinters or jagged plastic from ruining the presentation. Use fine-grit sandpaper on all cut edges before painting. A professional finish distinguishes a DIY project from a cheap craft. This preparation ensures the paint or fabric adheres properly.
Select hardware based on your expected cupcake count. A standard wedding cupcake weighs about three ounces. A one hundred count display puts nearly twenty pounds of pressure on the bottom tier. Reinforce the lowest level with a wider base to lower the center of gravity. Stability starts at the ground and moves upward. Check every component for levelness before final assembly.
Where To Source Affordable Materials For Your DIY Cupcakes Stand
Budget-conscious builders find the best values at local hardware stores and wholesale suppliers. Home improvement centers sell large sheets of MDF and PVC pipe for a low cost. Ask staff to make the primary cuts in the store to save labor time. This method yields professional results for a fraction of the price of retail kits. Bulk buys reduce the per-unit cost.
Look for repurposed materials at decorative discount shops or restaurant supply outlets. Cake boards and cardboard rounds are available at bulk prices through online bakery distributors. Thrift stores often stock glass plates or wood platters that you can stack using industrial glue. Mixing industrial hardware with retail finishing supplies creates a custom look. Track every receipt to manage your total wedding budget effectively.
How To Make A Cupcake Tower Step By Step From The Base Up
Constructing The Base And Determining The Right Tier Spacing For Stability
The base supports the entire weight of the structure and the baked goods. Use a heavy material like thick plywood or dense MDF for the bottom layer. Ensure the footprint is at least four inches wider than the largest cupcake tier. This creates a low center of gravity. A solid foundation prevents the tower from tipping when guests remove cupcakes from one side.
Standard cupcake height requires four inches of vertical clearance between tiers. This spacing allows guests to reach under the upper layers without damaging the frosting. Use central dowels or PVC pipe segments to maintain this distance. Measure each support post with a square tool to ensure a ninety degree angle. Level tiers are essential for structural integrity and a professional look.
Assembling Each Tier Securely And Testing The Tower’S Weight Capacity
Apply a high strength adhesive or wood glue to the top and bottom of each support post. Slide the tiers onto a central threaded rod if your design allows for it. This rod locks every layer together as a single unit. Use locking nuts at the top and bottom to prevent shifting. Tighten all connections until the plates do not wiggle when you apply pressure.
Test the completed stand with weights before the wedding day. A standard cupcake weighs approximately two to three ounces. Multiply your total cupcake count by three to find the minimum load capacity needed. Place actual weights or bags of flour on every tier for twenty four hours. Check for sagging or leaning. A successful test proves the tower can handle the load during the event.
How To Make A DIY Large Cupcake Stand For Bigger Wedding Receptions
Scaling Up Your Tower Design To Accommodate 100 Or More Cupcakes
Large wedding receptions require efficient vertical density to manage space. A standard cupcake measures about two and a half inches in diameter. To hold one hundred cupcakes, you need at least five hundred square inches of surface area. Calculate your tier dimensions by subtracting the center support area from the total plate size. Increase the diameter of your base tier to eighteen or twenty inches to ensure a stable foundation.
Vertical height creates visual impact but increases the risk of tipping. Space your tiers approximately four inches apart to allow guests to grab cakes without hitting the level above. Use a pyramid profile where each upper level is two inches smaller than the one below it. This geometry keeps the center of gravity low. Ensure your materials can handle the weight of five to seven pounds per tier when fully loaded.
Reinforcing A Large DIY Cupcake Stand To Prevent Wobbling Or Collapse
Structural failure occurs when the weight of the cupcakes exceeds the shear strength of the center support. For large stands, move away from thin dowels and use solid wood blocks or industrial PVC pipes. These thicker cores distribute the load across a wider surface area of each plate. Force the center post to sit perfectly flush against the horizontal tiers to eliminate any side-to-side movement.
Secure every joint with a combination of mechanical fasteners and industrial adhesives. Use wood screws driven through the plates into the support posts for a permanent bond. If using foam board, reinforce the center hole with a plastic or metal washer to prevent the material from tearing under pressure. A wide, weighted base plate prevents the entire assembly from leaning if a guest bumps the table during the event.
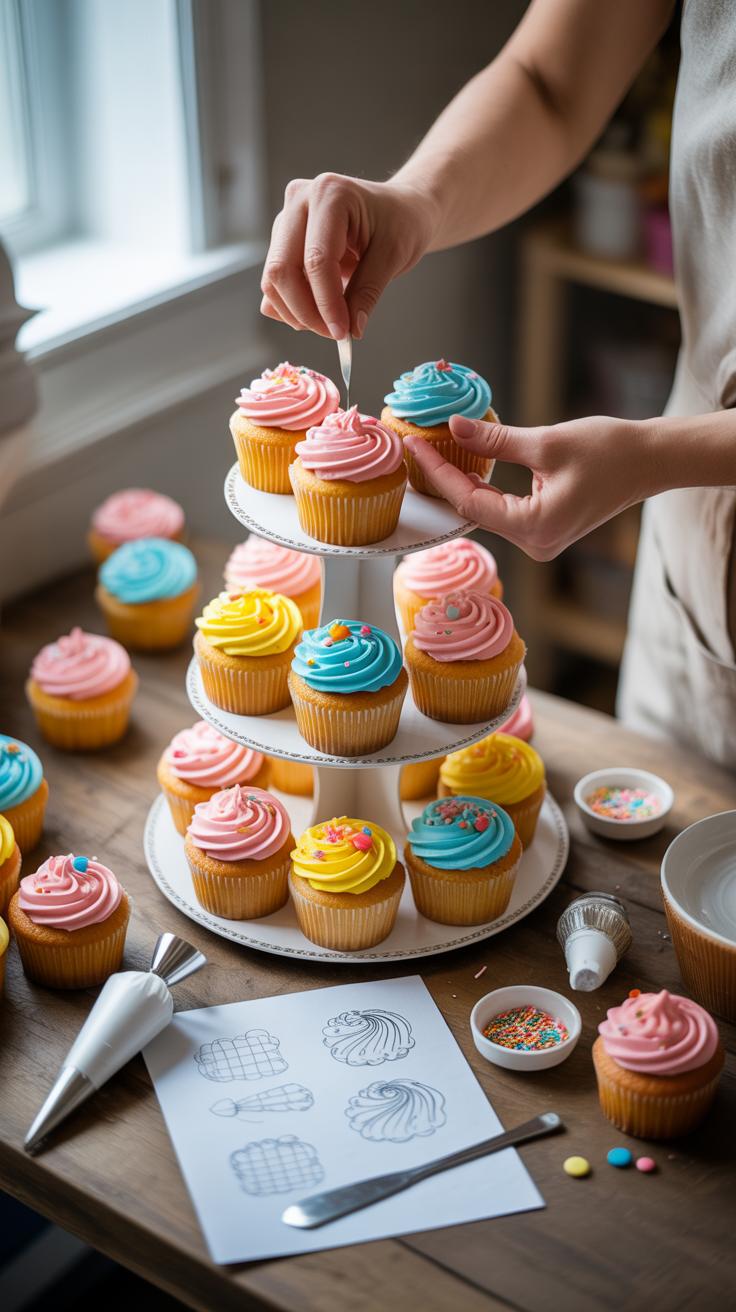
How To Make A Cupcake Display That Looks Professional And Polished
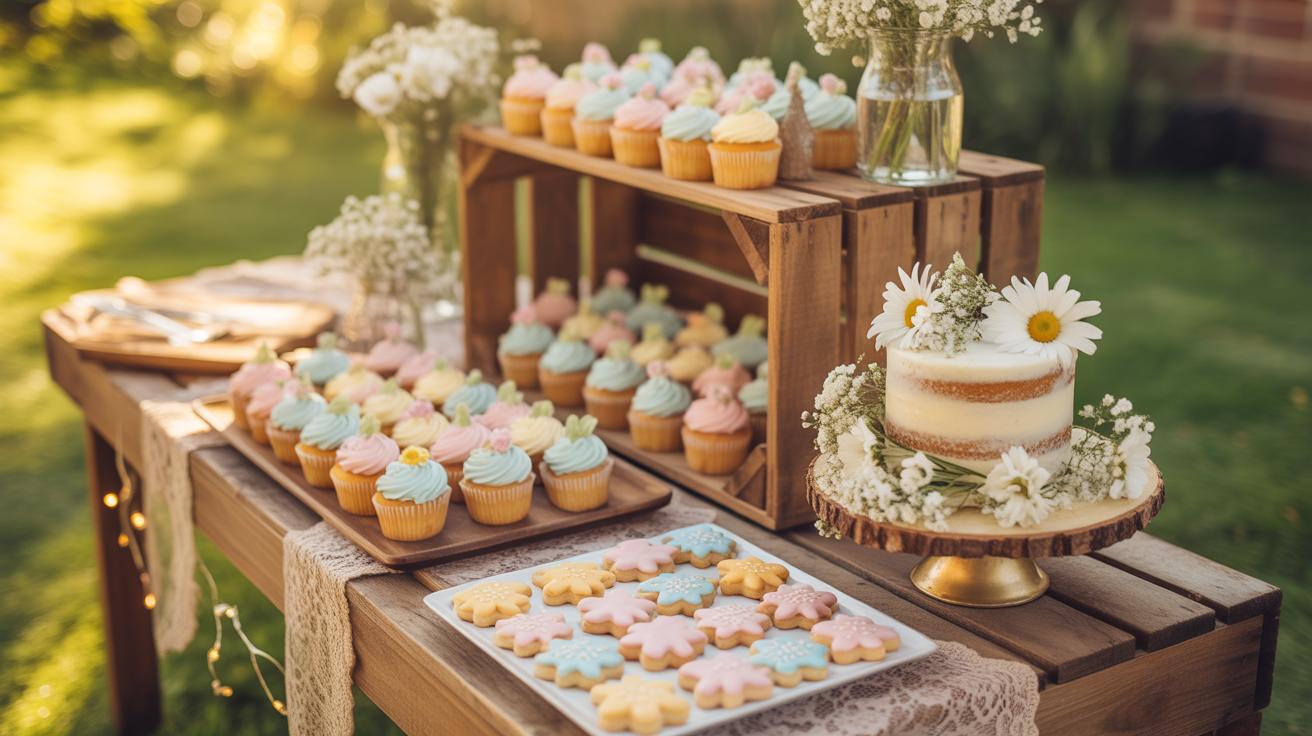
Decorating Your Tower With Fabric Ribbon Florals And Finishing Touches
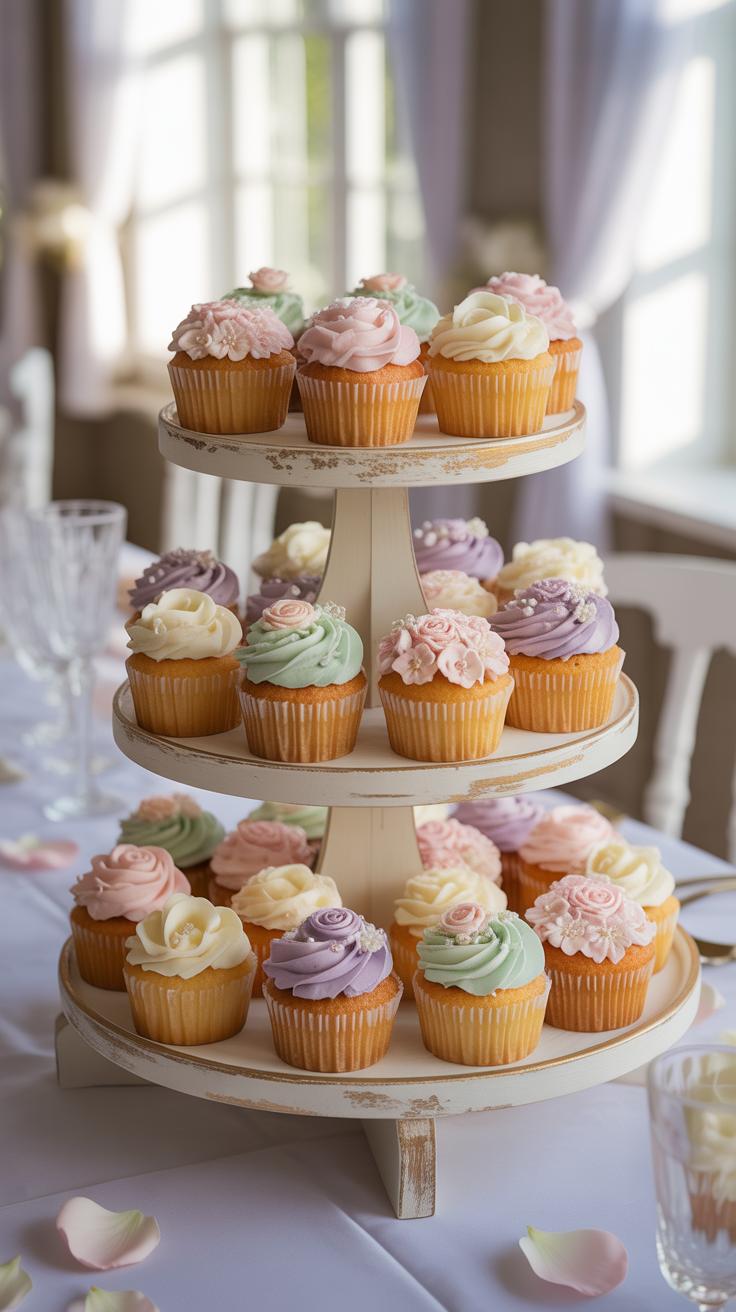
Hide the raw edges of your stand tiers with high quality ribbon. Use double sided tape to pull the fabric tight against the perimeter. This creates a clean line that mirrors high end pastry shop displays. Real silk or heavy grosgrain works best because they do not fray or sag. Avoid cheap plastic ribbons as they reflect light poorly in professional event photography.
Integrate fresh flowers that match the wedding bouquets. Cut stems short and use floral water tubes to prevent wilting. Place largest blooms at the base to ground the design. Use smaller buds or greenery on upper tiers to maintain scale. Ensure all plants are non toxic and food safe. This technique bridges the gap between a simple dessert rack and a custom wedding installation.
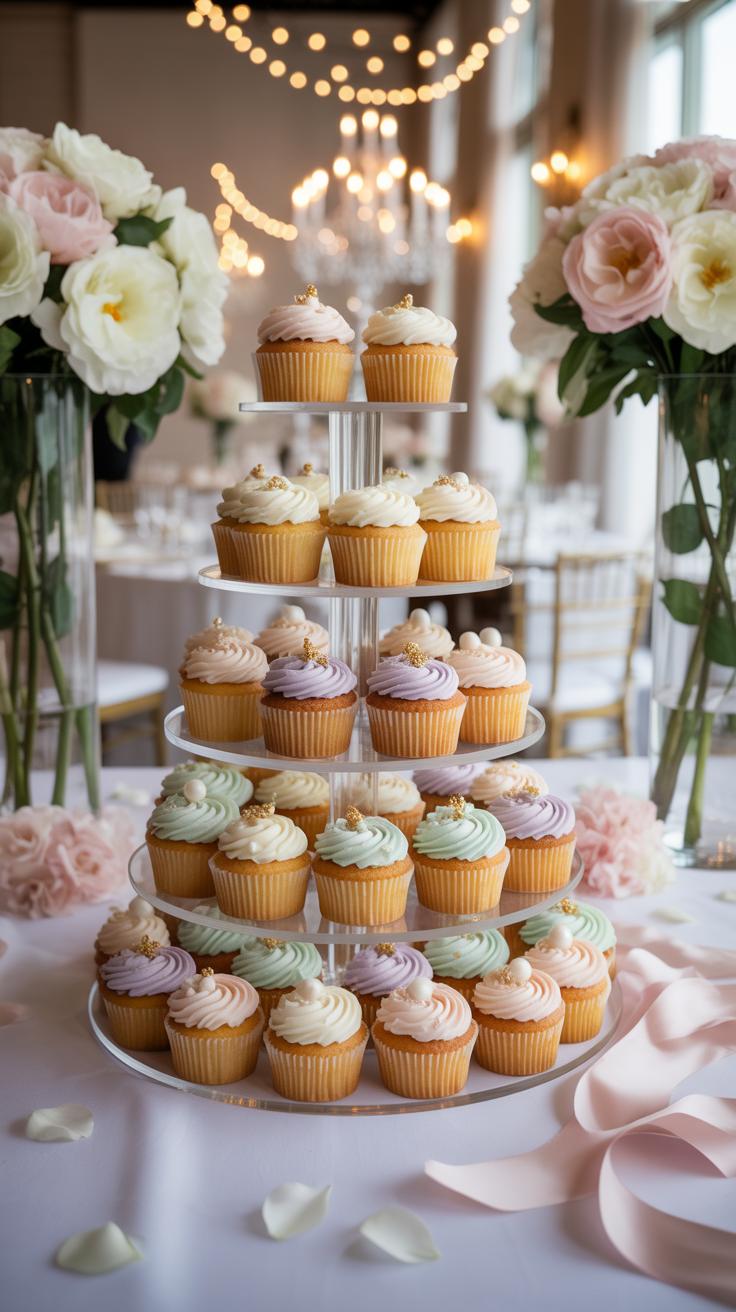
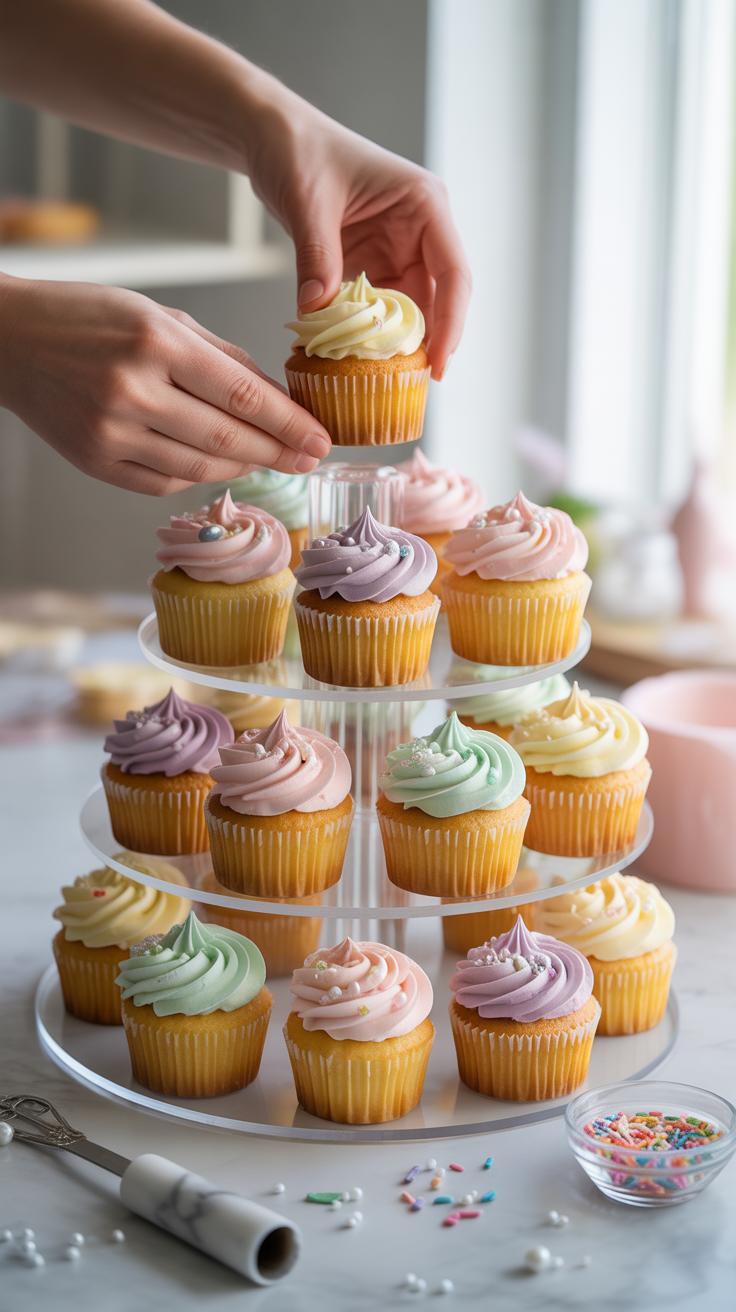
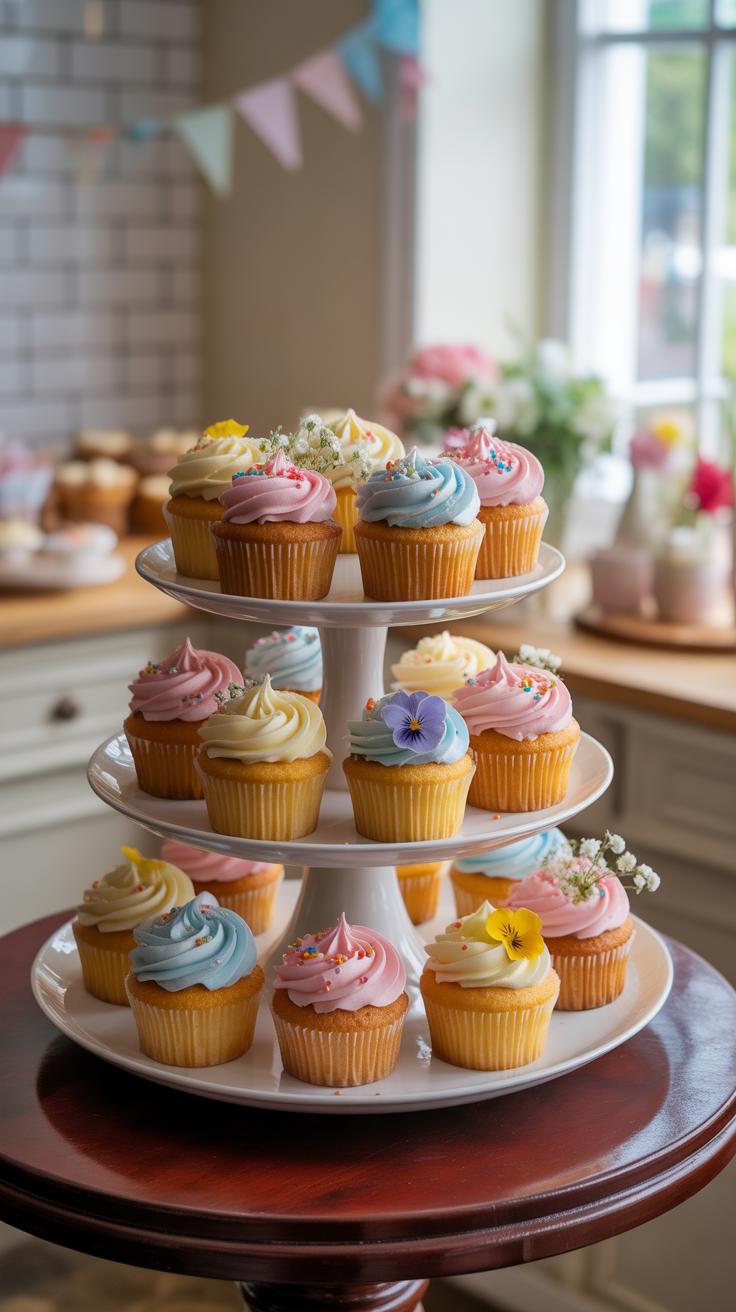
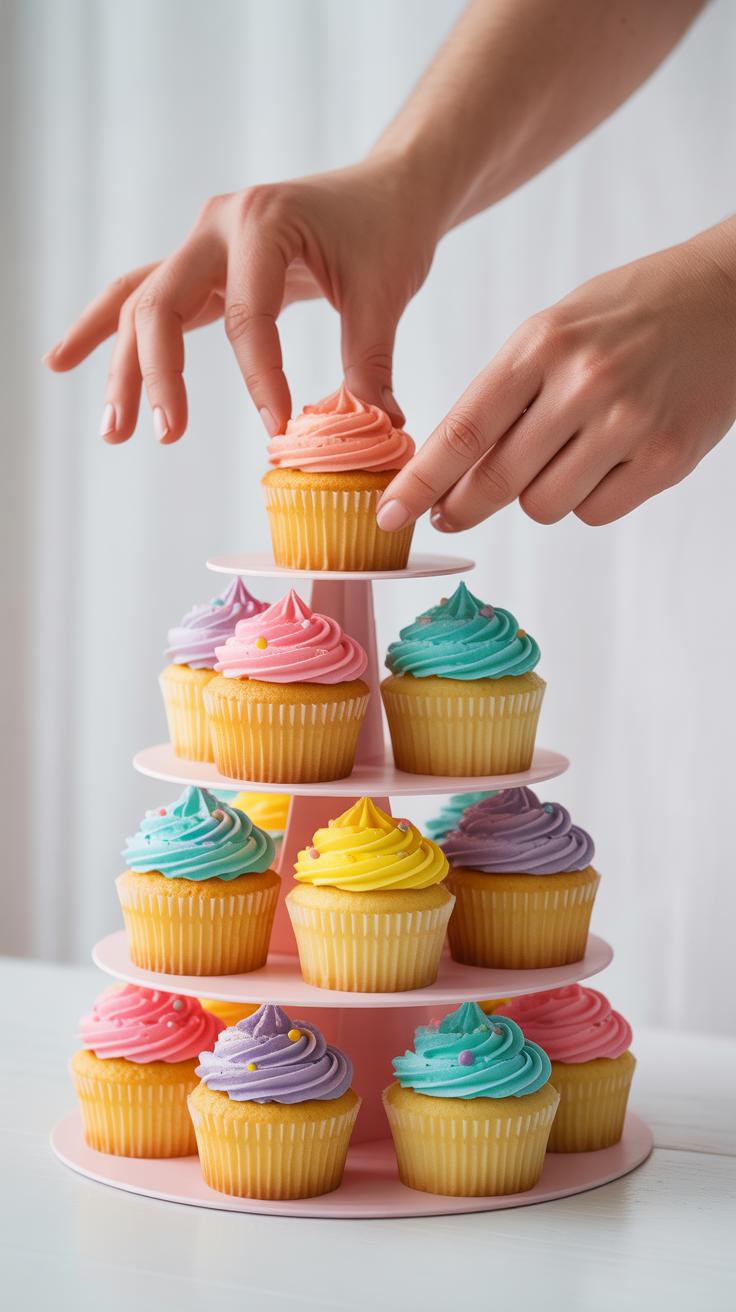
Arranging Cupcakes On The Stand To Create A Visually Balanced And Elegant Display
Start by placing cupcakes on the top tier and work downward. Focus on symmetry to provide a sense of order. Leave a small gap between each liner so the display does not look crowded. Align the frosting peaks or toppers in a consistent direction. This uniform placement mimics the structured aesthetic of traditional French tier cakes and improves the overall visual impact.
Balance the weight by putting denser patterns on the lower, larger tiers. If using multiple flavors, alternate them in a repeating sequence to guide the eye. Use a level to ensure the tiers do not lean under the weight. A stable and even arrangement prevents the structure from looking amateur. Consistency in spacing makes the tower look like a singular architectural piece rather than a random collection.
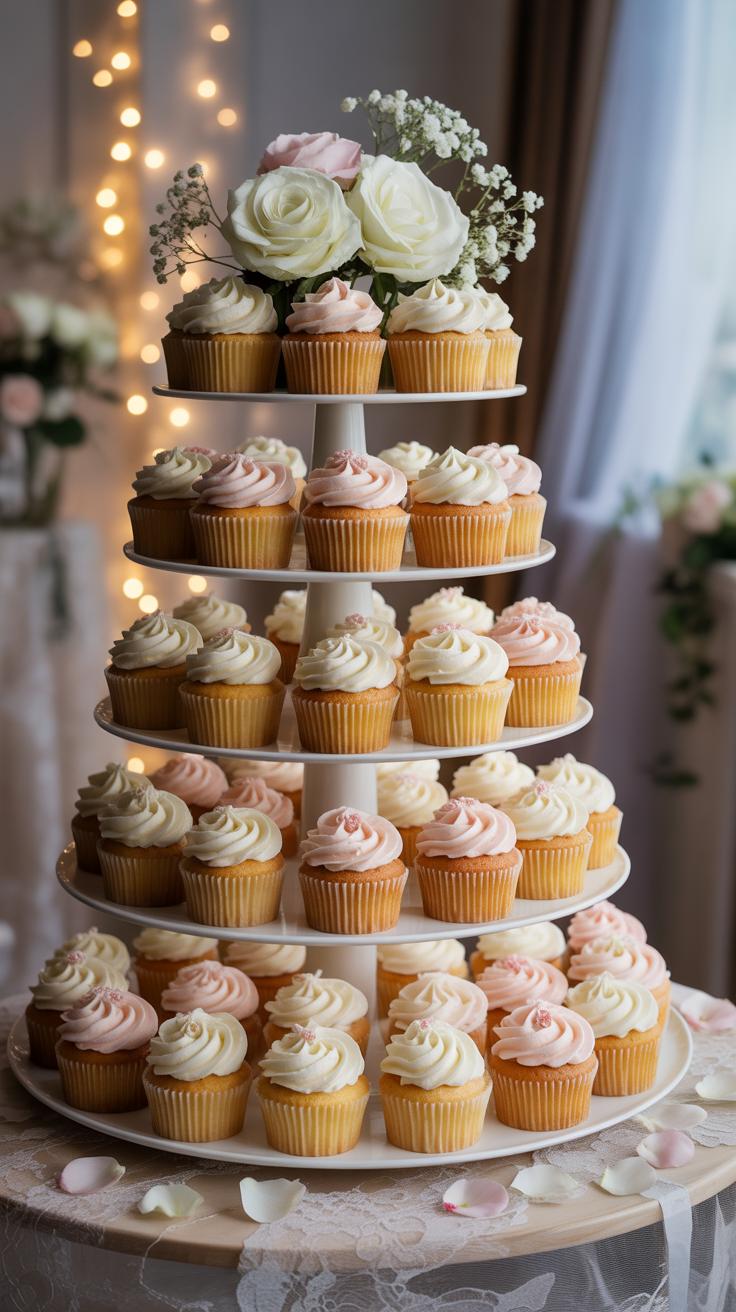
Understanding The DIY Cupcake Tier System For A Seamless Stacked Look
How Many Tiers You Need Based On Your Cupcake Count And Table Space
Standard towers usually feature four to seven tiers. A five-tier stand holds approximately 75 standard cupcakes. You must calculate two inches of space for every cupcake on the outer diameter. Small tables require a vertical approach to save space. Large tables allow for multiple towers of varying heights. Measure your table width before you build. A crowded table prevents guests from reaching the food safely.
Base your tier count on the total guest list. Most weddings require 1.5 cupcakes per guest to account for different flavors. If you serve 150 guests, you need 225 cupcakes across three towers or one massive nine-tier unit. Heavy wood tiers require central support rods to prevent sagging. Ensure the bottom tier has a diameter at least 15 inches wide for stability. Balance the weight to keep the tower upright.
Choosing Between Round, Square, And Hexagonal Tier Platforms For Your Tower
Round tiers are the industry standard for wedding displays. They offer 360-degree access for guests and eliminate sharp corners that can catch clothing. Circular designs maximize surface area relative to the footprint. Most acrylic and wood kits use this shape because it distributes weight evenly. It mimics the look of a traditional stacked wedding cake. Choose round tiers if you want a classic aesthetic and high stability.
Square tiers offer more surface area than rounds of the same width. They fit well in modern or architectural wedding themes. Alignment is critical with squares because any rotation error is visible. Hexagonal tiers provide a geometric look popular in Art Deco and modern designs. These shapes require precise cutting and sanding of the edges. Use square or hexagonal tiers if your table sits against a flat wall to optimize the layout.
How To Make Cupcake Towers That Stay Fresh And Intact On Your Wedding Day
Best Practices For Baking, Frosting, And Storing Cupcakes Before The Event
Bake your cupcakes no more than forty-eight hours before the wedding. Use high-quality oil or sour cream in your batter to retain moisture. Professional bakers avoid overbeating the eggs to prevent the domes from collapsing. Once cooled, store the unfrosted cakes in airtight containers at room temperature. Refrigeration dries out the crumb and alters the texture of the sponge.
Apply frosting only after the cakes reach full room temperature. Use a crusting buttercream or a high-stability ganache to withstand venue temperatures. These fats hold their shape better than cream cheese or whipped toppings. Store the finished cupcakes in a cool, dark place away from direct sunlight. High humidity will soften the sugar and cause the frosting to slide off the cake.
Transporting And Setting Up Your DIY Cupcake Tower Safely At The Venue
Transporting a fully assembled tower is a recipe for disaster. Moving parts shift during transit and cause structural failure. Pack the cupcakes in specialized professional bakery boxes with individual inserts. These inserts prevent the cakes from sliding and touching each other. Place these boxes on a flat surface in your vehicle, such as the floorboards, rather than tilted car seats.
- Individual Transport Boxes: Use heavy-duty cardboard boxes with pre-cut holes for each cupcake. This prevents movement during sudden stops or turns. Avoid plastic containers that trap heat and create condensation on the frosting.
- Component Disassembly: Pack the tiers of the stand separately in bubble wrap or foam. Do not stack the acrylic or wood plates directly on top of each other without protection. Scratches happen easily and ruin the clean aesthetic of the display.
- Nonslip Matting: Place a grip mat on the floor of your trunk or van. This prevents the bakery boxes from sliding during the drive. Secure the boxes together with painters tape to ensure they move as a single unit.
- On-Site Assembly Kit: Bring a small bag containing extra frosting, a piping tip, and a spatula. This allows you to repair any smudges or damage that occurs during the move. Keep paper towels and sanitizer ready for a clean assembly process.
- Level Surface Verification: Check the display table with a level before you build the stand. If the table is uneven, the center of gravity will shift and the tower will lean. Use small shims under the table legs to create a flat base.
Assemble the tower frame first at the venue before adding any cupcakes. Start loading the bottom tier and work your way up to maintain balance. Keep the height within a manageable range to avoid top-heavy instability. If the venue is outdoors, do not set up the tower until thirty minutes before guests arrive. Direct heat will compromise the structural integrity of your frosting and the stand itself.
Common Mistakes To Avoid When You How To Make Cupcake Towers For A Wedding

Structural And Design Errors That Can Ruin The Look Or Safety Of Your Tower
Weight distribution is the most critical failure point in tower construction. Many DIY builders choose thin cardboard tiers that buckle under the weight of heavy buttercream and dense cake. You must use rigid materials like medium density fiberboard or reinforced acrylic. Center poles must be perfectly vertical to prevent a lean. A slight tilt at the base becomes a collapse at the top tier.
Surface grip affects the safety of your display during the event. Smooth plastic tiers allow cupcakes to slide during transport or when guests bump the table. Use thin dots of frosting or non slip liners to secure each cake. Ensure the base tier has a larger footprint than the layers above it. This low center of gravity prevents the entire structure from tipping over easily.
Last Minute Fixes And Backup Plans Every DIY Wedding Baker Should Have Ready
Heat destroys cupcake displays faster than any structural error. High humidity or sun exposure melts buttercream and causes toppers to sag. Always have a backup supply of stiff icing and a small offset spatula on site. If the tower begins to lean, use wooden skewers to pin the tiers together internally. These hidden stabilizers provide immediate support without ruining the visual design of your tower.
Transporting a fully assembled tower is a high risk move that often ends in disaster. Carry the components in separate reinforced boxes and assemble the unit at the venue. Bring extra cupcakes to replace any that suffer damage during the drive. Keep a repair kit with extra liners, pearls, and frosting. These tools allow you to fix smudges or gaps before the guests enter the room.
Frequently Asked Questions

Is it difficult to build a custom cupcake display for a wedding?
Creating a beautiful display is much easier than it looks, even for those without crafting experience. The secret to a successful diy wedding cupcake tower lies in preparation. By using sturdy materials and pre-made tiers, you can focus on the artistic arrangement and decorations. With a little patience and a clear vision, any beginner can assemble a professional-looking stand that serves as a stunning focal point for their reception.
How do you ensure a homemade cupcake stand is stable enough for a large event?
Stability is crucial for a successful diy wedding cupcake tower. To ensure your structure is secure, always use a heavy, wide base to prevent tipping and opt for thick cardboard or wood tiers. If glueing components together, use a high-strength adhesive and allow it to cure for twenty-four hours. Always test the weight capacity beforehand with dummy weights to ensure your tiers won’t sag or collapse under the delicious frosting.
Can I create an elegant cupcake display on a very tight budget?
Absolutely! You can achieve a high-end look without the boutique price tag by repurposing household items like sturdy boxes, vintage plates, or terracotta pots. Wrapping these items in silk fabric, decorative lace, or quality contact paper instantly elevates the aesthetic. Choosing affordable materials allows you to allocate more of your wedding budget toward gourmet ingredients or premium liners, proving that style and savings can go hand in hand.