Introduction
Making a diaper bouquet at home is a creative and fun project. It is not only a useful gift for new parents but also an eye-catching centerpiece at baby showers. In this article, you will learn how to assemble a diaper bouquet using common materials and simple techniques.
We will explore all the steps from gathering your supplies to arranging your bouquet beautifully. You will find tips and tricks that help you make a stunning diaper bouquet that will impress everyone. Whether you are a beginner or looking for new ideas, this guide is here to help you craft something special.
Gathering Your Materials
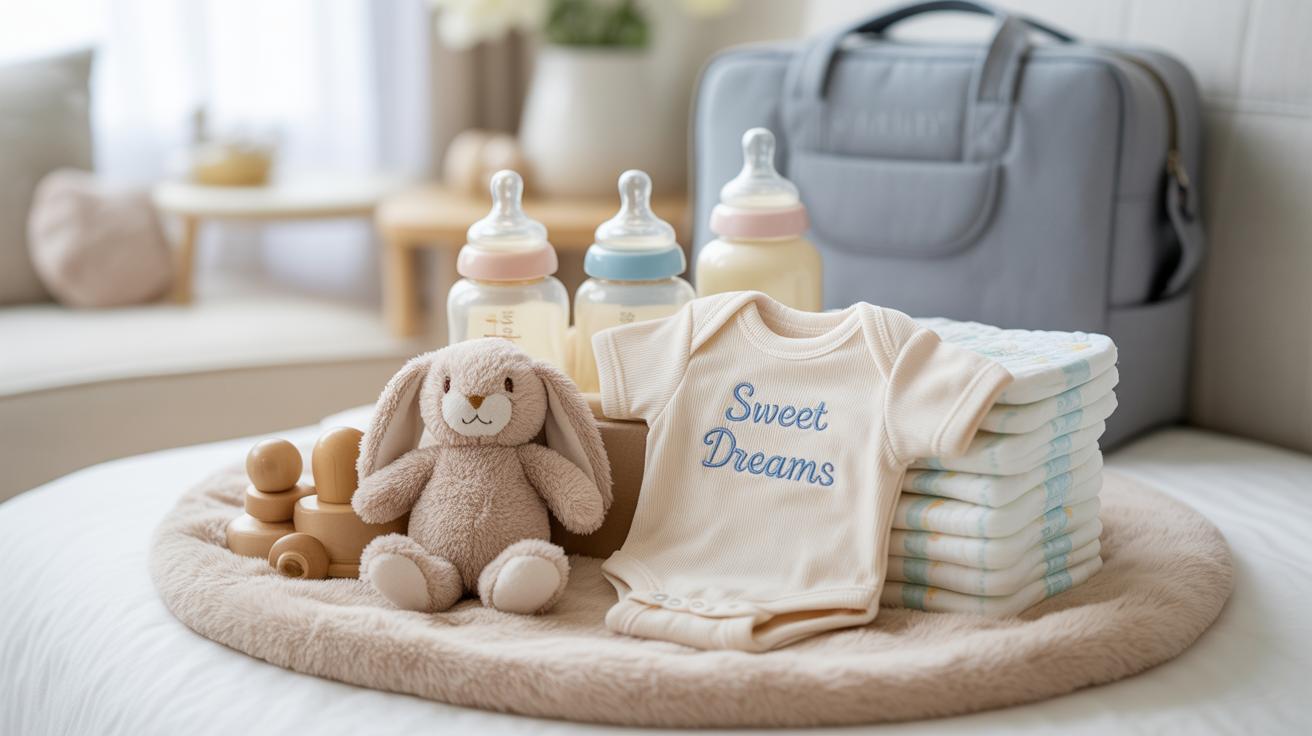
Before you start assembling your diaper bouquet, you’ll need to gather a few key items. First and foremost are the diapers themselves. A good pile of clean, brand-new diapers forms the core of your bouquet, so you want enough—usually around 30 to 40, depending on how full you want it. Don’t rush this; having extras is better than running short mid-assembly.
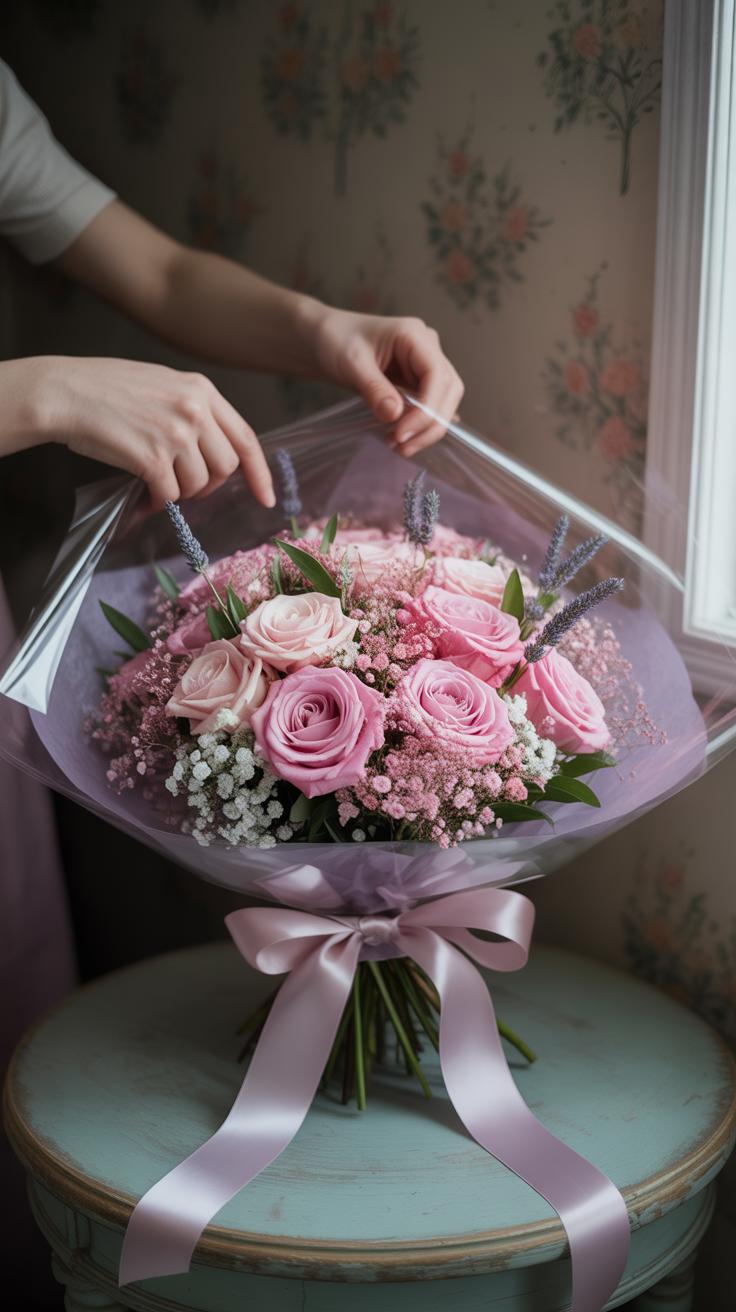
Next come ribbons. These aren’t just for tying; they hold everything in place and give the bouquet that finished look. Choose ribbons that complement your color scheme, but also pay attention to their width and texture. Some thin ribbons won’t hold well; a ribbon about half an inch to an inch wide tends to work best.
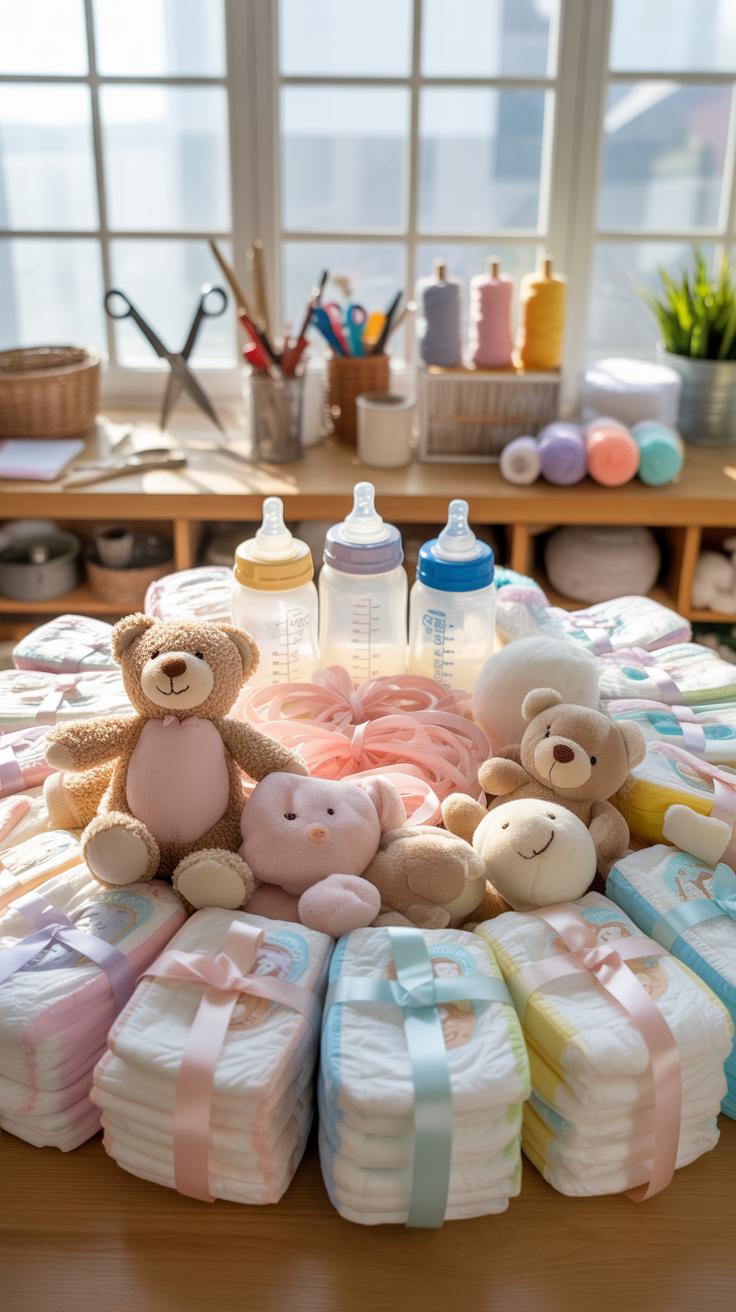
Of course, you’ll want small toys or baby items mixed in, too. Think rattles, pacifiers, little plushies—items that add personality and, well, usefulness. If you include pins or safety pins, they’ll help secure your pieces without risking damage to the diapers.
Finally, decorative paper or tissue paper can give your bouquet a polished look. This might feel like an extra step, but wrapping your base or lining the interior can elevate the whole bouquet. All together, these materials create a balanced mix of beauty and practicality.
Choosing the Right Diapers
Picking diapers isn’t as straightforward as just grabbing any pack off the shelf. The quality really matters because flimsy diapers can collapse or lose shape quickly. Go for well-known brands with a reputation for sturdiness. It’s a bit counterintuitive, but sometimes the pricier options are more durable—which is helpful when you’re shaping them into a bouquet.
Sizes matter, too. Newborn size might be tempting for a tiny, neat bouquet, but remember that parents will appreciate sizes they actually need in the coming months. Size 1 or 2 is often a safe bet since babies grow fast and these sizes get used plenty. Also, keep in mind your bouquet’s scale; smaller sizes can result in a delicate bouquet, but might be trickier to arrange evenly.
Additional Decorative Materials
There’s more you can add beyond diapers and ribbons to make your bouquet stand out. Fresh or faux flowers, for example, bring freshness and can soften the overall appearance. If you pick fresh flowers, just keep them minimal so they don’t wilt too soon. Small baby socks, mittens, or even a cute bib can peek out among the diapers and add extra function and flair.
Little details count here. My own attempts at including tiny blocks and baby spoons made the gift feel more thought-out, though sometimes these extras can clutter the look. It’s kind of a balancing act: too many accessories and the bouquet loses simplicity; too few, and it might seem plain. You’ll find your own rhythm as you go.
Preparing the Diapers

How to Roll Diapers Neatly
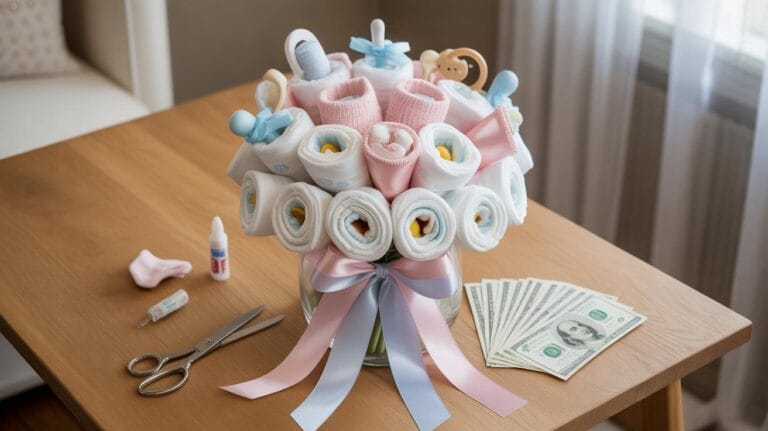
Start by laying a diaper flat on a clean surface. Fold it in half lengthwise to make it narrower—that helps with a tighter roll. Then, from the shorter end, begin rolling the diaper tightly, making sure to keep it even and snug. If it’s loose, the bouquet won’t hold its shape well, so try to keep the roll firm but not so tight that it wrinkles the diaper.
Once rolled, secure each diaper with a small rubber band around the center. Some prefer ribbon instead—it looks prettier, but rubber bands do a better job holding everything steady while you build the bouquet. You can always cover the rubber bands later with decorative wraps, so don’t worry if they look plain now.
Personally, I’ve found that rolling diapers in batches helps—rolling five or so at a time keeps the pace steady without feeling like a chore. Though, I admit, I sometimes rush and the rolls come out less neat, but it usually doesn’t affect the final look too much.
Alternatives to Rolling
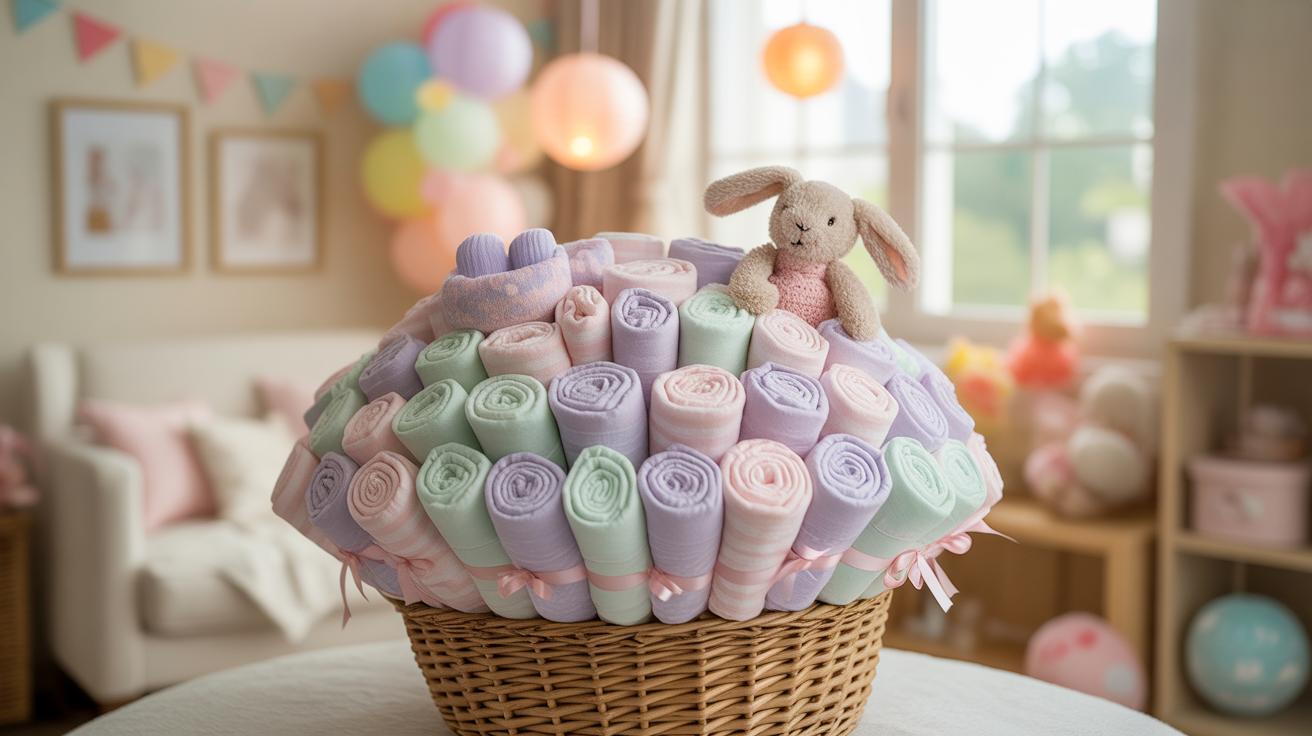
Rolling isn’t the only way. Some people prefer folding diapers into shapes like triangles or fan folds. For example, folding each diaper into thirds lengthwise and then into thirds widthwise creates a compact square shape. These can stack neatly and create a different bouquet texture.

Another option is making a simple tube fold where you roll but leave the edges loose, creating a more organic, flower-like effect. It’s less structured, which might suit a casual or rustic bouquet better. It reminds me of how you make paper flowers sometimes—it’s less precise but more artistic.
There’s no strict rule here. Try different folds if rolling feels tedious or you want a softer look. The main idea is making units that can stick together well and keep some firmness for assembly. I wonder sometimes if folding, while messier, might feel less clinical, more like crafting.
Building the Base of the Bouquet
Arranging Diapers in a Circle
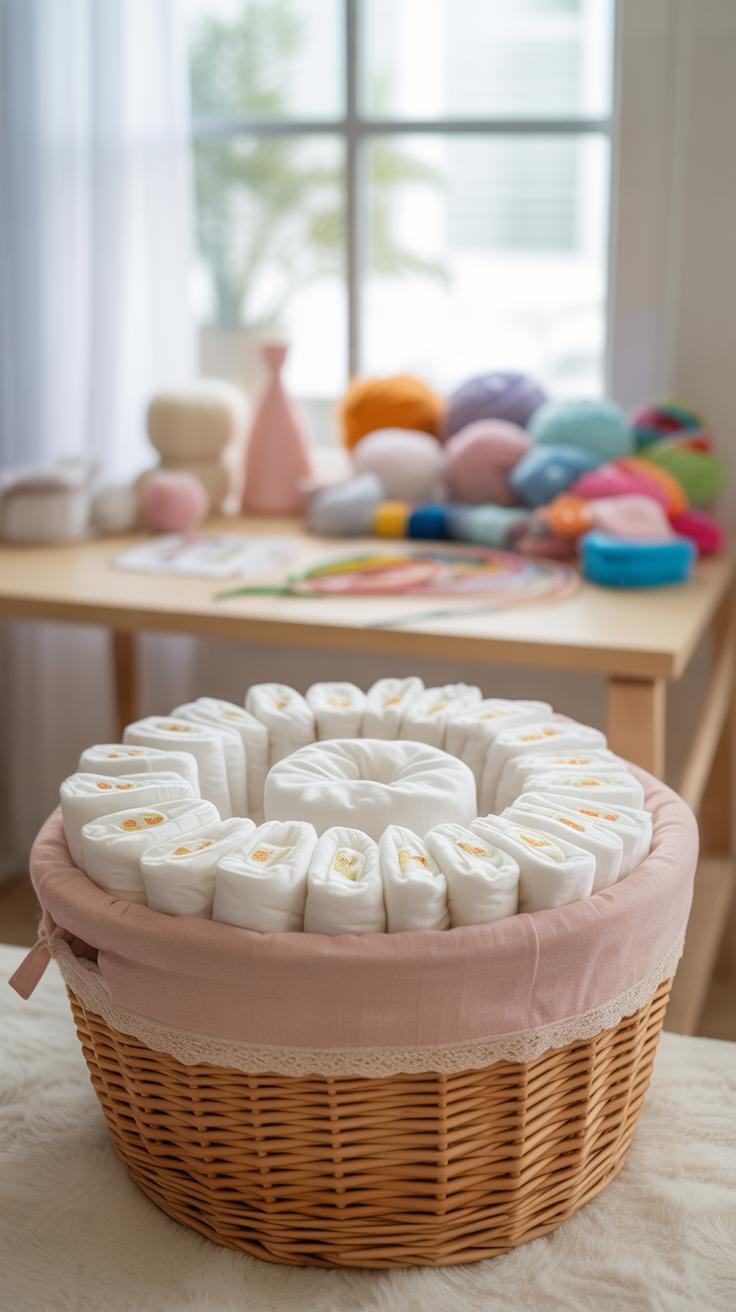
Once you have your diapers rolled or folded, the next step is to form a solid base. Laying them out in a circle works best for most bouquets. The idea is to nestle each diaper snugly against the next, creating a sort of ring. Don’t stress if the circle isn’t perfectly even; small gaps can be filled later with decorations or smaller layers. I found that starting with about 10 to 12 diapers often makes a sturdy base, but it depends on the size and how tightly you rolled them.
Sometimes, bending a few diapers slightly can help maintain the circular shape—just be careful not to crease too much or they’ll lose their neat look. You’ll want the base to be firm enough to support whatever comes next without wobbling.
Securing the Base
Getting those diapers to stay put can be tricky but there are a few ways you can go about it. Ribbon is very popular since it’s easy to adjust and adds a decorative touch right away. Wrapping a wide ribbon or two around the circle and tying it tight helps keep everything stable.
Pins can work too, especially if you use safety pins—they hold the diapers together without slipping but be cautious not to poke the diaper through too harshly. Some people use double-sided tape or even a dab of glue, but I personally find that ribbon and pins give more flexibility if you need to make adjustments. What feels right may depend on your style and patience.
Remember, the goal is a base firm enough to hold more tiers or decorations without collapsing but still soft enough to remain diaper-friendly. The base is your foundation, so spend a little extra time here—that patience usually pays off when the bouquet holds its shape beautifully.
Adding Decorative Elements
Using Ribbons for Style
Ribbons do more than just hold your creation together—they add personality and charm. When wrapping ribbons around the diaper bouquet, start by choosing colors that complement your overall theme. Don’t feel like you have to stick to just one type; mixing sheer with satin or even textured ribbons can create a more interesting look.
Wrap the ribbon snugly but not too tight, so the diapers don’t shift underneath. Try wrapping around the base first, then branch out toward the “blooms” — I find layering ribbons at different heights adds depth. When tying bows, take your time. A messy bow can quickly spoil the delicate balance you worked to build. Instead, make loops even and tails trimmed at an angle; it’s the small details like this that often make a big difference.
If you’re unsure, it helps to practice a few bow styles on spare ribbon before committing to your bouquet. Once you get it right, securing the bow with a small dab of glue or a discreet pin can keep it in place—just be mindful where you place pins so they don’t poke out unexpectedly.
Incorporating Baby Items
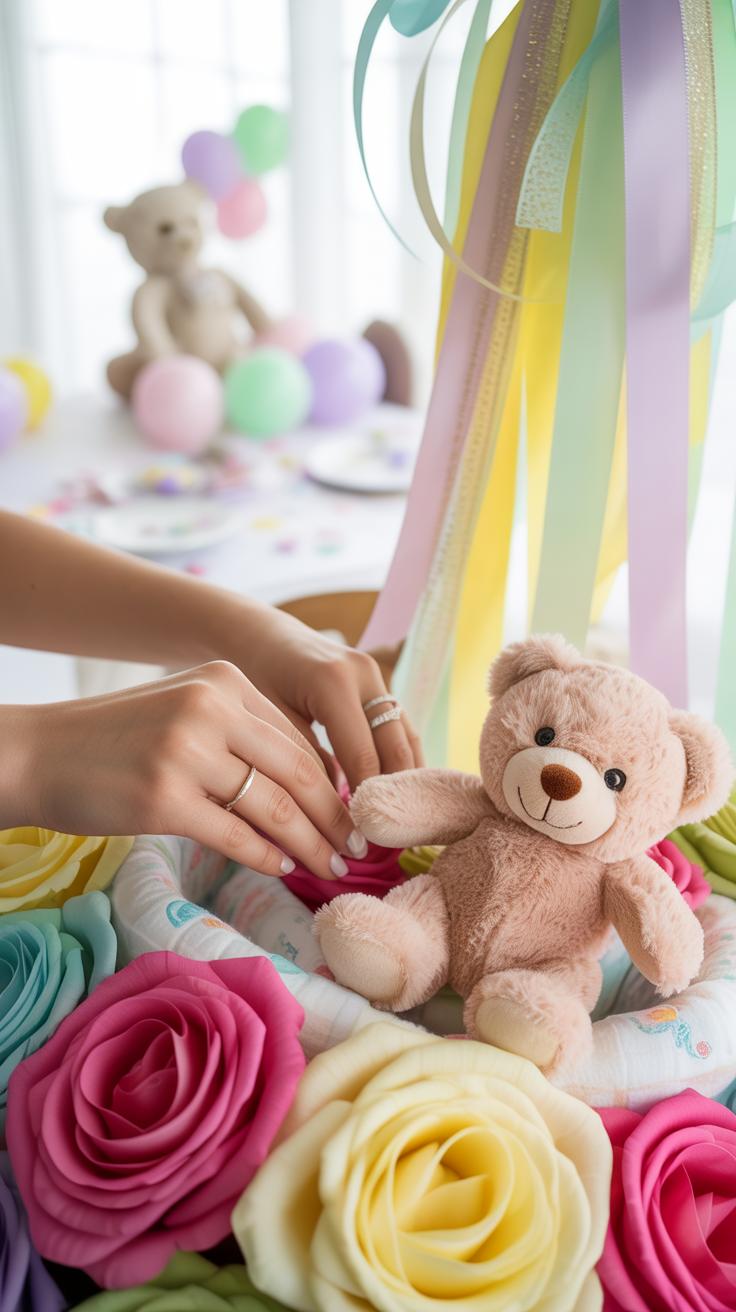
Adding baby items transforms the diaper bouquet from something purely decorative into a practical gift. Soft toys, pacifiers, and tiny socks aren’t just cute—they’ll actually get used, and you’ve cleverly integrated them into your design.
Place small plush toys nestled between rolled diapers, letting their heads or limbs peek out. For pacifiers, attach ribbons and tuck them into small openings, or clip them onto the ribbons you’ve already wrapped—this way they’re both accessible and decorative. Socks can be rolled tightly and scattered throughout the bouquet like miniature flowers.
Think about balance—too many items clustered in one area might make the bouquet look lopsided or cluttered. Spread them evenly but not mechanically, so it feels natural. I like to imagine the bouquet as a little world where every piece has a purpose and space to breathe.
One tip I learned the hard way: choose baby items in different textures and shapes to avoid the bouquet feeling flat. Contrast soft toys against pacifiers or textured socks to keep things visually interesting.
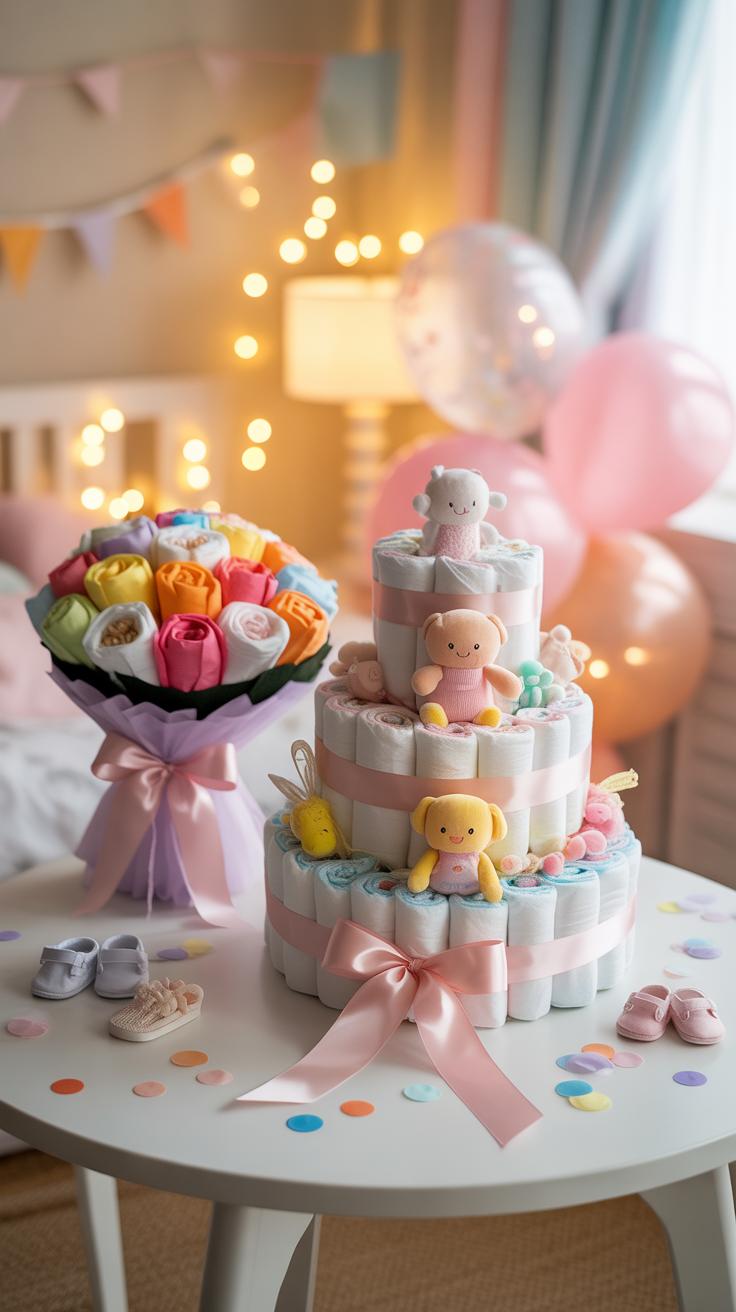
Creating Layers for a 3D Effect

Building the Second Tier
Once you have your base layer of rolled diapers arranged, adding a second tier introduces that much-needed height and volume. It’s like giving your bouquet a gentle lift, making it stand out more on the table. To do this, start by securing a smaller circle of diapers on top of the base layer, either by gently tying it with a soft ribbon or using floral picks. The key is to keep the layers stable but not too tight—if it’s too compact, it loses its airy appeal.
I found that placing a small, lightweight item—perhaps a baby bottle or a plush toy—in the center of the second tier can provide natural support. This creates a nice structure and keeps the layer from sagging. You don’t want it too heavy, though, or the base might shift under the weight.
Layer Decoration Ideas
Each tier offers a new space to play with textures and colors. For the bottom layer, try using wider ribbons or larger faux flowers. Then, as you move upwards, switch to slimmer ribbons or delicate small blooms to keep the eye moving upward. It breaks monotony and adds interest.
Think about using different types of baby items on each level. For instance:
- The base layer can feature practical items like bibs folded into rosettes or socks artfully tucked in.
- The second tier might showcase tiny booties or a soft toy balanced on one side.
- Adding a contrasting texture, like lace or mesh fabric around one tier, can add subtle complexity without overwhelming the bouquet.
Sometimes, a little asymmetry in decoration—say, a cluster of small flowers on one side—makes the bouquet feel more alive and less predictable. So, when decorating, ask yourself what draws your eye and if that reflects what you want your bouquet to say.
Securing the Entire Bouquet

Using Pins and Tape
When it comes to holding your diaper bouquet together, pins and tape can be your best friends, but you need to handle them carefully. Diapers are delicate—piercing or tearing them too deeply can ruin both their look and function. So, think of pins as tiny anchors rather than nails. Use straight pins with small heads and only push them through the outer layers, catching enough fabric to hold without poking through entirely.
Clear tape is another option. Instead of wrapping it directly around the diapers, try anchoring it on the ribbons or the base structure, where there’s more support. Transparent tape won’t be obvious, but it can quickly lose stickiness if the surface isn’t smooth. I found that a few strategically placed pieces, pressed firmly but gently, do wonders. Don’t overdo it—too much tape or pins can feel excessive and cluttered.
Wrapping the Bouquet
Once everything is held together, wrapping the bouquet is your last step to protection and presentation. Cellophane works well because it is both protective and transparent; it shows off your handiwork while keeping everything clean. You can either gather it loosely around the bouquet or wrap it tighter for a crisper shape.
Decorative paper is an alternative and adds color or theme to your gift. If you use paper, make sure it’s not too stiff to avoid awkward folds. When wrapping, try pulling the paper or cellophane up from the base and tying it neatly at the top. Don’t forget to leave some room so the bouquet doesn’t squish—air helps maintain its shape.
Wrapping isn’t only about looks. It helps secure the entire structure, makes carrying easier, and protects the diapers from dust or moisture. You might wonder if wrapping is always necessary—sometimes, it feels like an extra step, but once you’ve seen how much safer your bouquet travels thanks to it, you might think it’s worth it.
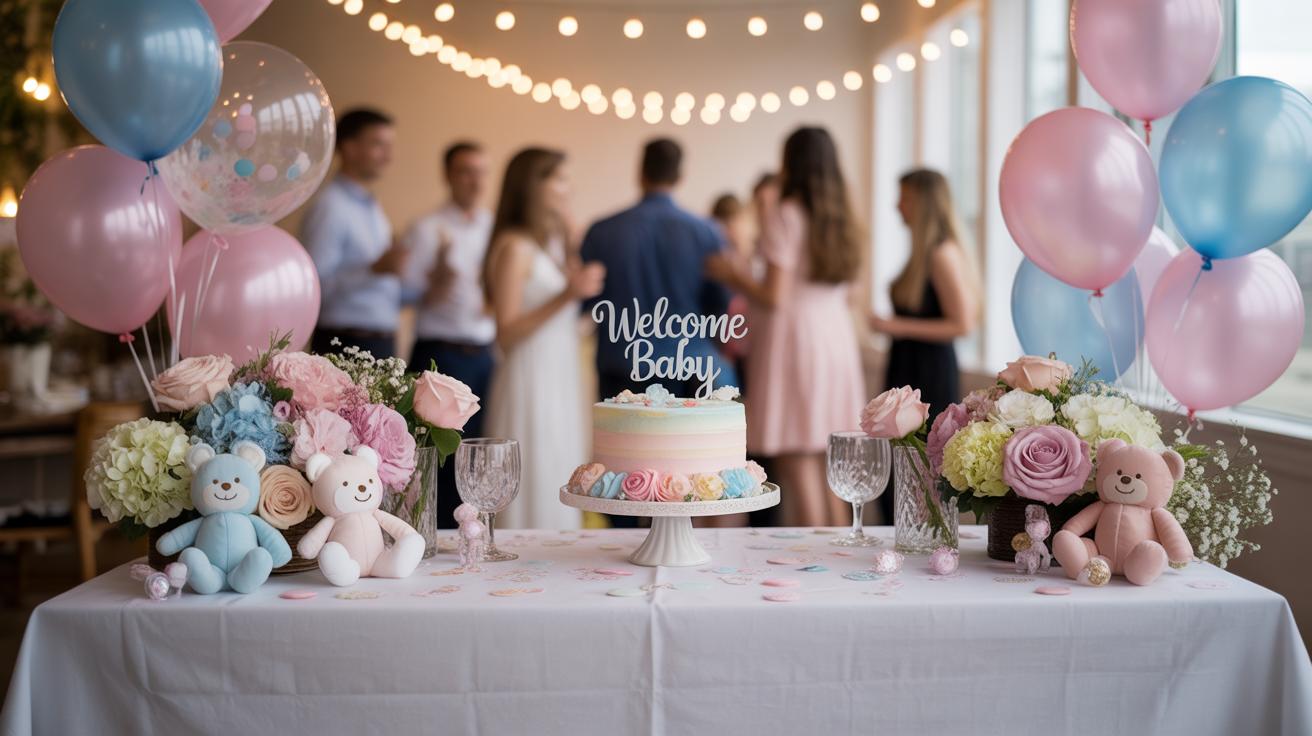
Presenting Your Diaper Bouquet
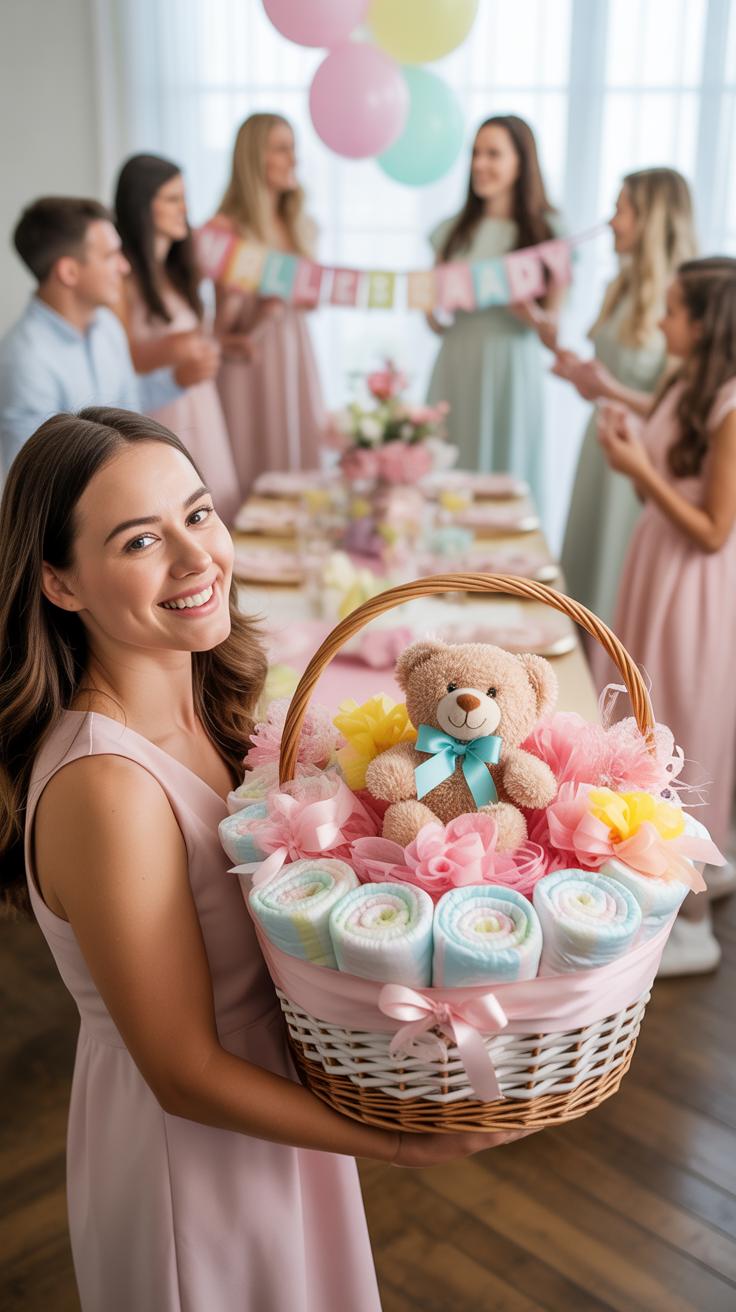
When it comes to gifting your diaper bouquet, how you present it can make all the difference. You want it to feel special, not just another package. Think about the setting: baby showers often have tables full of gifts, so placing your bouquet in a prominent spot or carrying it in makes it stand out immediately. Sometimes, presenting it in a nice basket or decorative box can help—it keeps the bouquet intact and looks polished.
Adding a personal touch matters. A handwritten card or a small tag with a thoughtful message can turn a practical gift into something heartfelt. I’ve seen simple notes like “Here’s to many diaper changes and diaper smiles” brighten the gift’s appeal. You can also attach small keepsakes like a pacifier clip or a tiny plush toy. These details invite the recipient to pause and feel the effort behind the gift.
Transporting your bouquet? Take care—these arrangements can be a bit delicate. Carrying them in a sturdy box or using a reusable tote bag with some padding around the bouquet keeps everything safe. If you’re driving, placing the bouquet on a non-slip mat or securing it with a seatbelt can prevent it from tipping over. Maybe you wonder if it’s better to assemble the bouquet at the venue. That can work, but sometimes having it all ready is just easier, as long as you are cautious with transport.
Creative Variations and Ideas
If you want your diaper bouquet to stand out even more, exploring different themes can be a really fun direction. Think beyond just the usual pastel blues or pinks. For instance, you might create an animal-themed bouquet by adding small stuffed toys or paper cutouts of baby animals like ducks, rabbits, or bears. It’s a simple way to bring personality without needing any fancy skills.
Cartoons can also inspire—you could match colors and little figurines from popular toddler shows, giving the bouquet a playful edge. Sometimes I’ve seen people use multicolor layers that reflect popular superheroes or fairy tale characters; it’s quirky, sure, but memorable. The key is choosing items that aren’t too bulky, so your bouquet remains compact and balanced.
Eco-conscious choices are becoming more common when making diaper bouquets. Organic diapers make sense if you know the parents prefer sustainable products. You could also swap out ribbons and paper wraps for biodegradable or recycled materials. Twine, for example, works well and adds a rustic feel. It takes a bit more hunting to find these materials, and maybe a tad more effort, but it feels worthwhile knowing you’re keeping things green.
Have you ever considered a gender-neutral bouquet? Using whites, yellows, and greens with natural accents opens up a fresh look that’s less typical, which some parents appreciate. Ultimately, crafting your bouquet with small touches like these can really speak to the recipient’s tastes and values. It makes your gift feel more thoughtful, I think.
Conclusions
Creating a diaper bouquet at home can be a rewarding task. With the right materials and careful assembly, you can produce a charming and practical gift. This project not only saves money but also adds a personal touch that store-bought gifts often lack.
As you practice the techniques shared here, you will gain confidence and be able to customize each bouquet to suit the occasion. Your efforts will surely be appreciated by the new parents and make the celebration memorable. Enjoy making your diaper bouquet!