Introduction
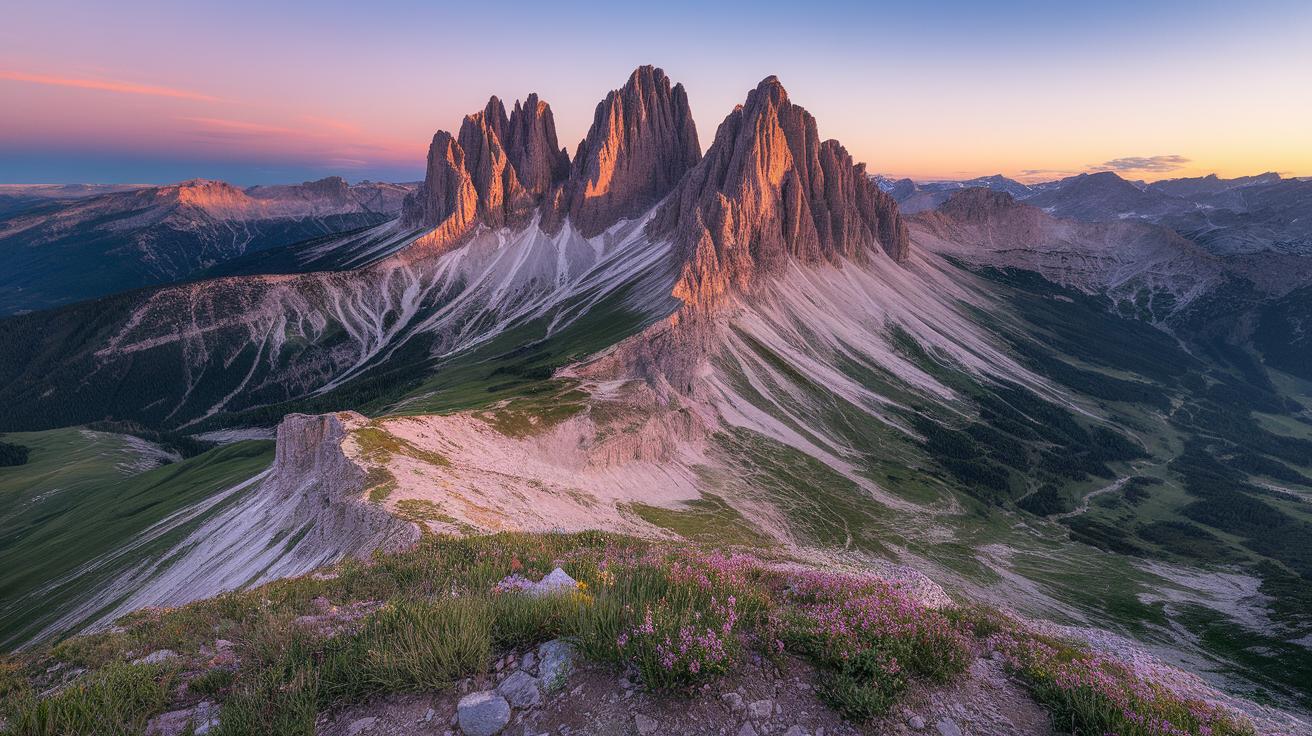
Mountains offer some of the most breathtaking landscapes for photographers. Photographing these vast natural wonders allows you to capture scenes filled with texture, light, and scale. Mountains can challenge your skills by their sheer size and the shifting light conditions. Your camera can reveal their patterns and moods in ways the eye alone might miss. Understanding how to approach mountain photography opens doors to creating striking images that resonate with viewers. Photography is more than snapping pictures. It requires thoughtful composition and technique. When applied to mountains, composition helps frame their majesty, guiding your audience’s focus and enhancing story-telling.
Mastering composition techniques tailored for mountains means you pay attention to elements like lines, balance, simplicity, and framing. Each shot becomes a purposeful visual message. You can make use of natural lines that mountains create or their unique shapes to lead your viewer into the image. Whether you shoot peaks, ranges, or close-ups, composition tricks help the image make sense and hold interest. You will learn to see mountains not just as a scene but as components that build a strong photo. This article explains key composition methods and how to apply them to mountain photography for more compelling results.
Understanding Mountain Photography
Mountain photography focuses on capturing the beauty and grandeur of mountainous landscapes. It stands apart from other landscape types because of the dramatic scale and complex forms involved. Mountains create powerful visual statements using towering peaks, deep valleys, and rugged textures.
Capturing this scale can challenge your senses. Mountains often dwarf other elements, making it hard to show true size and depth. Light changes rapidly as it interacts with rocky surfaces, casting sharp shadows and sudden highlights.
Weather adds unpredictability. Mist, clouds, or snow can hide details or create mysterious moods. You must adapt quickly to shifting conditions and anticipate moments worth shooting.
The reward lies in the awe these scenes evoke. Photographing mountains allows you to engage with nature’s forces and present their raw power. This process tests your skills in framing, timing, and patience, making each successful image truly satisfying. How will you capture both vastness and fine detail in your next mountain photo?
Why Photograph Mountains
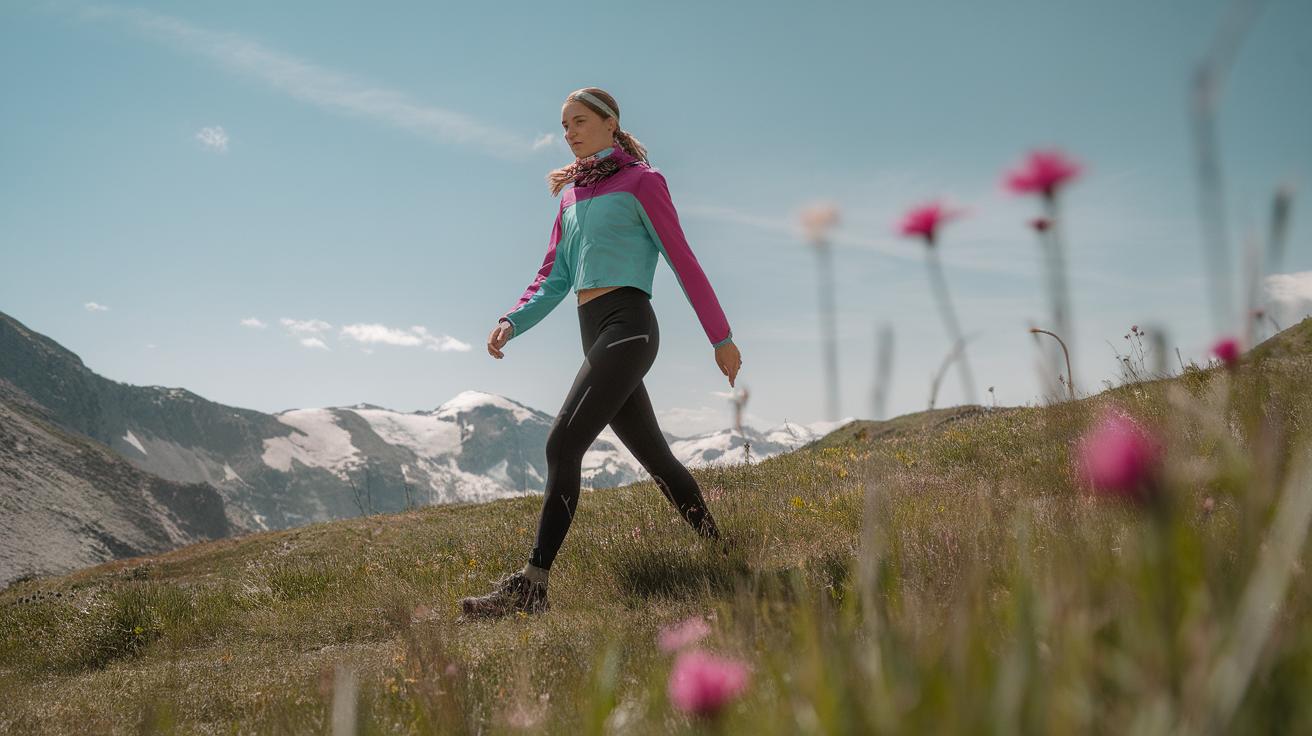
Mountains draw photographers because they reveal nature’s scale and change through seasons. You can capture summer’s lush greens, fall’s colorful leaves, or winter’s stark snow. This variety keeps your work fresh across trips.
These landscapes invite a personal connection. You might feel peace in quiet alpine meadows or excitement on jagged ridges. Your experience shapes each photo, making your view unique.
Creating mountain images asks for creativity. You decide how to balance sky and land, where to place the horizon, and which elements tell your story. What story does your mountain photo tell about nature or your own journey?
Challenges Specific to Mountains

Changing light in mountains demands quick adjustments. Shadows deepen fast as the sun dips behind peaks. Finding the best exposure means paying attention and adapting lens settings on the spot.
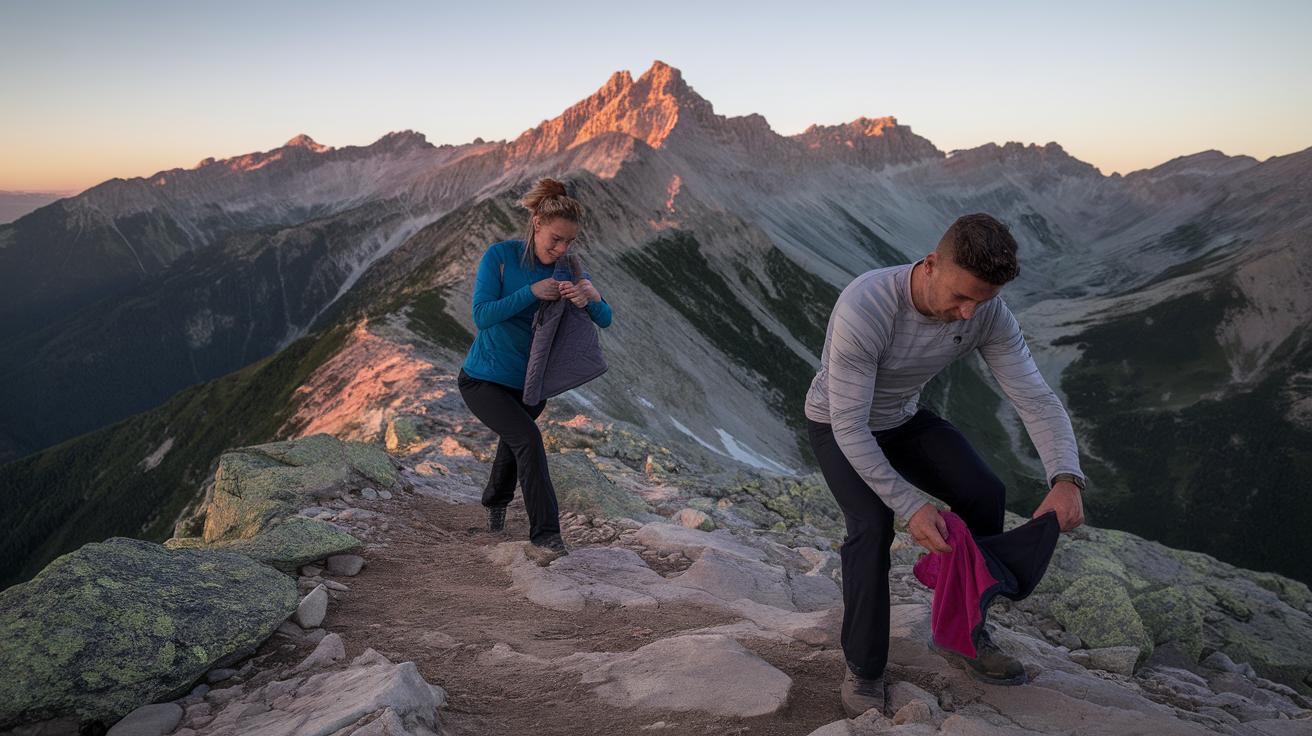
Altitude can affect both you and your gear. Thin air may tire you faster, so plan your timing carefully. Cold temperatures can drain batteries, so carry spares and keep them warm.
Composing mountain photos requires observing depth and layers. Empty foregrounds can flatten the scene, while clutter might distract from the main subject. Try different angles and distances to find a strong balance.
Basic Photography Composition Principles

Composition shapes the way viewers experience your mountain photos. Without strong composition, even the most stunning scenery can seem flat or confusing. Simple rules help organize the visual elements so your photos tell a clearer story.
The rule of thirds, balance, and framing are key tools you can use. The rule of thirds splits the frame into a grid of nine parts. Placing your main mountain subjects along these lines or intersections creates natural points of interest.
Balance influences how stable or dynamic a photo feels. Symmetrical balance offers calmness, while asymmetrical balance adds tension and movement. Framing uses surroundings like trees or rocks to isolate your subject and keep focus there.
When you control composition, you guide the viewer’s eye and create impact. How would a mountain photo feel if your eyes had nowhere to focus? Composition anchors your images and keeps viewers engaged.
Rule of Thirds and Balance
Use the rule of thirds grid to place mountains or peaks off-center. Imagine a mountain summit aligning along a grid line rather than dead center. This adds interest and avoids a static feel.
You can balance a towering peak on one side with a forest or valley on the opposite. This balance can be equal or uneven, depending on the mood you want. Symmetry gives a sense of order, while imbalance injects energy and curiosity.

Try shifting your camera’s position to see how different placements affect tension and harmony in your frame. What feels more natural or inviting to you? Balance controls how comfortable or dramatic your mountain photo looks.
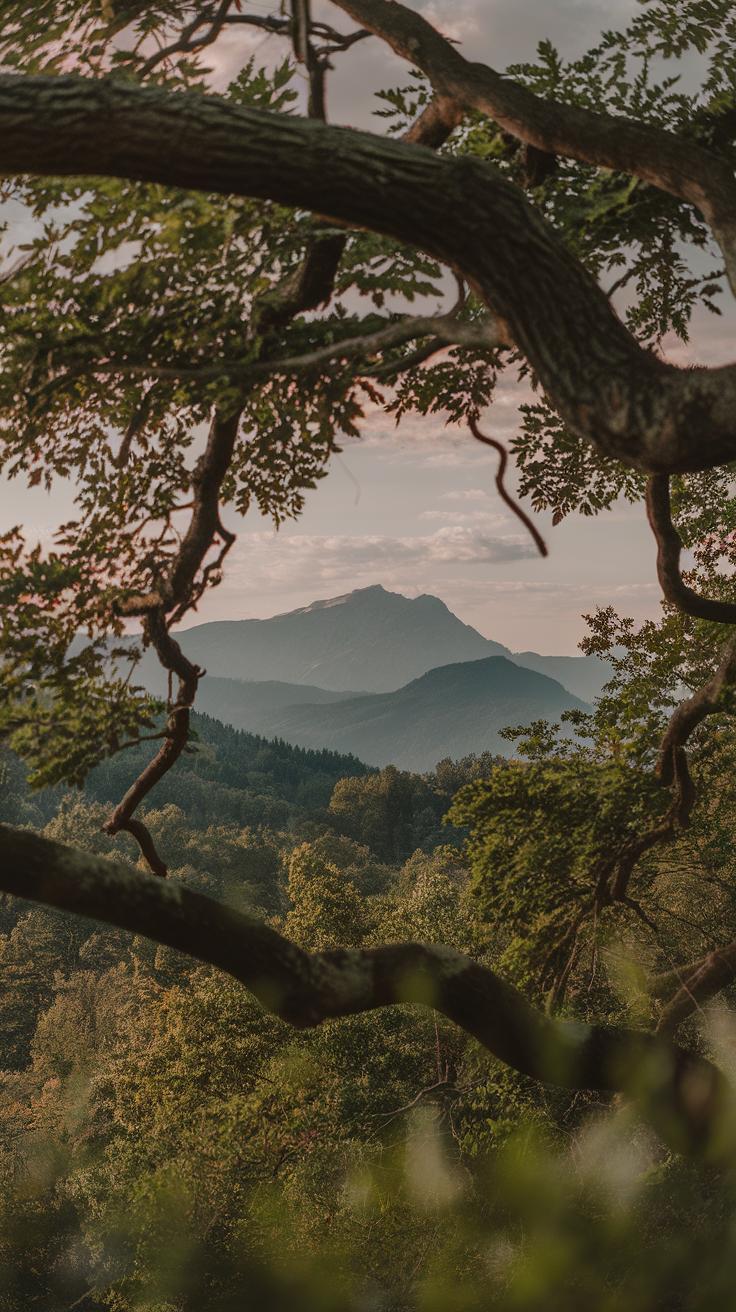
Using Framing and Leading Lines
Natural elements like tree branches, rock edges, or ridgelines can frame mountains within your photo. This draws attention to your subject and creates a visual window. Framing also adds layers and a sense of depth.
Leading lines, such as a river, trail, or a row of jagged peaks, guide the viewer’s eye deeper into the landscape. They create a path through your photo, enhancing both focus and scale.
Ask yourself where the viewer’s eye travels first. Can you use natural lines or frames to direct that journey toward the key mountain features? Thoughtful use of these tools transforms flat images into immersive scenes.
Applying Simplicity and Minimalism
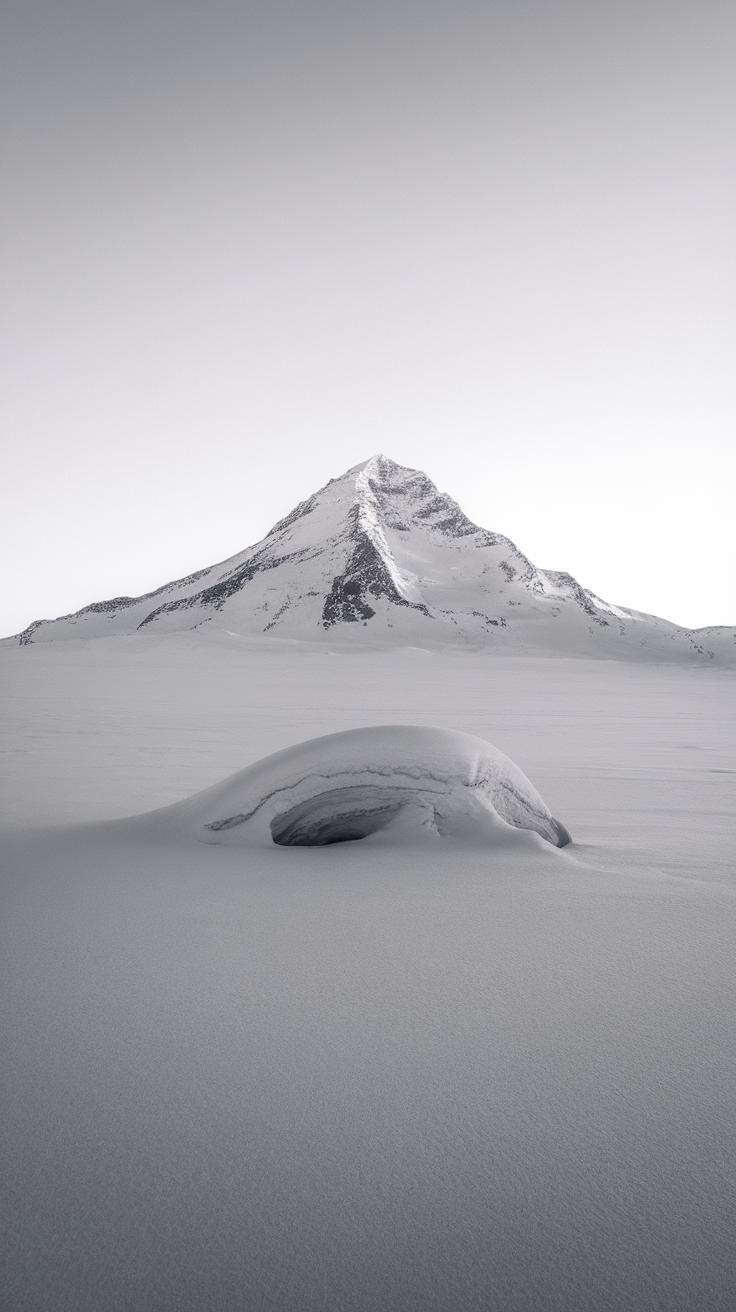
Mountain landscapes can feel overwhelming with so many details in every frame. Removing distractions helps your main subject stand out and creates a clear, powerful image. When you simplify your composition, the viewer’s eye focuses on what truly matters. Negative space—empty areas around your subject—can emphasize the shape and scale of mountains. It gives your photo room to breathe and highlights the textures or colors that catch attention.
Try to keep your composition clean by including only essential elements. Ask yourself what you want the viewer to feel or notice first. Is it the sharp peak against a clear sky? Or maybe the gentle curve of a mountain ridge? Using simplicity guides the story you tell with your photo, making it stronger and more memorable.
Identify Distractions in Mountain Scenes
Cluttered foregrounds with rocks, branches, or trash can distract from the grandeur of mountains. Busy skies filled with uninteresting clouds or power lines may also pull attention away from your main subject. Watch for people, animals, or scattered debris that don’t add value to your shot.
To reduce distractions, change your angle or move your position. Sometimes stepping back or zooming in isolates the mountain better. Using a shallow depth of field to blur clutter in the foreground can help. Keep the horizon clean and avoid overly bright spots that draw the eye from the mountain itself.
Harnessing Minimalism
Minimalism focuses on using few elements to create a strong image. In mountain photography, a single peak alone on a clean sky can carry a big impact. A lone tree standing at the base draws the eye and adds scale without crowding the frame.

Look for simple shapes and patterns, then center your composition around them. Removing extra details allows textures and lines to become more noticeable. What happens if you frame a mountain peak with empty space on all sides? It often feels more dramatic and peaceful.
Next time you shoot, challenge yourself to capture the mountain’s essence with less. Focus on one subject and its relationship with surrounding space. How much can you leave out while still telling the full story?
Using Light to Enhance Mountains
Light plays a key role in mountain photography. Its direction changes how mountains appear, affecting their shape and texture. When light strikes from the side, it emphasizes ridges and crevices. Front lighting can flatten features, while backlighting creates silhouettes for drama.
Light quality also matters. Soft, diffused light reduces harsh shadows and reveals gentle details. Hard light raises sharp contrasts, which can either add energy or hide features, depending on your goal.
Color in light changes mood. Warm light adds richness, while cool light can create calm or mystery. Capturing mountains during the golden hour, shortly after sunrise or before sunset, lets you use this warmth to highlight textures. Blue hour, the time just before sunrise or after sunset, offers a cool, soft glow that feels serene. Shadows cast by the mountain’s contours give shape and depth, guiding your viewer’s eye.
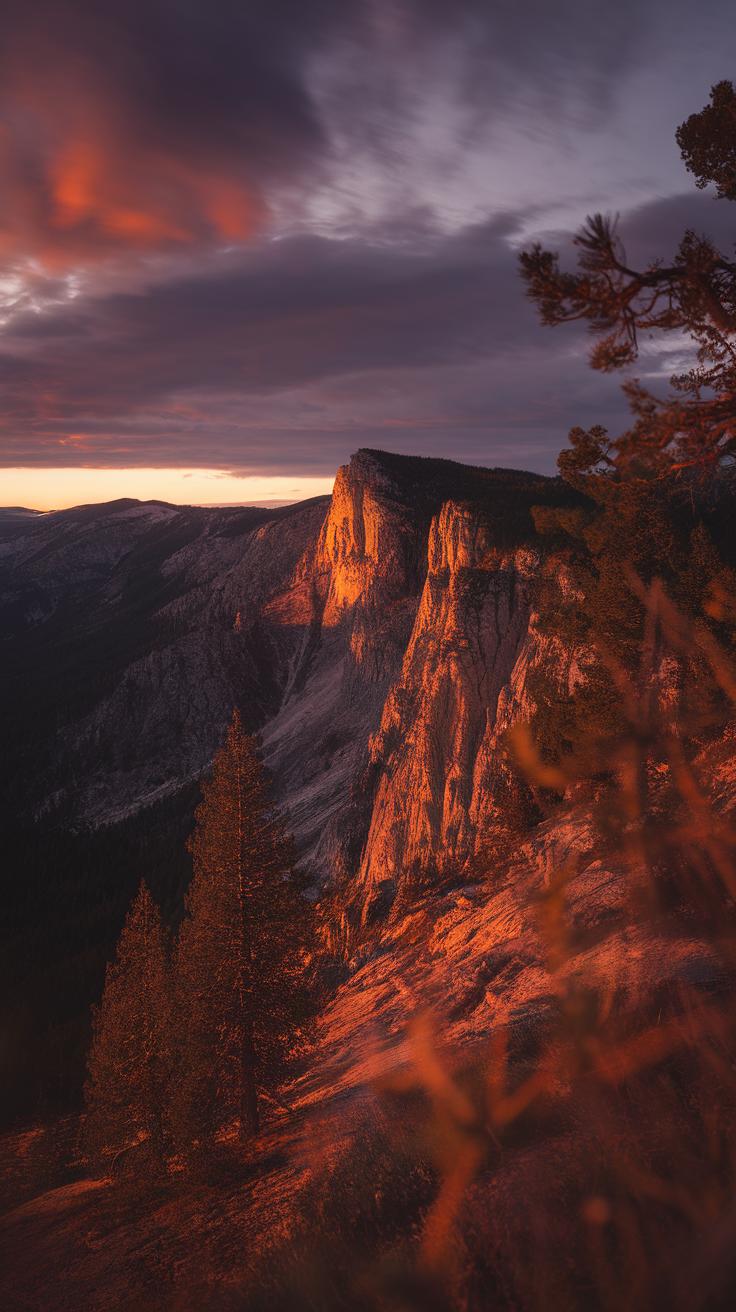
Golden Hour Magic
Golden hour offers soft, warm light that falls at a low angle. This light paints the mountain surface with long shadows that reveal every ridge and rock. Do you notice how textures appear more pronounced during this time? It happens because the light hits the mountain at an angle, lifting its features out of flatness.
The warmth of golden hour light adds color to your photo without editing. If you time your shots right, you can capture rich oranges and pinks on mountain peaks. These tones make your photo feel dynamic and alive. Seek out areas where shadows create a natural contrast against lit parts. This simple trick improves the clarity and impact of your composition.
Shadow and Contrast
Shadows create a sense of depth and mood in mountain photography. They divide the scene into light and dark areas, making flat landscapes appear three-dimensional. Have you tried shooting a mountain with strong side light? The shadows will outline every slope and valley, giving your photo a sculptural quality.
Contrast between bright and dark zones can also set the photo’s tone. High contrast creates drama and tension. Lower contrast offers calm and softness. To use shadows effectively, wait for the right light angle and look for mountain shapes that cast interesting shadows. Sometimes, even a small shadow can lead the viewer’s eye or frame a particular detail.
Composing with Foreground Midground and Background
Mountain photographs gain power when you layer elements in the foreground, midground, and background. This layering creates depth, making your image feel three-dimensional and alive. Each plane holds a role that helps guide your viewer’s eye through the scene. Without thoughtful placement, photos may appear flat or confusing.
Start by identifying strong points that work well in each plane. Placing engaging elements in the foreground anchors your composition and invites viewers into the frame. The midground then bridges that connection, leading the eye naturally toward the mountain peaks in the background. Consider how these layers create a visual path that tells a story with your photo.
Ask yourself: Are the elements arranged to create balance and harmony between planes? Is there enough separation between the layers to show depth? Think of your photo as a journey viewers take from front to back. This intentional layering will transform your mountain landscapes into images that pull people in and hold their attention.
Choosing Foreground Interest
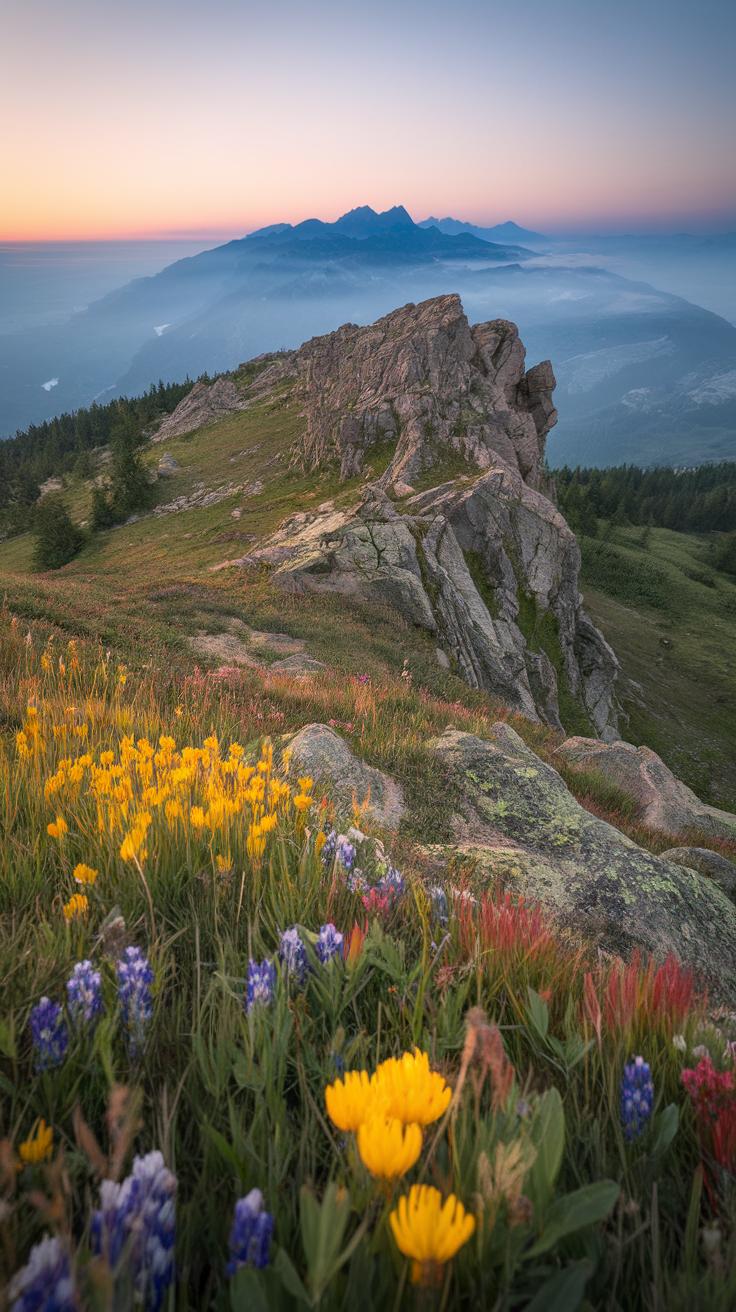
Look closely for rocks, plants, or water features in the foreground to anchor your shot. These elements add texture and context. For example, smooth river stones or wildflowers can give the viewer a sense of place and scale.
When you include foreground interest, your photo gains an entry point that feels tangible. Without it, the scene may lack a sense of dimension. You want to make sure the foreground is neither too plain nor overwhelming. Try moving around to find objects that complement the mountains and help balance your frame.
Could a simple rock or a flowing stream improve your composition right now? Taking a few extra steps to scout the foreground can make a big difference in how your mountain photo engages viewers.
Midground and Background Roles
The midground acts as the bridge between foreground interest and distant mountain peaks. Use features like trees, hills, or ridgelines to lead the eye deeper into the scene. These elements create a natural progression that completes your photo’s story.
Background mountains anchor the composition and provide grandeur, but they work best when supported by clear midground elements. This interplay adds layers of meaning and helps viewers understand the scale and geography of the landscape.
When framing your shot, think about how the midground connects the foreground with the mountains behind. Are your midground objects pointing the eye toward the peaks? Can you arrange your composition to highlight this connection? Using these three planes thoughtfully will help you create mountain photos that feel rich and immersive.
Capturing Scale and Perspective
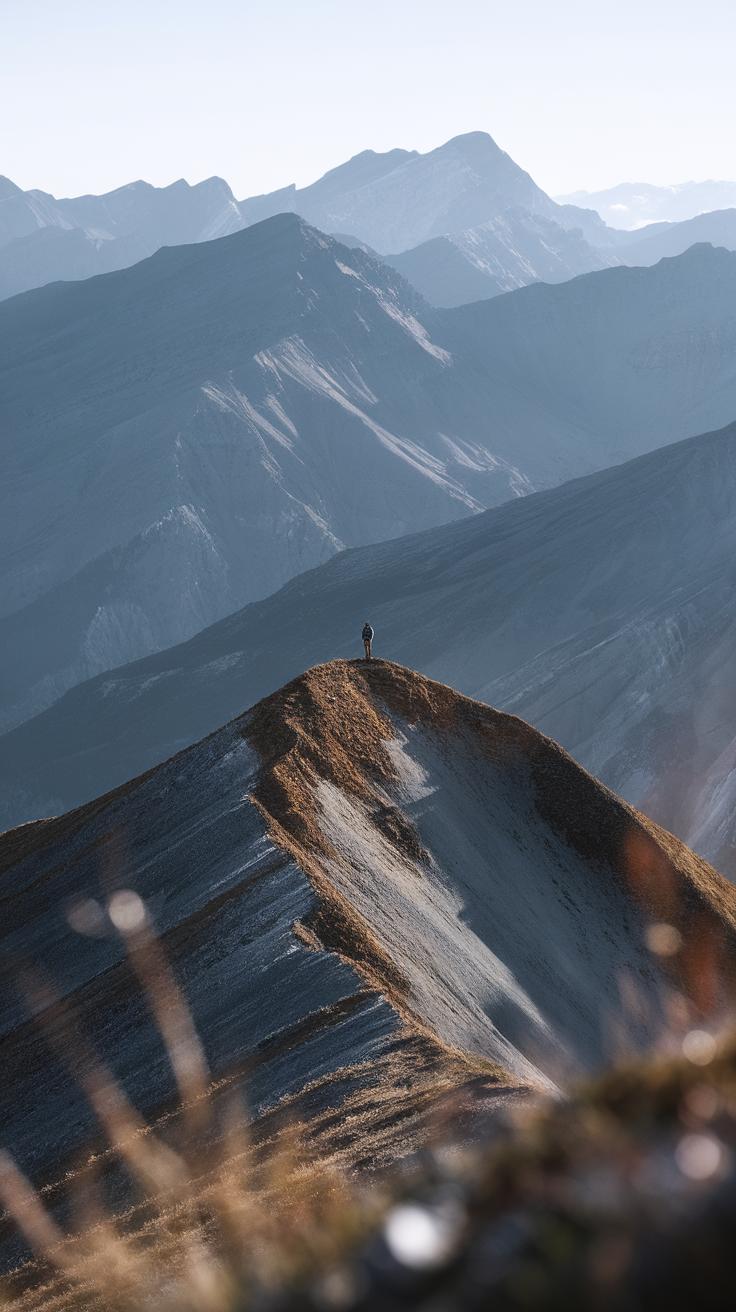
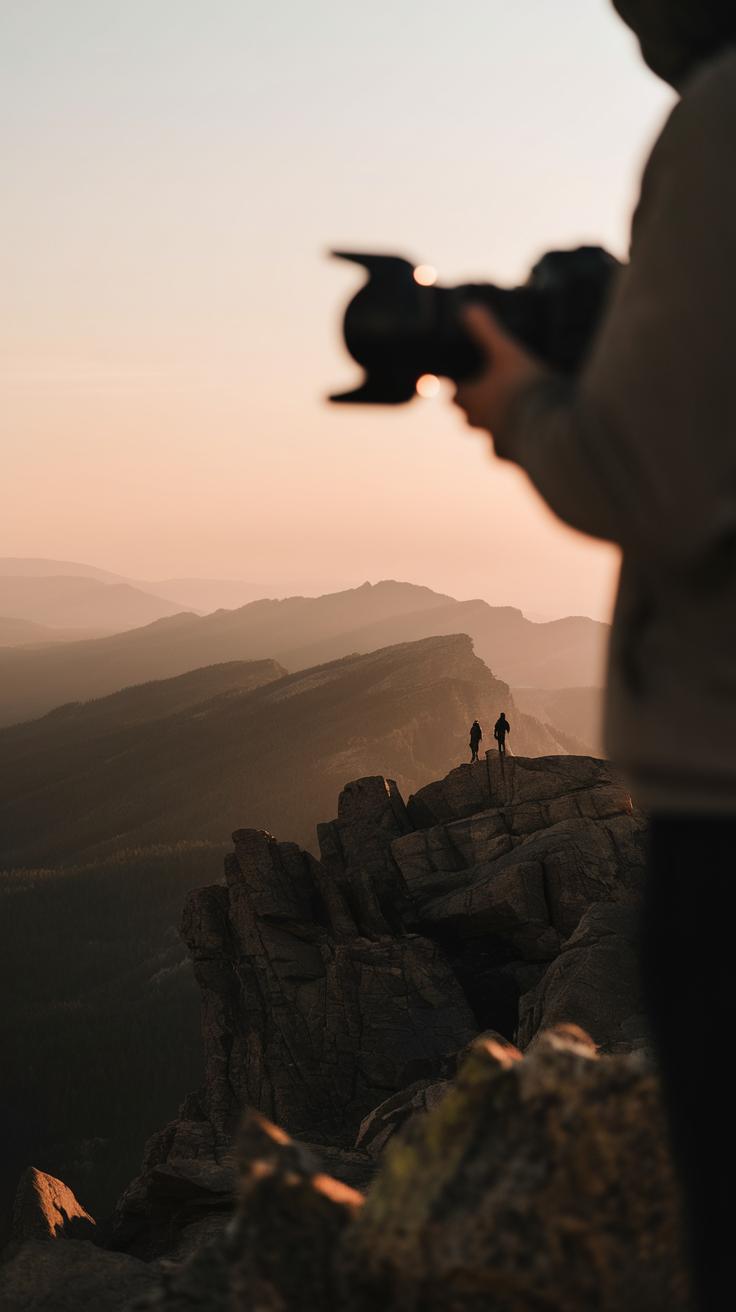
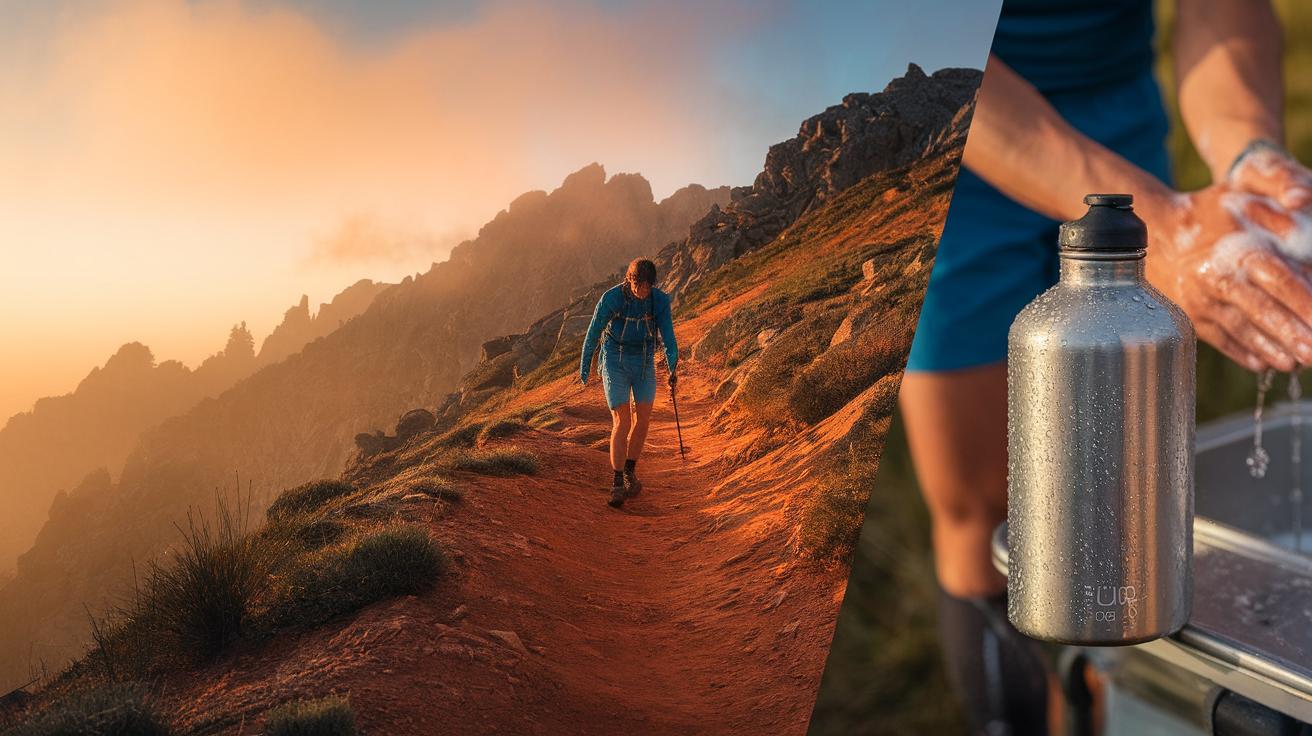
Mountain landscapes often feel vast and overwhelming. To show their true size, you need a way to connect the viewer to the scale. Including objects like hikers, trees, or cabins helps provide reference points. When you place a tiny figure against a towering peak, your photo shows the mountain’s full size more clearly.
Perspective changes how large or small a mountain seems. Shooting wide angles creates a sense of openness. Using a telephoto zoom compresses distance, making mountains appear closer but sometimes flatter. Trying a mix of lenses can help find what best conveys the mountain’s scale.
Including Reference Points
Try placing people or familiar objects in your shot. A hiker on a trail shows the mountain’s vastness by comparison. Trees can also help, especially if they stand tall but still look small next to cliffs. Even cabins or small buildings create easy-to-understand scale.
You don’t have to put these objects in the center. Position them at edges or corners to guide viewers’ eyes through the scene. When was the last time you noticed a tiny figure in a huge mountain scene and felt the size of nature?
Choosing Perspectives
Shooting from low angles can make mountains feel more powerful. When you point your camera from the ground looking up, peaks seem to reach higher into the sky. Conversely, capturing the scene from a high viewpoint offers a broader look. You can see how peaks stack or how valleys stretch out below.
Changing your viewpoint also affects mood. A low shot might feel dramatic and close. A high shot feels distant and vast. When you head out to shoot mountains, ask yourself what feeling you want to create and choose your perspective to match that.
Incorporating Patterns and Textures
Mountains offer more than just vast views; they present a tapestry of patterns and textures that bring your photos to life. Repeated shapes like jagged ridges or layered rock formations create rhythm in your images. These natural patterns guide the viewer’s eye and add depth to your composition. When you carefully observe the mountain’s surface, look for lines that repeat or intersect, such as parallel ridges that stretch across the frame.
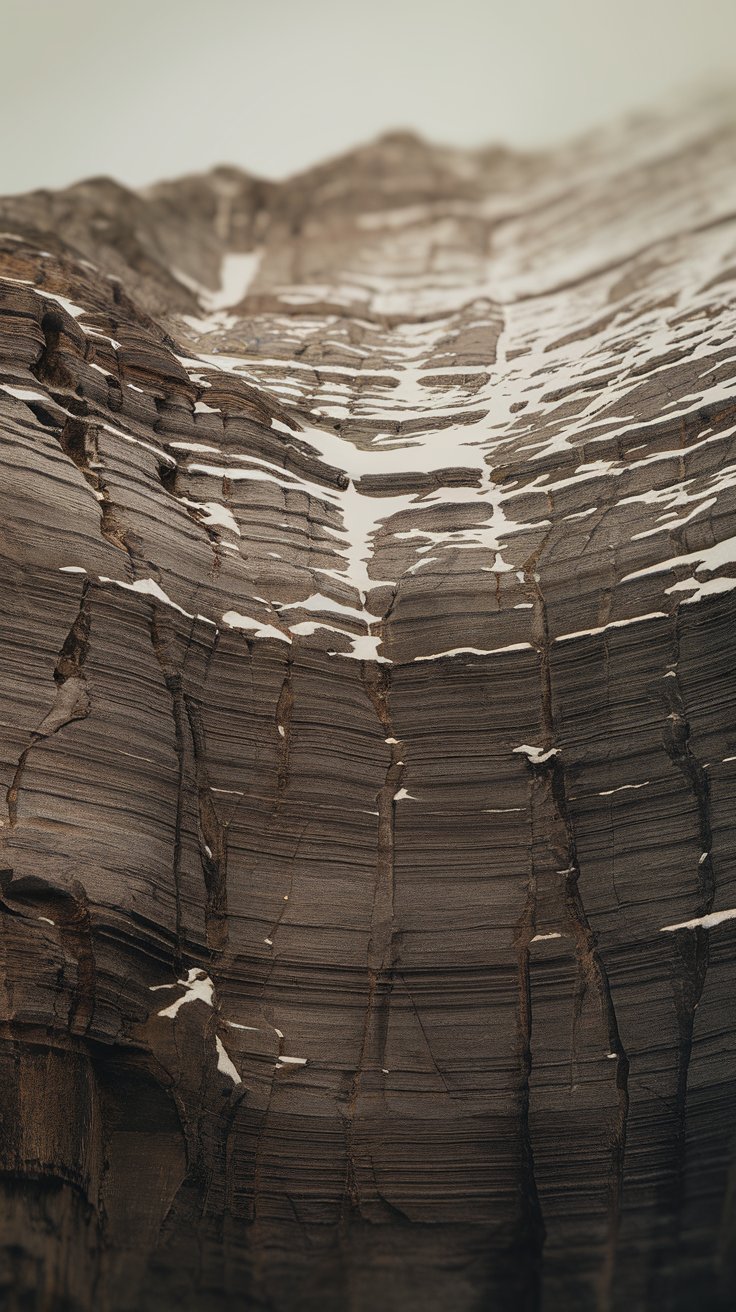
Watch how snow settles into grooves and cracks, emphasizing shape through contrast. Are you noticing how the textures change with light throughout the day? You can use those shifts to highlight details in your photos. Identify areas where rough rock meets smooth snow or where erosion patterns shape the cliffs. Capturing these elements helps you tell a more detailed story of the mountain’s character.
Spotting Natural Patterns
Mountain ridges often form strong lines that curve and lead your eyes through the picture. These lines act like arrows, directing attention to key parts of your image. When snow draws a boundary along a ridge or a cliff, it emphasizes the mountain’s form and separates layers. Take time to find these dynamic shapes before snapping your shot.
Ask yourself where the repeating elements appear. Are the ridges parallel, intersecting, or radiating? Positioning these shapes thoughtfully can balance your frame. Try shifting your angle to strengthen these lines. Would the pattern look more compelling from a higher viewpoint or a low angle? Let the natural geometry decide your composition.
Emphasizing Texture
Texture adds a tactile feel to mountain photos. Get closer to show the grain of rocky surfaces or the powdery quality of snow. Early morning or late afternoon light can make texture pop by casting side shadows over the rough terrain.
Consider zooming in on cracked rock faces or frosted branches to highlight fine details. Strong directional light reveals every bump and crevice. Have you experimented with shooting against the sun or with side lighting to see how it changes the feel of the texture? Finding surfaces where rough and smooth meet can create interesting contrasts.
Reveal the mountain’s story by making texture a focus. It invites viewers not just to see but almost to feel the landscape through your photo.
Framing and Using Natural Elements
Mountains often stand out best when you frame them using natural elements around you. Trees, cliffs, or even clouds can act like a border, guiding your viewer’s eye straight to the mountain subject. Framing adds focus and helps avoid distractions in the background.
Try looking for things like branches curving over the top of your frame or a rock ledge that forms a natural edge. These elements create a sense of order in your image. They also invite viewers to explore layers within the scene. Natural frames add context and can give a photo more depth without cluttering it.
When you use natural framing, ask yourself: What shapes or lines nearby can surround my mountain? How can these elements make the peak stand out? Use your surroundings to build more interesting and layered mountain photos that hold attention.
Creating Frames with Nature
Look closely around the scene to find framing elements. Tree branches make strong frames, especially when their shapes curve or point toward the mountain. Rock edges can form solid lines that add structure to your composition.
Clouds can also frame parts of a mountain, creating contrast or filling empty sky space to highlight the peak. Search for shapes that form natural windows or borders. Be patient, and change your position to line up these elements perfectly.
How do these frames change the feel of your photo? Notice how framing can reduce distractions and keep the focus on your mountain. Try different angles until the natural frame encloses your subject in a clean, balanced way.
Depth Through Layering
Layering takes your images further by stacking visual elements from front to back. Use foreground frames like leaves or rocks, then let the mountains rise in the background. This creates depth and draws the eye through the scene.
When you rely only on the mountain, your photo can feel flat. Adding layers helps tell a story about the place. The details close to your lens anchor the scene and add scale.
Ask yourself: Can I add something in the foreground to frame the mountain? How do the layers connect to lead the viewer’s gaze? Compose your shot so layers blend naturally instead of looking forced, and watch your mountain photos gain a 3D feel.
PostProcessing Tips for Mountains
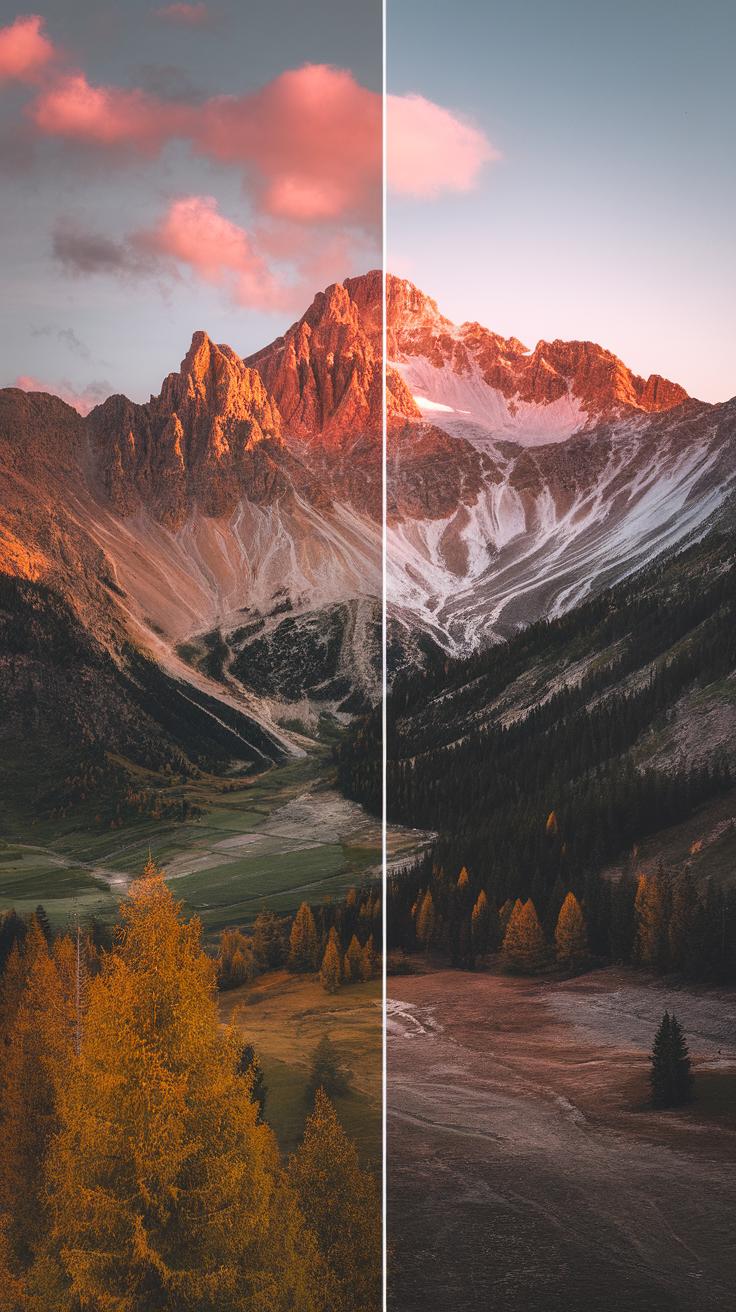
Editing mountain photos lets you highlight the strongest parts of your composition. It gives you control to sharpen details, shape the tones, and direct attention. When you adjust contrast, you can turn flat-looking images into powerful scenes with depth and dimension. Stronger contrast helps define mountain ridges and valleys, making textures pop.
Color balance plays a big role too. Mountains often show subtle shades that need careful boosting to feel alive. Warming up the color temperature can add a sunrise or sunset glow, while cooling tones can enhance a cold, crisp atmosphere. Adjusting clarity sharpens the midtones and pulls out the fine roughness in rocks and trees. This creates a tactile sense you want viewers to almost feel.
How do you know where to crop? Try removing distractions near the edges or shift the frame to follow the rule of thirds. Sometimes just cutting a small strip from one side can improve visual weight and guide the eye better through the scene. Your goal is to make the viewer focus on the mountain’s essence, not stray details.
Enhancing Composition in Editing
Cropping does more than just change size. It changes how each element in your photo relates to the others. If a mountain peak appears too centered, try cropping to push it left or right. This simple move creates tension and interest. It also helps balance large sky areas with foreground features like trees or rocks.
Framing with natural elements in-camera sets you up. Editing lets you refine the effect by cutting out intrusive parts or balancing visual weight. Play with horizontal and vertical crops. Could a square crop intensify the sense of isolation? Could a wider crop add drama by including stormy clouds?
Repeatedly ask: Does this crop strengthen the story I want to tell with my mountain image? Changing the frame invites you to experiment with new perspectives on what you’ve already captured.
Color and Contrast Adjustments
Mountain scenes often look dull straight from the camera. Adjusting color temperature can change the mood instantly. Increasing warmth adds sunlight’s golden touch, perfect for early morning or late afternoon shots. Cooler adjustments emphasize crisp air or snowy peaks. Think about the feeling you want the photo to evoke.
Contrast brings out the layers of rock, trees, and sky by separating highlights from shadows. Don’t overdo it. Too much contrast can hide details, especially in complex mountain faces. Clarity improves texture by enhancing midtone edges and fine details without affecting overall brightness.
Try subtle tweaks first. How does your mountain look after each edit? Does the mood become clearer? Editing is about reinforcing the story you captured, not changing it completely. Let your adjustments highlight what made your mountain shot stand out in the first place.
Conclusions
You now have a solid start on photographing mountains with essential composition tools. Applying techniques like the rule of thirds, leading lines, and framing helps you make images that are both beautiful and meaningful. Mountains offer endless variety, from rugged peaks to gentle slopes, and mastering composition allows you to capture their story in every shot. Keep practicing with deliberate attention to balance and structure. Review your photos to see how these choices affect the mood and impact.
Photography is a skill honed by observation and experimentation. Mountains challenge photographers to adapt and see creatively. Use the methods shared here on your next mountain outing to engage viewers and express your vision. Consider how you position elements, control light, and choose perspectives to craft memorable mountain images. Your growth in photography depends on applying knowledge consistently and seeking new perspectives. Reach for your camera and put these tips into action to elevate your mountain photography to the next level.