Introduction
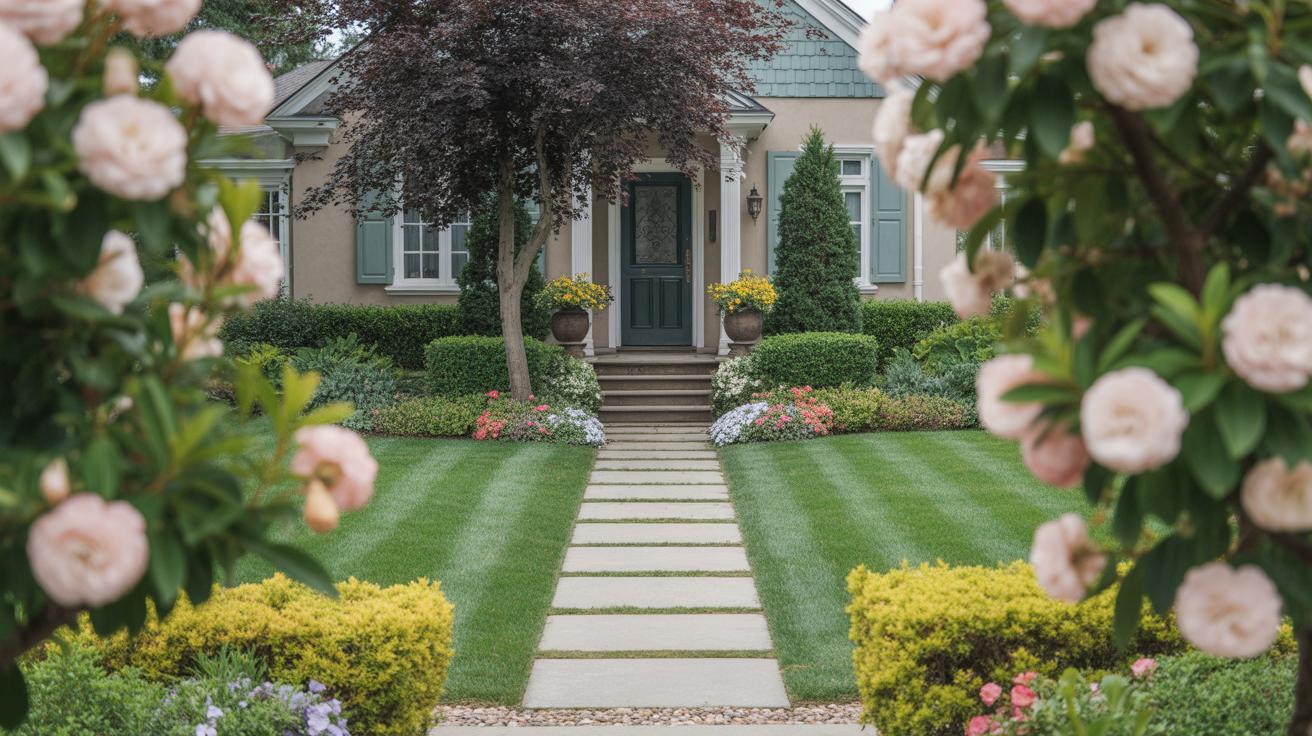
Rock garden landscaping offers a unique way to enhance your outdoor space by combining natural stone elements with plants that require little water and care. Using low maintenance techniques not only saves you time but also creates a durable and attractive garden that lasts through various seasons.
In this article, you’ll learn how to select appropriate rocks and plants, design a practical layout, and care for your rock garden in a way that reduces upkeep. Whether you are new to gardening or want to simplify your current setup, these insights will guide you in making smart landscaping choices that fit your lifestyle.
Understanding the Basics of Rock Gardens
A rock garden is a curated outdoor space where stones play a central role in shaping the environment. Rather than being an afterthought, rocks form the backbone of these gardens, creating structure, texture, and natural contours. Alongside the stones, plants fill in the gaps, usually those that thrive in well-drained, rocky conditions.
Think of rock gardens as a blend of hard and soft elements. The rocks offer permanence and define the scene, while the plants add color, movement, and life. This combination creates a setting that can look attractive all year round without the need for constant care.
Key components usually include:
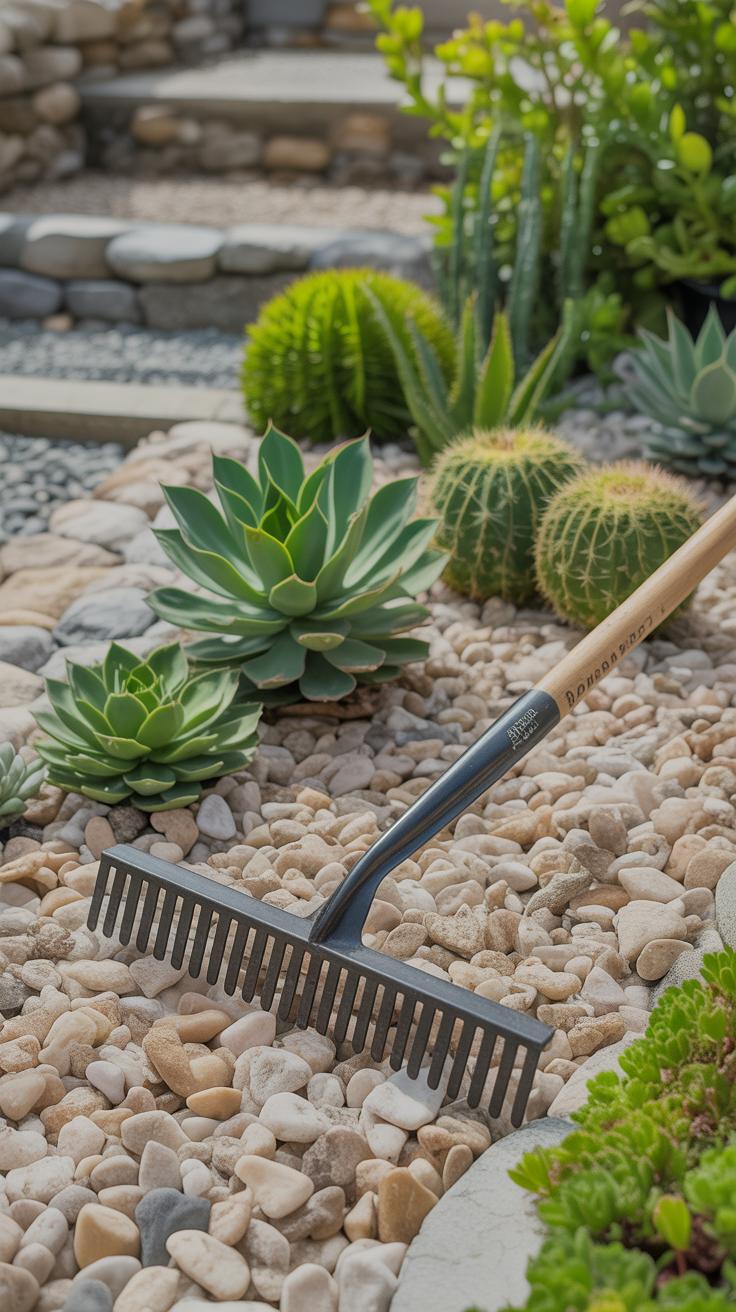
- Various sizes of stones—from small pebbles to larger boulders
- Low-water, drought-tolerant plants such as succulents, alpines, or ground covers
- Well-prepared soil with good drainage to prevent waterlogging
- A layout that mimics natural rock formations or slopes
The main purpose? To craft an appealing outdoor area that doesn’t demand much time or effort to keep looking good. While it might sound simple, getting the balance between rocks and plants just right can be a subtle art.
What Makes a Rock Garden Different
Unlike traditional gardens, a rock garden’s focus isn’t primarily on lush greenery or flower beds. Instead, it’s about showcasing rocks as design elements, with plants playing a supporting role. You won’t usually see large lawns or labor-intensive flower borders here.
Plants chosen for rock gardens are often tough, adaptable types that survive in less fertile, more exposed conditions. Think sedums, creeping thyme, or dwarf conifers—not your usual hydrangeas or petunias. This means less watering and fewer pests. The overall look tends to be more rugged and natural, as if sculpted by nature rather than human hands.
The Benefits of Low Maintenance Design
Designing a rock garden with low upkeep saves you from everyday chores like constant watering and weeding. Rocks hold heat and reduce soil erosion, which helps plants survive dry spells. Plus, the gaps between rocks mean fewer places for weeds to take hold.
Water conservation becomes easier, especially in drier climates or during summer months. At the same time, the garden’s visual appeal lasts longer—rocks don’t wilt or fade, so your garden keeps a consistent look between growing seasons.
While low maintenance sounds great, it’s not just about saving labor. It also means thinking carefully about how plants and rocks interact over time. Your choices can lead to a stable, long-lasting garden that still feels alive, interesting, and naturally beautiful—even if you only check on it occasionally.
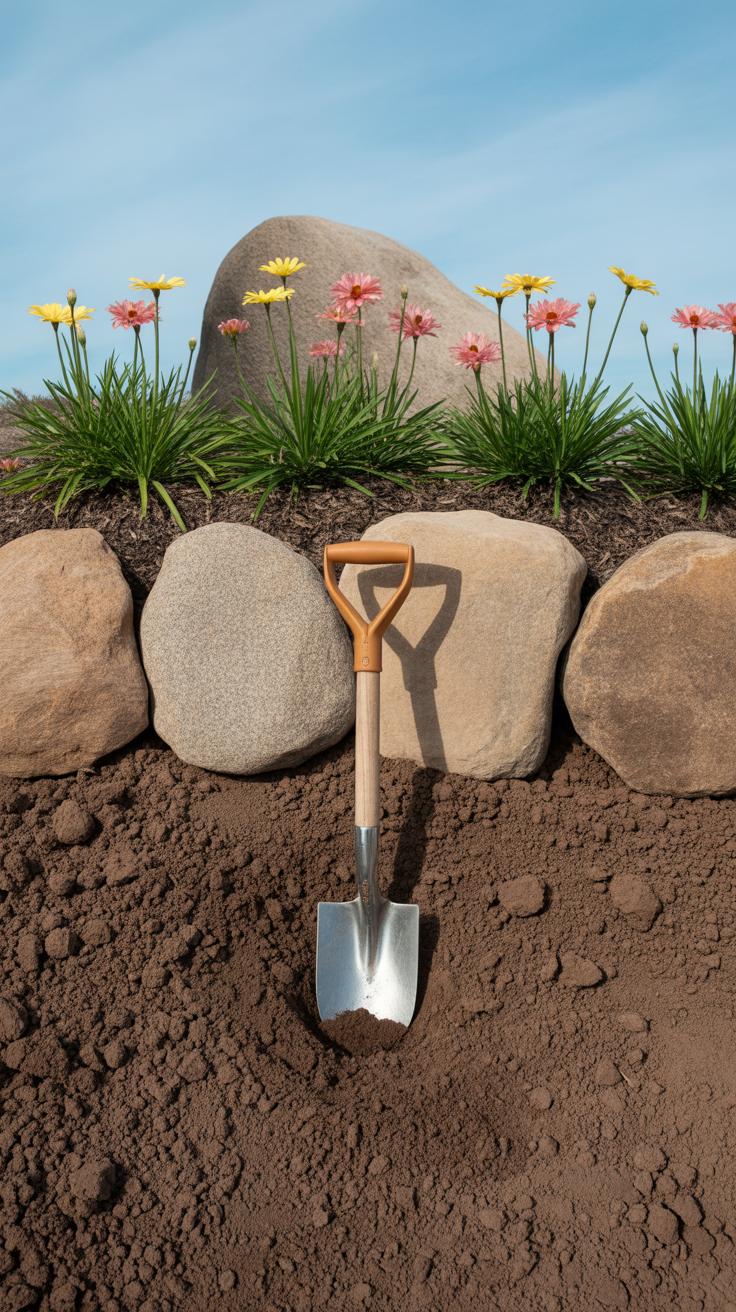
Selecting the Right Rocks for Your Garden
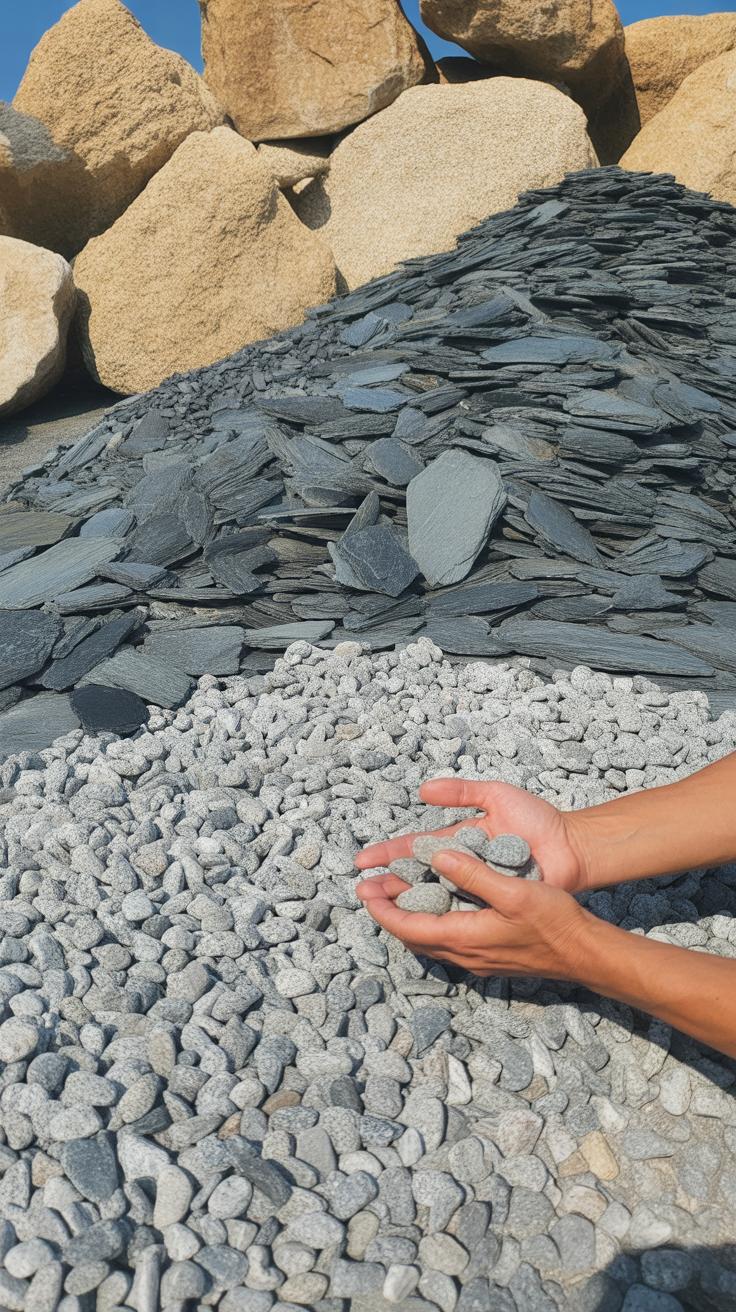
Types of Rocks Suitable for Gardens
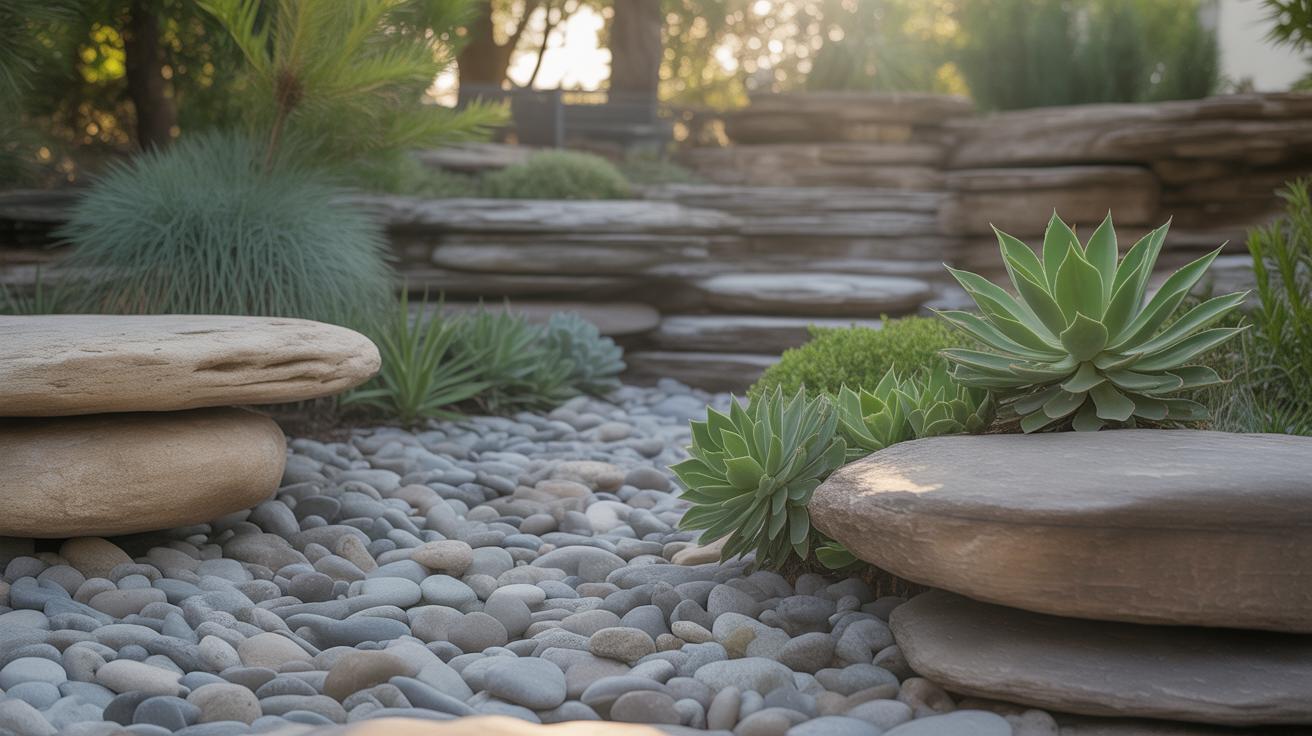
When it comes to picking rocks, you’ll find a surprising variety out there. Granite, sandstone, limestone, and slate are among the common choices. Granite is tough and speckled—often gray or pinkish—with a rough texture that suits rugged designs. Sandstone feels softer and can show warm beige or rusty tones. Limestone usually comes pale and smooth and can brighten a garden space. Slate, with its thin plates and dark colors, adds a modern edge.
Each rock type can set a different mood. Granite looks strong and natural but might feel cold in some settings. Sandstone and limestone offer warmth but can erode faster. Slate requires care in colder areas since it can crack. So, think about how the rocks’ texture and color fit your garden’s intended style—more rustic or sleek—and what upkeep you can handle.
Positioning Rocks for Practical and Visual Appeal
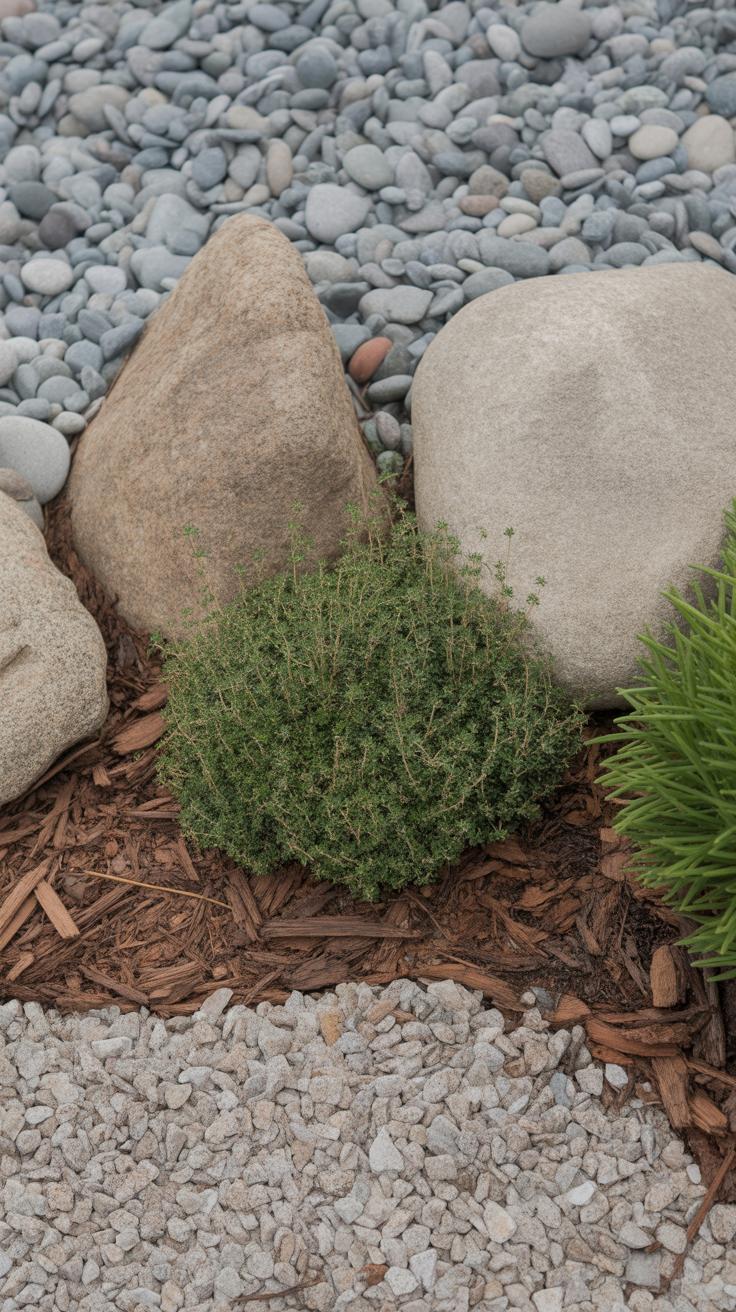
Placement plays a big role—not just for how the garden looks but for how it holds up. Larger boulders should nestle partly into the soil; this stops them from rolling and gives a stable base. Smaller stones work well layered around plants, letting flora peek through while anchoring soil. Avoid piling rocks too tightly; wrong pressure can squash plant roots or trap water, causing rot.
Try to group rocks in odd numbers—three or five—but without obsessing over the rules. Natural clusters are rarely symmetrical, so feel free to arrange casually. Stepping back often helps catch awkward spots or imbalance. Look for visual flow: where do your eyes move? If a large rock dominates too much, add smaller stones nearby to balance without clutter.
It’s tricky sometimes, but aim to blend rock sizes and shapes—a jagged one next to a rounded stone creates interest. Don’t forget orientation; placing a flat side up or showing rough edges differently can mimic natural settings. The idea is for your garden to appear as if the rocks settled there over time, not like they were dropped randomly or forced into place. This approach not only looks better but makes the garden easier to maintain.
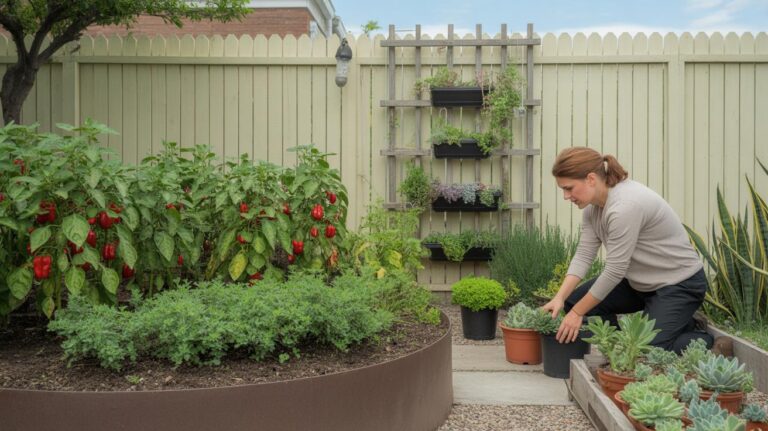
Choosing Low Water Plants for Rock Gardens
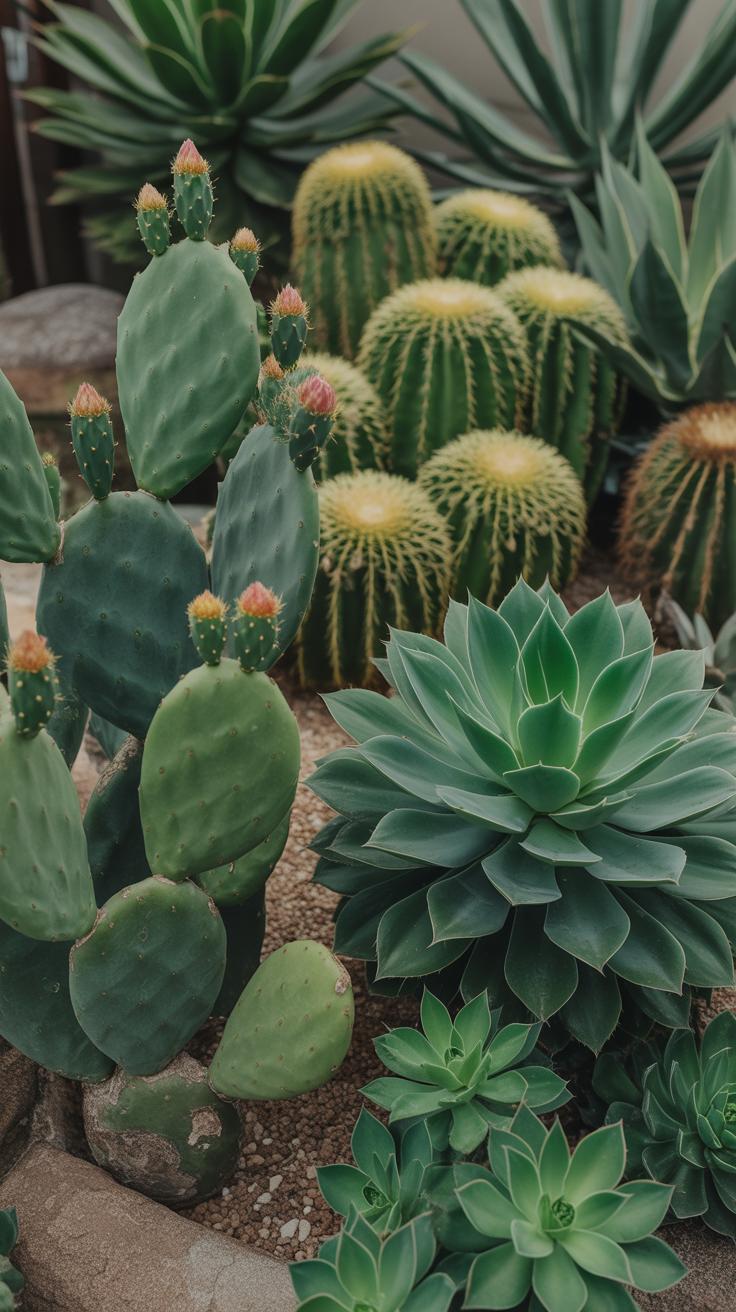

When picking plants for a rock garden, low water needs should top your list. Plants that survive well with minimal watering tend to have tough, drought-resistant features—think thick leaves, deep roots, or tiny foliage that reduces moisture loss. These traits help them handle hot sun and poor soil, both common in rocky spots.
You might wonder which plants fit this description best. Succulents, for example, store water in fleshy leaves. Many alpine plants, adapted to mountain conditions, also do well in rocky soils and dry spells. They stay small, spread slowly, and won’t demand much care, which is handy if spending lots of time on upkeep isn’t your thing.
When planting, try to mimic their natural conditions. Nestle smaller plants into crevices or gaps between rocks, where soil collects and moisture can linger longer. This helps roots stay protected and reduces evaporation. Also, avoid crowding; good airflow prevents disease and keeps plants looking fresh without extra fuss.
Have you noticed how some plants almost look like they belong in the stone? Picking species that blend well visually and thrive with little intervention feels rewarding. So, choosing the right drought-tolerant plants isn’t just practical—it’s part of what makes your rock garden special.
Planning Your Rock Garden Layout

Assessing Your Garden Space
Start by taking some time to measure the area you want for your rock garden. Knowing the exact size helps avoid overcrowding or leaving too much empty space. Then, observe how sunlight moves across the spot during the day. Is it mostly sunny, or does shade linger for hours? This makes a difference for plant choices and even rock placement.
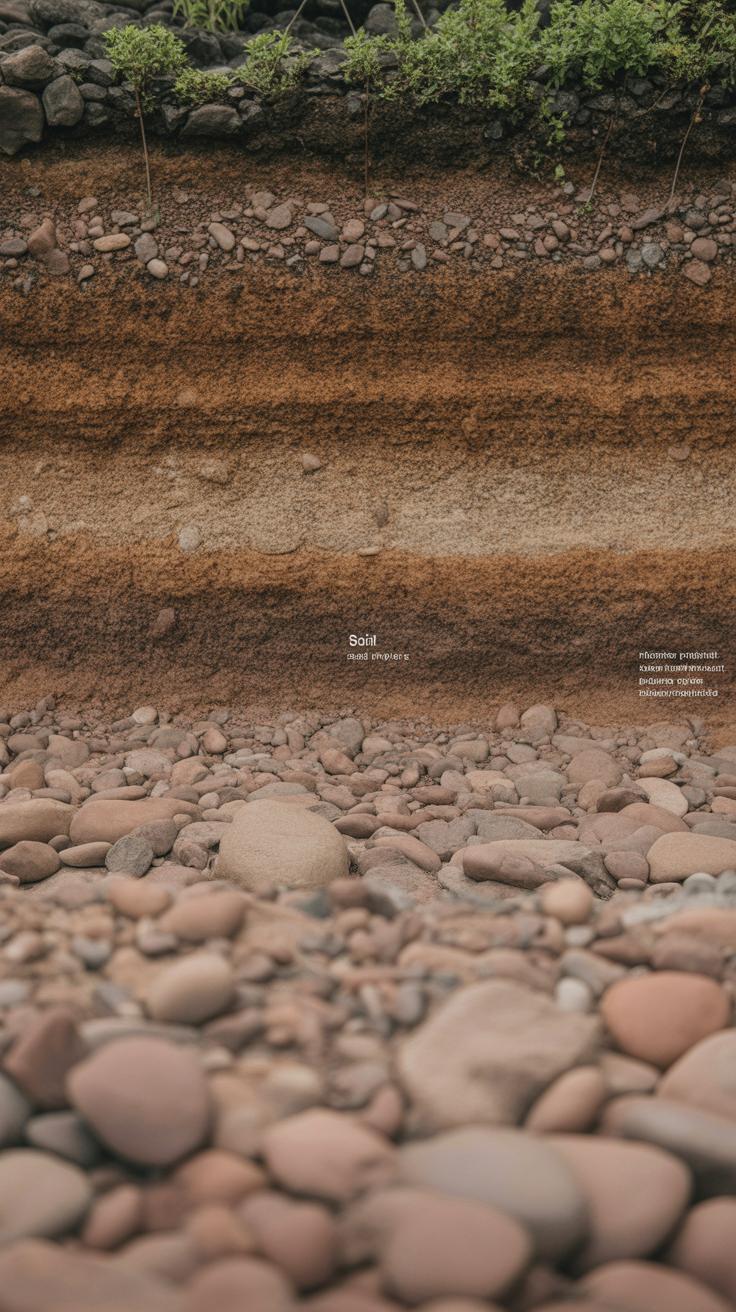
Drainage is another key factor. Water pooling or soggy soil can cause trouble, so check where water naturally flows or collects. Also, test the soil to see if it’s sandy, clay, or somewhere in between. You might need to amend it or pick plants that cope well with your soil’s quirks.
Creating a Balanced and Functional Design
Try to place rocks in groups rather than scattered randomly. It looks more natural and helps guide the eye. When you space them carefully, it also reduces spots where weeds might sneak in. You don’t want tight clusters that trap moisture, inviting rot or pests, but neither do you want wide gaps opening the door to persistent weeds.
Think about grouping plants that have similar water and sunlight needs together. That way, you can water selectively and not stress some plants while benefiting others. For example, succulents with low water needs should stay grouped and away from anything thirstier.
Of course, there’s a bit of trial and error involved. Sometimes a rock that seems perfect ends up overshadowing a plant, or spacing that looked good on paper feels cramped in real life. Still, a little extra thought here saves hours of future tweaking and keeps maintenance easier.
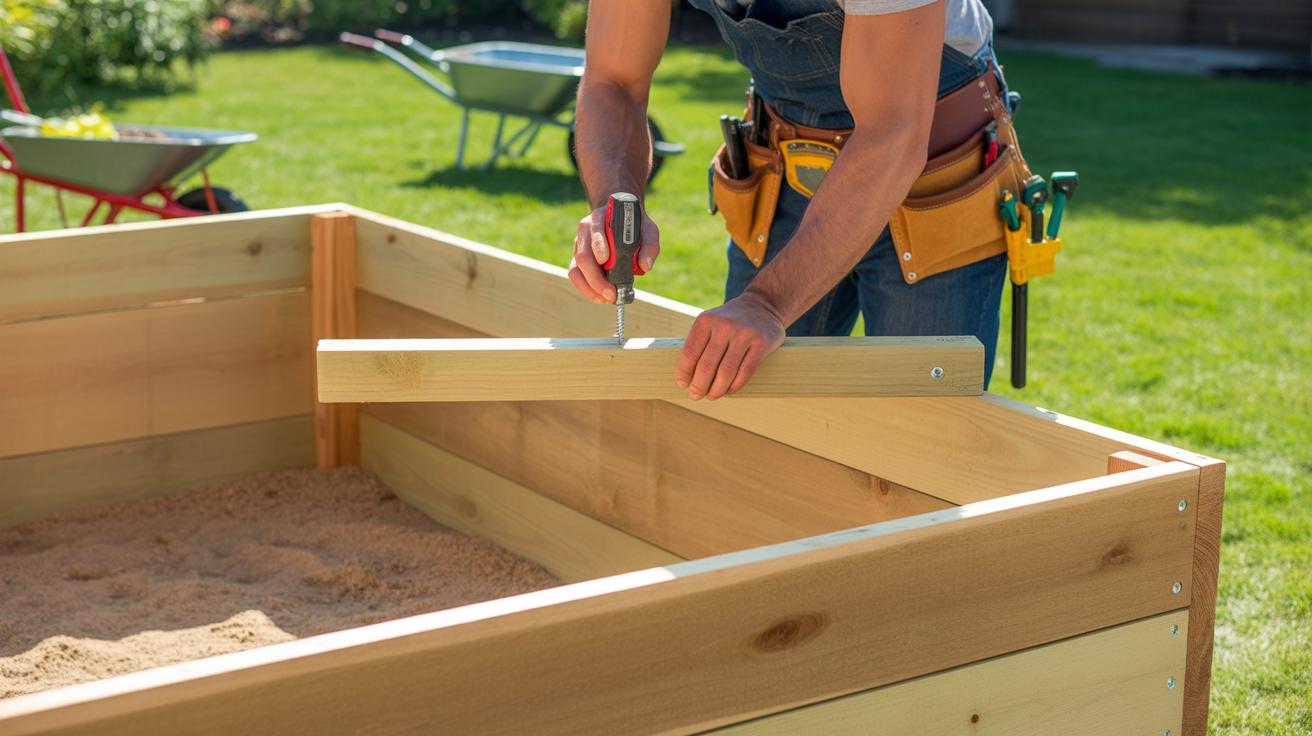
Building Your Rock Garden Step by Step
Preparing the Soil and Base
Start by checking the soil where you want your rock garden. You don’t need perfect soil, but testing for drainage helps—rock gardens dislike sitting in wet feet. Dig up the area and pull out any weeds, roots, or grass that might compete with your plants later. I usually find stubborn roots hiding; patience pays off.
Next, create a solid base with gravel or coarse sand. This layer improves drainage and stops water pooling around roots and rocks. About 2 to 3 inches of grit works well. If your soil is heavy clay, adding more sand or small gravel is better—trust me, your plants will thank you with healthier growth.
Arranging Rocks and Planting
Place the rocks first, before any planting. Think of this step like setting the bones of your garden—it defines the spaces where plants will go. Larger rocks anchor your design. Position them unevenly and partially bury some to look natural. Too perfect a setup can feel artificial.
Once the rocks are in place, plant around them. Choose low-maintenance plants that match your light and soil conditions—succulents or drought-tolerant ground covers are popular. Plant in small groups, letting some space show between to keep upkeep low. I tend to photograph this part; sometimes, shifting a tiny rock or plant a foot one way makes all the difference.
Think about how plants will grow over time and interact with the rocks—will they spill over or stay tidy? This step might feel like a guess, but trust your eye. By anchoring the rocks first, you create a framework that makes planting straightforward and your rock garden balanced without overworking it.
Maintaining Your Rock Garden Effectively
Watering Techniques for Low Maintenance
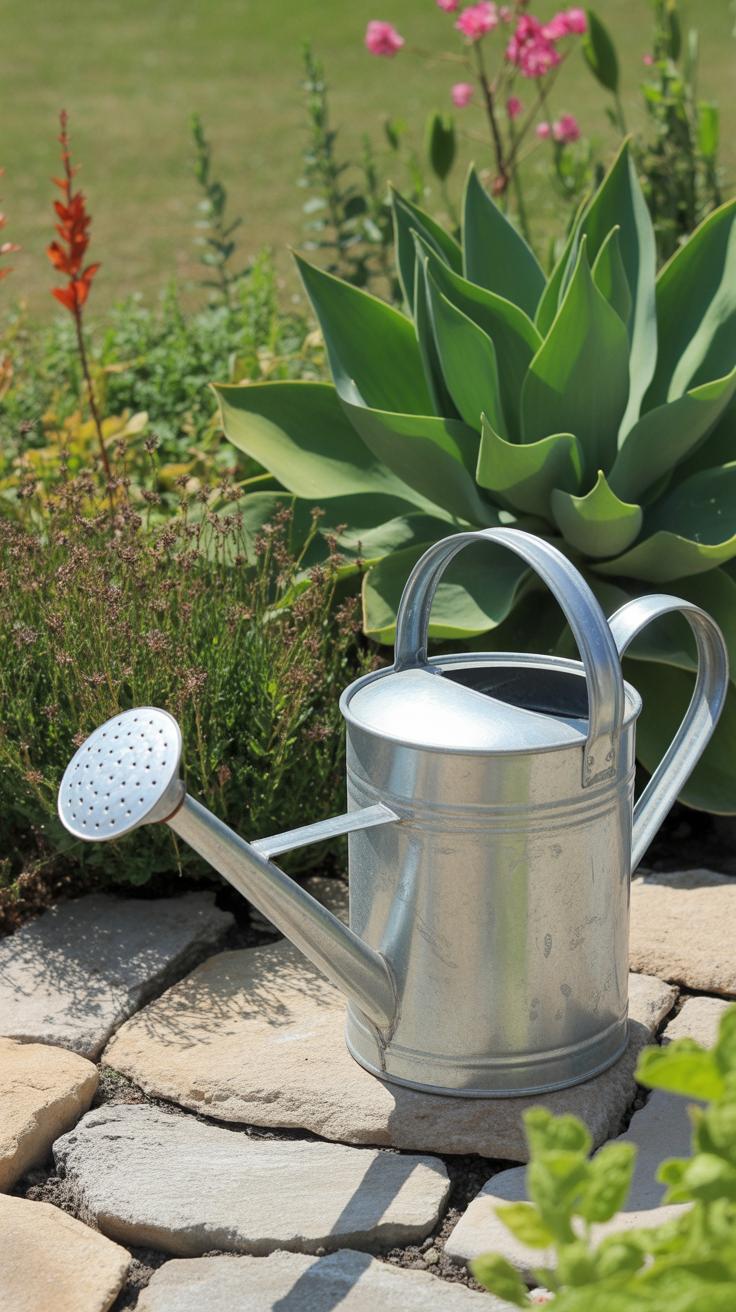
With rock gardens, less is usually more when it comes to watering. Many of the plants you’ll find nestled between stones, like succulents or alpine varieties, prefer dry conditions once established. So, watering too often can actually harm them.
Try to water deeply but infrequently. Early morning is the best time—this helps water soak into the soil before the day gets hot. You might notice plants drooping a bit in the afternoon; it’s not always a sign they need water immediately.
Also, targeting the base of the plants instead of spraying broadly helps avoid wasting water and keeps the rock surfaces dry, reducing algae or moss growth. If you set up a simple drip irrigation system, it can cut down the effort even further.
Keeping Weeds and Pests Under Control
Weeds in rock gardens tend to appear in cracks or between stones, and though they might seem insignificant, they can spoil the garden’s look fast. A practical way to stay ahead is regular hand weeding—quick and targeted. Pulling weeds before they seed makes a big difference.

Using a layer of landscape fabric beneath the rocks (if you haven’t already) reduces the number of weeds sprouting through, but it’s not foolproof. Sometimes seeds get carried in by the wind or birds.
As for pests, the good news is most rock garden plants aren’t hugely attractive to insects. If pests do show up, stick to mild, natural treatments like neem oil or insecticidal soap rather than harsher chemicals. Observing your garden often lets you catch issues early, before they become a real nuisance.
Would you guess that some ants actually help by keeping other pests in check? Sometimes, a little balance rather than total elimination keeps the whole garden healthier.
Using Mulch and Ground Cover Wisely
Mulch and ground covers play a pretty crucial role in keeping your rock garden looking tidy with less fuss. When you apply mulch around rocks and plants, it helps trap moisture in the soil, which means you don’t have to water as often. Plus, mulch forms a sort of barrier that slows down weed growth by blocking sunlight. So, your garden stays cleaner with less weeding. It sounds simple, but it really can cut down on one of the biggest maintenance tasks.
When picking mulch, you want materials that don’t break down too fast or clash with the natural look of your rocks. Gravel, crushed stone, or bark chips can work well. Apply mulch in a thin layer—too thick, and plants might struggle to grow through it. Around larger rocks or clusters of plants, just scatter it lightly to keep the area neat without suffocating anything.
Ground covers come into play when you want to fill those stubborn empty spots that mulch alone can’t hide. Low-growing plants like creeping thyme, sedum, or ajuga spread nicely, suppress weeds, and keep soil in place. They also add subtle color and texture without drawing a lot of water or needing constant trimming. Sometimes, I think of ground covers as the unsung heroes of rock gardens—quiet but very helpful in reducing upkeep.
Have you thought about which ground cover might blend with your rocks while keeping weeds down? It’s worth trying a few to see what thrives best in your conditions. You might find one that surprises you with how much easier it makes managing those bare patches.
Seasonal Care Tips for Your Rock Garden
Spring and Summer Maintenance
Your rock garden needs just a bit more attention once the warmer months arrive. Watering remains important, but because rocks hold heat, the soil can dry out quickly in some spots while staying moist in others. So, watch your plants carefully—some might need a deep soak once a week, while others prefer less frequent watering. I’ve found drip irrigation handy here, though that’s not always necessary.
Trimming back overgrown or dead foliage during spring helps plants stay tidy and encourages new growth. Don’t be too aggressive, though—you might accidentally cut something that looks untidy but is actually protecting roots from sun exposure. Pests can sneak in too, especially aphids or snails, so check regularly. You could try natural methods, like handpicking or using insecticidal soap, which keeps maintenance simple and chemical-free.
Fall and Winter Preparation
As temperatures drop, your rock garden shifts into a slower rhythm. This is the time to tidy up any fallen leaves or debris that can trap moisture against rocks, possibly causing unwanted mold or rot on certain plants. You might hesitate to clean too much at once, given some ground cover plants do better with a bit of insulation.
Protecting tender plants from frost might mean moving pots inside or using frost cloths. For planted-in-place species, adding a light layer of mulch around the base can help, but be careful not to smother them. Rocks themselves usually don’t need much care, but if you notice shifting or erosion because of freeze-thaw cycles, resetting larger stones can prevent bigger problems down the line. Sometimes, I wonder if leaving some natural wear adds character—what do you think?
Common Challenges and How to Solve Them

Dealing with Soil Erosion and Rock Movement
Soil erosion can quietly undo your hard work in a rock garden. When rain washes away soil, rocks shift or sink, making the garden look messy and uneven. To keep rocks stable, start by placing larger stones where the slope is steepest—they act as natural barriers. Then, add smaller rocks or gravel around these to fill gaps and lock everything in place.
Another helpful trick is using landscape fabric beneath the rocks. It lets water through but keeps soil from washing away. I’ve seen this work well in spots where water tends to pool or run off fast. Also, layering with mulch or ground covers that spread slowly can help hold soil. Some people avoid digging too deep so the soil stays intact, which is worth considering if you want less ongoing fix-up.
Managing Plant Growth and Replacement
Some plants in rock gardens get out of hand, spreading aggressively and demanding constant pruning. It’s tempting to let them run free until they take over, but tackling them early is easier. Regularly trim back runners or shoots that crowd rocks or overshadow other plants. You don’t have to prune hard—just enough to keep control.
Choosing slow-growing, drought-tolerant species reduces this hassle upfront. Succulents, sedums, and some native grasses fit the bill. When a plant starts to decline or requires too much fuss, consider swapping it for one needing less care. You might hesitate to replace a favorite, yet sometimes it’s worth it if minimal effort is the goal. Have you noticed how some low-maintenance plants still bring a lot of life to rock gardens? They balance beauty and calm upkeep better than any high-maintenance showpiece ever could.
Conclusions
Low maintenance rock garden landscaping can transform your yard into a peaceful retreat without demanding endless hours of work. By carefully choosing your rocks and plants and following thoughtful design principles, you create an appealing garden that practically takes care of itself.
Remember, understanding your garden’s environment and using practical techniques can keep maintenance low while enhancing beauty. With the right approach, your rock garden becomes a lasting, simple joy. Take what you’ve learned here and start building a garden that fits your needs today.