Introduction
An intensive vegetable garden layout allows you to grow more vegetables in less space. This approach focuses on maximizing yield by carefully planning garden beds and plant arrangements. Whether you have a small backyard or a larger plot, learning how to design your garden for maximum production will help you enjoy fresh, home-grown vegetables throughout the season.
In this article, you will explore key strategies like raised beds, close spacing, companion planting, and crop rotation essential for an intensive vegetable garden. These techniques have been used since the 1500s and remain popular among gardeners aiming to get the most produce from their space. Let’s dive into practical tips to help you create a productive, easy-to-manage vegetable garden at home.
Understanding Intensive Gardening Principles
Intensive vegetable gardening revolves around a few key ideas that, when combined, can really boost your garden’s output. One of the foundations is improving soil quality. Without healthy soil teeming with nutrients, nothing else matters much. Raised beds come next, letting you control soil conditions better—drainage, temperature, texture. These beds also make dense planting easier. Speaking of which, close planting means putting crops nearer than usual, which might seem risky but actually limits weeds and conserves moisture.

Companion planting plays a clever role, too. Placing certain plants side by side can help repel pests or enrich the soil naturally, like beans fixing nitrogen for leafy greens. Succession planting keeps your garden producing throughout the season by staggering planting times—so you’re harvesting one crop while another is just starting. And crop rotation? Rotating different plant families prevents soil depletion and reduces diseases.
Each principle overlaps. Improved soil supports close planting; raised beds help with drainage and warmth, perfect for early or late crops; companion planting offsets the risks of dense arrangements. When these are applied together, your garden space feels fuller—yields increase without needing extra land. But there’s a balance to strike because pushing one part too hard, like overly close plants, can backfire if soil or water isn’t carefully managed.
Soil Preparation Techniques
Preparing soil for intensive gardening often goes beyond just digging a hole. Double-digging is a classic method—turning over two layers of soil to loosen it deeply. It might feel like hard work upfront, but loosening the subsoil lets roots grow better and water drain well. You’ll notice plants growing stronger with this extra effort.
Adding organic matter like compost or well-aged manure changes everything. It improves texture, feeds microbes, and holds moisture. Sometimes I found that adding compost just a few weeks before planting made a visible difference in crop vigor. The trick is keeping soil healthy over time. That means regular additions of organic matter rather than relying on chemical fertilizers. Mulching, cover cropping, and avoiding compaction all support soil life, making your dense plantings more sustainable.
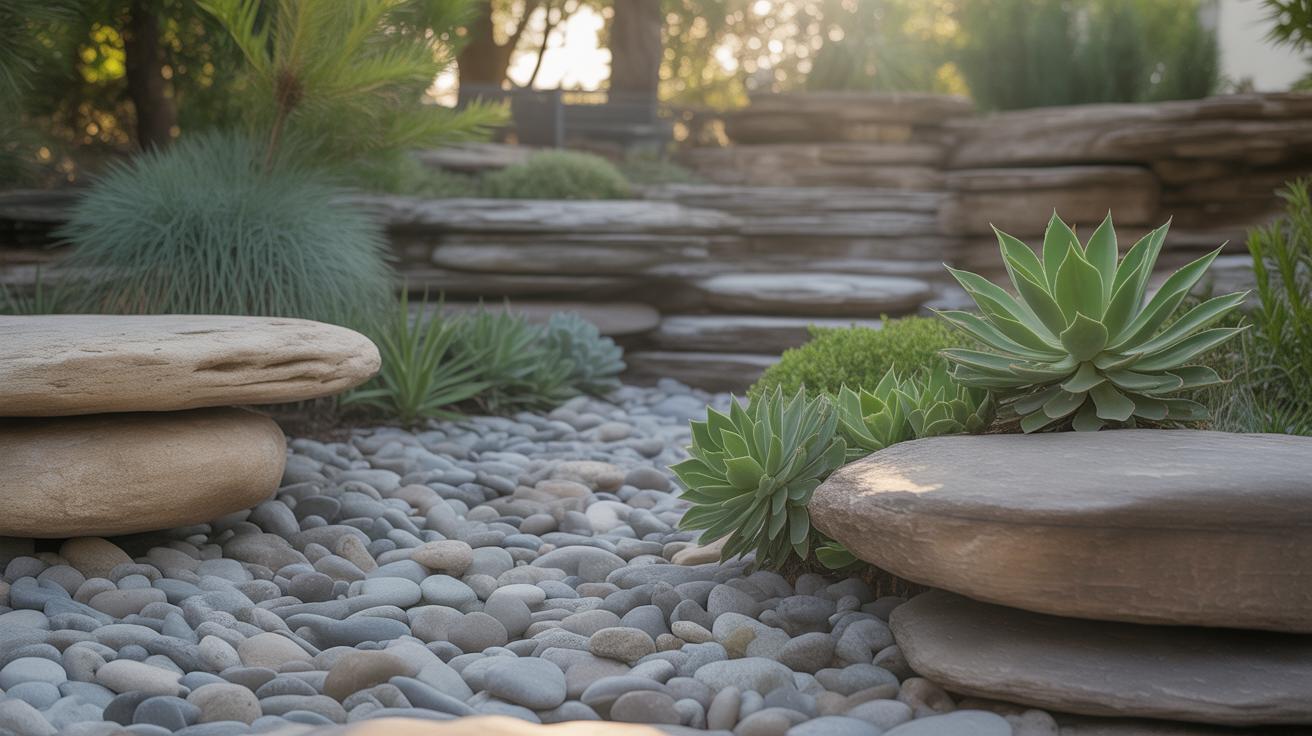
Raised Beds Advantages
Raised beds fit in naturally with intensive gardening. Their slightly elevated soil warms up earlier in spring, giving you a longer growing season. This warmth comes from better soil aeration and drainage—especially useful if your garden sits on clay or poorly draining ground.
Maintenance feels simpler, too. You don’t have to bend over as far, and the defined borders keep paths clear. Raised beds usually measure around 3 to 4 feet wide, allowing easy reach from either side without stepping on soil. Length varies, but 6 to 10 feet is common. A height of 8 to 12 inches works well in many situations, though you might adjust it if you want deeper roots or better insulation in colder spots.
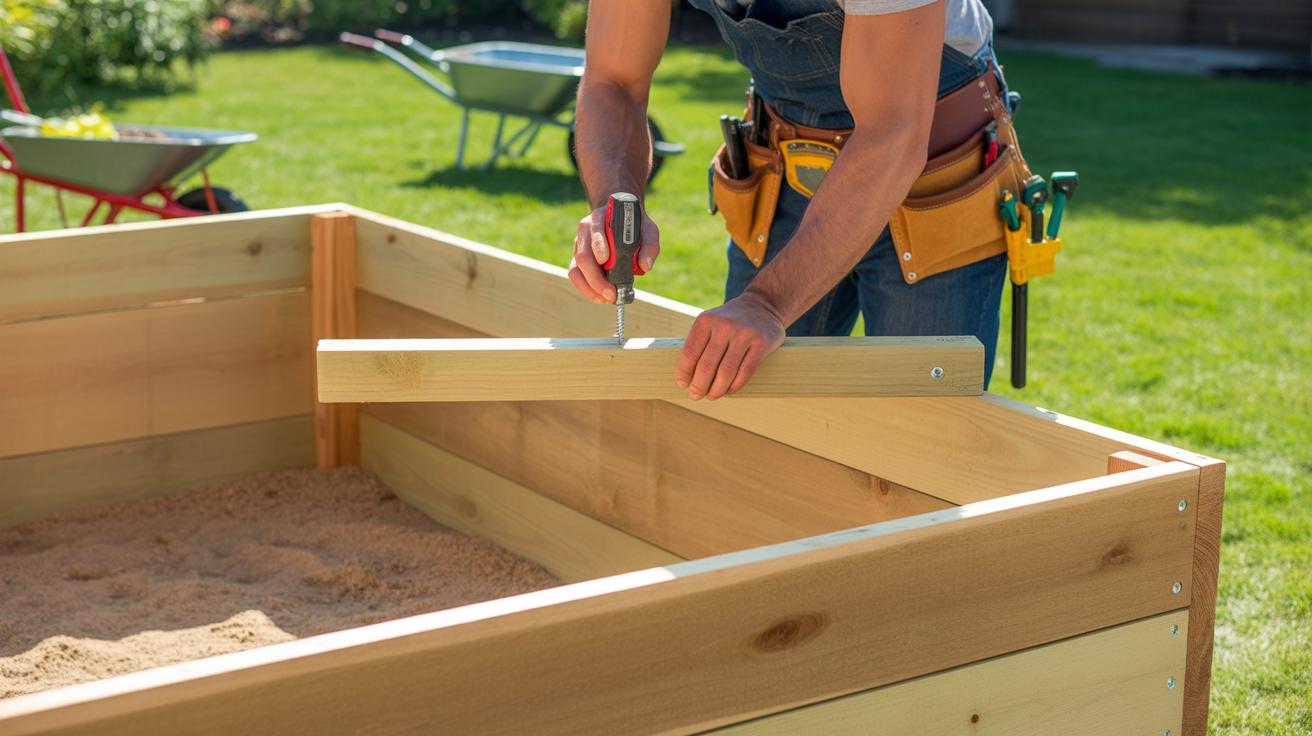
This format also helps you organize your garden into manageable sections. You can experiment with different crops or rotations bed-by-bed without confusion. Some of my neighbors swear by raised beds—their garden feels tidier, and they harvest more in smaller spaces. Though, not everyone finds them suitable, especially if water access is limited or initial setup feels overwhelming.
Planning Your Garden Layout

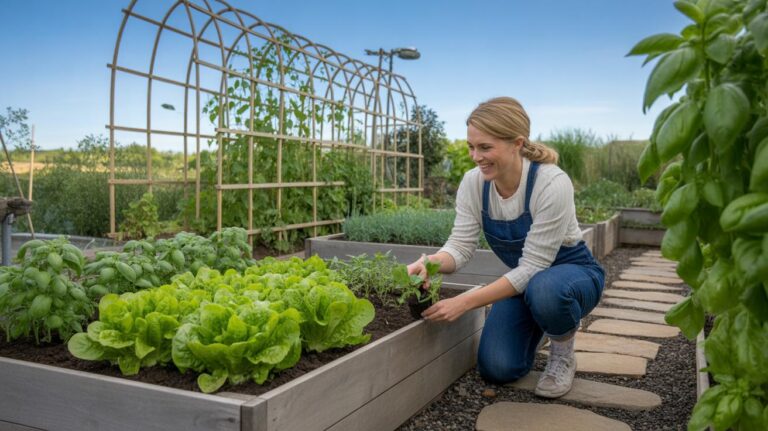
Choosing the size and shape of your garden beds matters more than you might initially think. Beds sized around 3×3 or 4×4 feet are common because they let you reach the center without stepping on the soil. But then again, 5×10 feet beds can hold a surprising amount of plants without feeling cramped, especially if you’re aiming for a medium-sized garden. The shape affects how you move around and work—narrower, longer beds might make watering and harvesting easier, but could limit how many paths you need.
Speaking of paths, don’t overlook how you arrange access. Leaving enough room for walking without squishing plants makes tending less of a hassle. You might want narrow beds with wider aisles, or combine compact beds with stepping stones. Think about your climate, too. Raised beds help with drainage in wetter places but can dry out too fast in hot, dry areas, so adjusting bed height is worth considering depending on where you live.
Sunlight is another big factor. Beds generally do best running north to south to catch the sun evenly—plants won’t shade each other too much during the day. But if your property has quirks, like shade from nearby trees or buildings, you may need to get creative. Taller crops on the north side of the bed can prevent shadowing smaller ones. Don’t always stick strictly to rules; sometimes a slight tilt or staggered layout works better for your space and plants.

Thinking about microclimates in your garden is helpful. The way you space and shape beds can create warmer or cooler spots. For example, a bed tucked against a wall might stay warmer at night. Or grouping certain beds can protect tender plants from strong winds. You might not plan all this perfectly on the first try, but starting with manageable bed sizes gives you flexibility to adapt.
Optimizing Plant Spacing for Maximum Yield

In an intensive vegetable garden, close spacing of plants is crucial. When mature leaves of neighboring plants just touch, they form a natural canopy that shields the soil. This helps hold moisture and reduce weeds. It’s a bit like nature’s way of mulching, without the extra effort. But there’s a fine line—you want plants close enough to use the space fully, but not so crowded that they compete aggressively or trap too much humidity.
Finding the right balance can be tricky. Overcrowded plants might grow slower or fall prey to diseases, while too much space wastes precious room. One approach is to observe your garden as it grows; sometimes, trimming or thinning may be needed to keep airflow steady.
Calculating Plant Spacing
Each vegetable has its own space preference. Consider these guidelines for common veggies, which are fairly reliable starting points:
- Tomatoes: 18 to 24 inches apart
- Lettuce: 6 to 8 inches apart
- Carrots: 2 to 3 inches apart
- Beans (bush variety): 4 to 6 inches apart
- Peppers: 12 to 18 inches apart

For example, if you plant tomatoes too far apart, you lose growing area. Too close, and the plants may shade each other and lower yield. So, stick close to these ranges, but it’s okay to adjust based on how your plants respond. Maybe start denser in smaller beds and then spread them out in larger rows.
Adjusting Spacing Based on Plant Types
Tall plants, like corn or pole beans, usually need more room around their base than low growers such as spinach or radishes. Fast growers—lettuce, radishes—can be spaced tighter because you’ll harvest and clear them faster, making space for the next crop.
Slow-growing crops, like cabbage or broccoli, benefit from extra elbow room since they take longer to mature and require better air circulation. Sometimes pairing a tall plant with a low one helps balance shade and space, but be cautious that the tall plant doesn’t crowd out the smaller neighbors.
When in doubt, watch your garden cycles closely and adapt spacing in future plantings. Sometimes what works one year in your garden won’t quite fit the next. Gardening keeps teaching us, if we pay attention.
Using Companion Planting to Boost Garden Health


Pairing plants in your vegetable garden isn’t just about fitting more into a small space; it’s about choosing partners that help each other thrive. Companion planting involves placing certain crops side by side because one plant can deter pests, improve soil quality, or even enhance the flavor of its neighbor. I’ve found that when you start thinking about plants in relationships rather than solo efforts, you open up new possibilities for a healthier garden.
Take basil and tomatoes, for example. Basil is said to repel aphids and whiteflies, which bother tomatoes. Plus, many gardeners claim tomatoes taste better when grown near basil. Then there’s the classic “three sisters” trio: corn, beans, and squash. Beans fix nitrogen in the soil, which benefits the heavy-feeding corn, while squash’s broad leaves shade out weeds and keep moisture in the ground.
Other pairs worth trying include:
- Carrots and onions—onions mask carrot scent from carrot flies.
- Cabbage and dill—dill attracts beneficial wasps that prey on cabbage pests.
- Marigolds near most veggies—they release compounds that deter nematodes and other soil pests.
Companion planting also reduces your dependence on chemicals. When plants naturally fend for themselves and help each other, you spend less time and money on pesticides or fertilizers. The garden becomes a miniature ecosystem, where bugs get balanced out and soil stays healthy. But, I’ll admit, it’s not always perfect—you might have mixed results early on. Still, the trial and error teaches you a bit about your garden’s specific quirks.
Succession Planting for Continuous Harvest


Succession planting is a way to keep your garden producing throughout the season by carefully timing when you sow and transplant crops. As one vegetable finishes early, you can start another in its place—a sort of relay race that keeps your soil busy and your table full. It’s a bit like gardening on a schedule, but the timing can be tricky. You need to know how long each crop takes to mature and how long the season will last in your area.
Fast-growing vegetables work best here. Think radishes, leaf lettuces, baby carrots, or bush beans. These can mature in just a few weeks, leaving space for another quick crop before the season ends. Maybe you plant a row of radishes early; once they’re done, replace them with something like spinach or a second round of lettuce that can grow in cooler fall weather.
Scheduling Planting Times
Rather than planting everything at once, stagger your sowing to keep harvests coming steadily. For example:
- Start your first round of radishes 2-3 weeks after the last frost.
- Plant lettuce about three weeks later in that same spot.
- Follow with kale or Swiss chard as temperatures drop.
Transplant seedlings before the first wave completely finishes to avoid gaps. It can feel like juggling, especially when weather varies, but tracking your last frost date and typical growing days helps. Sometimes you’ll find you have to adjust on the fly—gardens aren’t precise machines.
Choosing Crops for Succession Planting
Pick crops that suit your space and season length. Leafy greens like spinach, arugula, and lettuce are favorites because they mature quickly and fit well between longer-season crops. Radishes are another, ready in under a month, giving you an early success to motivate you.
Other options include baby carrots, bush beans, and even some herbs like cilantro. These don’t just fill gaps—they keep your garden habits sharp and your harvests frequent. You might wonder if it’s worth the effort; personally, I’ve found that seeing fresh greens every few weeks makes up for the extra planning.
Practicing Crop Rotation to Maintain Soil Fertility

Moving different vegetable families to new garden beds each season plays a crucial role in keeping your soil healthy. Crop rotation isn’t just a fancy term; it’s about giving certain nutrients a rest by switching where you plant groups of vegetables. This avoids draining the soil of the same nutrients and disrupts pest life cycles, making your garden less prone to infestations.
Most gardeners follow a rotation cycle of at least three to four years, shifting families to fresh plots each season. For example, you might plant leaf crops one year, root crops the next, then fruiting plants, before cycling back. This prevents any one nutrient from becoming overly depleted and reduces disease buildup in the soil.
Legumes like beans and peas deserve special mention. These plants work with soil bacteria to add nitrogen, a key nutrient many veggies need, directly into the soil. Including legumes in your rotation helps naturally boost soil fertility, cutting back on the need for synthetic fertilizers. I’ve found that mixing in peas early in the season really seems to pay off the next year.
Understanding Crop Families

To rotate effectively, you need to know which families your vegetables belong to. Here are some common ones, roughly grouped:
- Nightshades: tomatoes, peppers, eggplants, potatoes
- Brassicas: cabbage, broccoli, kale, cauliflower
- Legumes: beans, peas, lentils
- Root crops: carrots, beets, radishes, onions
- Leafy greens: lettuce, spinach, chard
Rotating these families rather than planting the same group back-to-back keeps soil nutrients balanced and helps break pest and disease cycles linked to specific crops. It might feel tricky remembering all this at first, but even a rough rotation beats planting tomatoes in the same spot year after year.
Creating a Rotation Plan
Setting up a rotation schedule can be straightforward. Start by mapping your garden beds and dividing them according to the number of crop groups you want to rotate. Then, assign each bed a different family each season, cycling through your list over a few years.
Try this simple approach:
- Label your beds as Bed 1, Bed 2, Bed 3, and so on.
- Year one: Plant Nightshades in Bed 1, Legumes in Bed 2, Brassicas in Bed 3.
- Year two: Move Nightshades to Bed 2, Legumes to Bed 3, Brassicas to Bed 1.
- Repeat this pattern annually, adjusting for your specific crops and garden size.
It really helps to keep notes or a garden journal. Over time, you might notice which rotations work better—and which don’t. I’ve seen that a flexible plan made my soil happy, even if I occasionally had to shuffle things unexpectedly due to weather or personal schedule changes.
Watering and Mulching Strategies

Keeping soil moist without drowning your vegetable garden can be tricky. You want water to reach roots deep enough, but not puddle and waste resources. One thing I’ve learned is that watering in the early morning is usually best—less evaporation and plants can absorb moisture before the heat sets in. Late afternoon watering sometimes invites fungal issues, though opinions vary.
Drip irrigation and soaker hoses are valuable tools for a dense garden layout. Drip systems deliver water directly at the root zone drop by drop, which reduces runoff and evaporation. Soaker hoses do something similar but rely on slight seepage along their length. Both work better than overhead sprinklers for soil moisture control in tight spaces. Setting up timers can also ensure you don’t forget or overwater, but there’s also value in observing the soil and plants regularly.
Mulching plays a key role in moisture retention and weed control. A thick layer shields soil from drying under the sun, holds in moisture longer, and slows weed growth by limiting light. I use different mulches depending on availability—a 2 to 3-inch layer usually feels right but you don’t want it too thick or it might invite pests or prevent air circulation.
Common mulches work in different ways:
- Straw sits light and airy, great for vegetable beds but needs replenishing each season.
- Dried leaves make a loose, insulating blanket and break down slowly, feeding soil organisms.
- Grass clippings are a quick-release mulch packed with nitrogen but should be dry to avoid clumping and odor.
Mixing materials can give balance, but always watch how mulch interacts with your soil and plant roots. Sometimes, what seems right in theory doesn’t feel perfect out in the garden. Do you find your soil drying out despite mulch? Or maybe weeds still sneak through? Mulching isn’t a one-size-fits-all solution, but it’s often a gardener’s best defense to keep water in and weeds down in an intensive planting setup.
Harvesting Methods to Maximize Yield

Harvesting is more than just picking ripe vegetables. When done the right way, it keeps your plants producing longer and maintains quality. I’ve noticed that waiting too long before harvesting can slow down new growth, while picking too early might stunt the plant’s potential. Timing feels tricky at first—sometimes you wonder if a tomato is ready or if you should give it a day or two more.
Knowing when to harvest is easier if you watch for specific signs: beans are usually best when pods are firm but still tender; zucchinis should be picked when they’re small, before their skin hardens. Leafy greens like spinach often show mature leaves but are tastier when picked young. Peppers turn a bright, full color when ready, but some varieties are edible even when green.
To avoid hurting plants during harvest, try these:
- Use a gentle twisting motion or sharp scissors to avoid tearing stems.
- Pick early in the day when plants are hydrated and less fragile.
- Remove dead or damaged leaves carefully to help redirect energy to new growth.
- Harvest frequently to discourage plants from going to seed too soon.
It may seem small, but these careful actions help keep your garden productive. I’ve lost count of how many times a careless pull snapped branches or bruised fruits, reducing yields. With practice, harvesting becomes part of the rhythm that maintains an abundant garden.
Dealing with Pests and Diseases Naturally
Common garden pests often sneak up on you before you even realize something’s wrong. Aphids, for example, tend to cluster on young leaves, sucking sap and leaving behind curled or yellowed foliage. Then there are cabbage worms—small green caterpillars that munch holes through cabbage, kale, and broccoli. You might notice tiny white butterflies fluttering nearby; those lay eggs that hatch into these voracious larvae. Another usual suspect is the tomato hornworm, a large green caterpillar that can strip leaves rapidly and may even chew on fruit.
Flea beetles jump from plant to plant, leaving a distinctive shot-hole pattern on leaves, which can stunt seedlings seriously if left unchecked. Also, spider mites produce fine webbing on undersides of leaves and cause speckled discoloration. Spotting these early helps a lot; sometimes you’ll find the pest before the damage appears.
Controlling these pests naturally can feel like a juggling act. Handpicking works surprisingly well for larger bugs, like hornworms—you just pluck them off and squash or relocate them. Trap crops interest me because they draw pests away from your main vegetables. For example, planting mustard as a sacrificial crop near your greens can lure aphids, keeping your lettuce safer.
Inviting beneficial insects into your garden adds another layer of defense—ladybugs love aphids, and predatory wasps handle caterpillars. If you’re hesitant about sprays, organic options like neem oil or insecticidal soaps can knock down pests without harsh chemicals, though they do require careful application to avoid harming helpful insects.
It’s a mix of tactics, really. Sometimes you need to act fast, other times just keeping an eye and letting nature balance itself seems to work better. The key might be patience and observation—knowing your pests and watching their behavior as closely as your plants’. That approach makes a difference if you want to reduce chemical use and still keep your veggies thriving.
Preparing Your Garden for Next Season
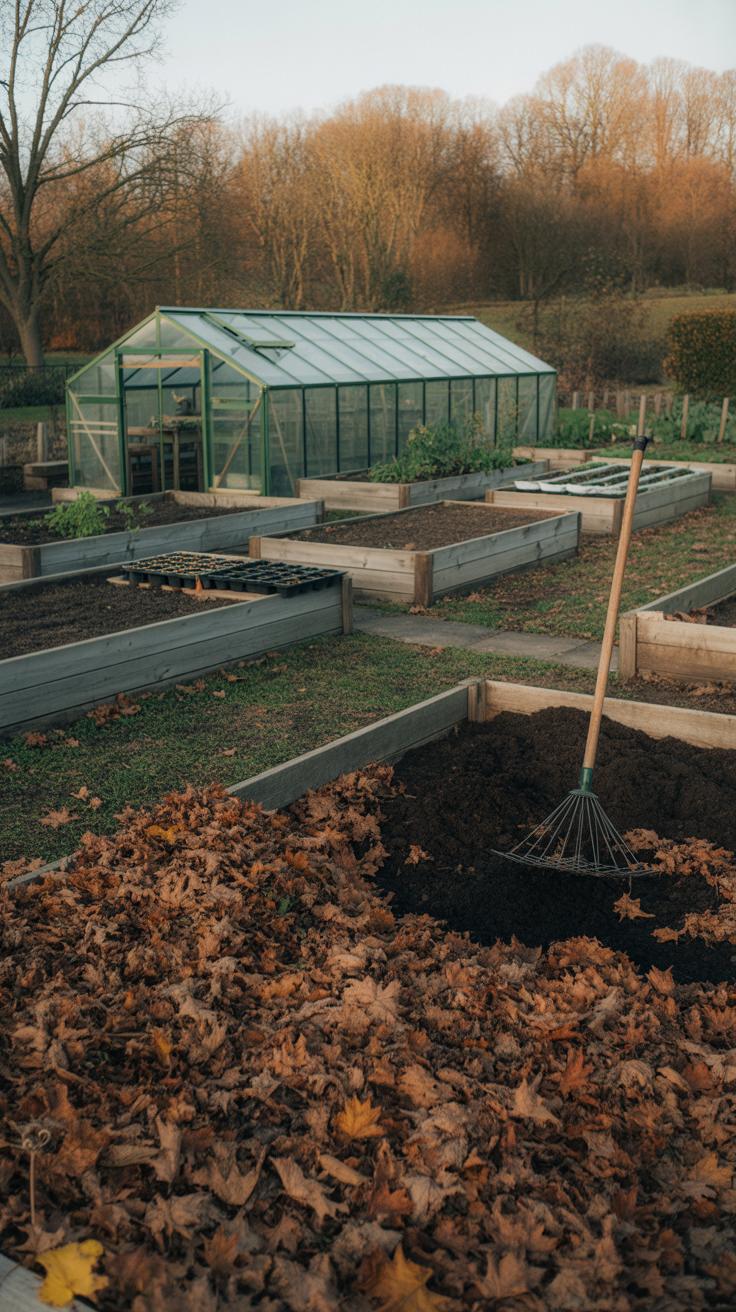
Once harvest wraps up, your garden beds don’t just sit idle until next spring. You need to clear out old plants promptly—dead or diseased material left behind can harbor pests or diseases that sneak into your new crop. Pull up everything carefully and toss it away, not into your compost if you suspect infection.
Next, think about soil health. I usually spend a couple of afternoons loosening soil with a fork, breaking up clumps and adding organic matter. Compost and aged manure work wonders here. They not only feed the soil but help improve texture, making it easier for roots to penetrate.
Crop rotation might feel like a puzzle at first, but it’s worth the effort. Moving families of plants away from their previous spots reduces disease build-up and balances nutrient use. For instance, avoid planting heavy feeders like tomatoes or cucumbers where potatoes or peppers grew last year.
If you’re willing, try planting winter cover crops such as clover, rye, or vetch. They cover the soil, prevent erosion, suppress weeds, and add nutrients when turned over in spring. Some years I skip this step, but it’s hard to argue with the long-term benefits.
Cleaning Up After Harvest
Removing old plants carefully is just one step. You want to clear all debris, fallen leaves, and even plant roots if possible, because pests and diseases often lurk there. Raking and removing this material from the garden area reduces chances of problems popping up again.
If there were any signs of disease, don’t compost those remains. Burning or disposing of them offsite keeps your soil safer. It feels a bit tedious, but trust me, skipping this step brings headaches in the spring. Consider it a preventative measure, like washing your hands before cooking.
Soil Care and Amendments
Good soil care really pays back the effort. After clearing, spread a layer of compost or well-rotted manure over your beds. These feed the microbial life in soil, helping break down organic matter and releasing nutrients slowly. One of my favorite but less talked-about things is giving soil a gentle fork-through before adding amendments—it aerates and mixes nutrients better.
If you decide on cover crops, planting them before winter helps trap leftover nitrogen and adds organic material when they decompose. This way, soil structure improves naturally, reducing compaction and boosting fertility without chemical inputs.
Thinking about your soil as a living system instead of dirt might change how you approach gardening. It isn’t static; it needs attention, resting periods, and feeding—not unlike a garden in its own right.
Conclusions
Creating an intensive vegetable garden layout is a smart way to grow more food in a smaller area. By using raised beds, preparing your soil well, and placing plants carefully, you can boost your garden’s productivity. Companion planting also supports healthier plants and better yields by making use of natural plant relationships. Crop rotation keeps your soil fertile and reduces pests over time.
Following these simple, effective practices will help you build a thriving home garden. You’ll enjoy fresh vegetables regularly and learn valuable gardening skills along the way. Start planning your intensive vegetable garden today and watch your harvest grow!