Introduction
Charming stepping stone ideas for garden pathways can turn your outdoor space into a welcoming and attractive place. These pathways guide your steps and protect your plants while adding personality to your garden. Whether you have a small backyard or a large garden, stepping stones can be adjusted to fit your style and needs.
This article explores various stepping stone ideas for garden pathways. You will learn about different designs, materials, and practical tips to create your own path that complements your garden beautifully. It also covers maintenance advice to keep your pathway looking its best all year round.
Choosing The Right Stepping Stone Style

Picking stepping stones isn’t just about function; it’s also about what feels right for your garden’s personality. You might lean toward classic round stones if your space has a timeless, relaxed vibe. These smooth, simple shapes fit almost anywhere and can subtly invite visitors to wander.
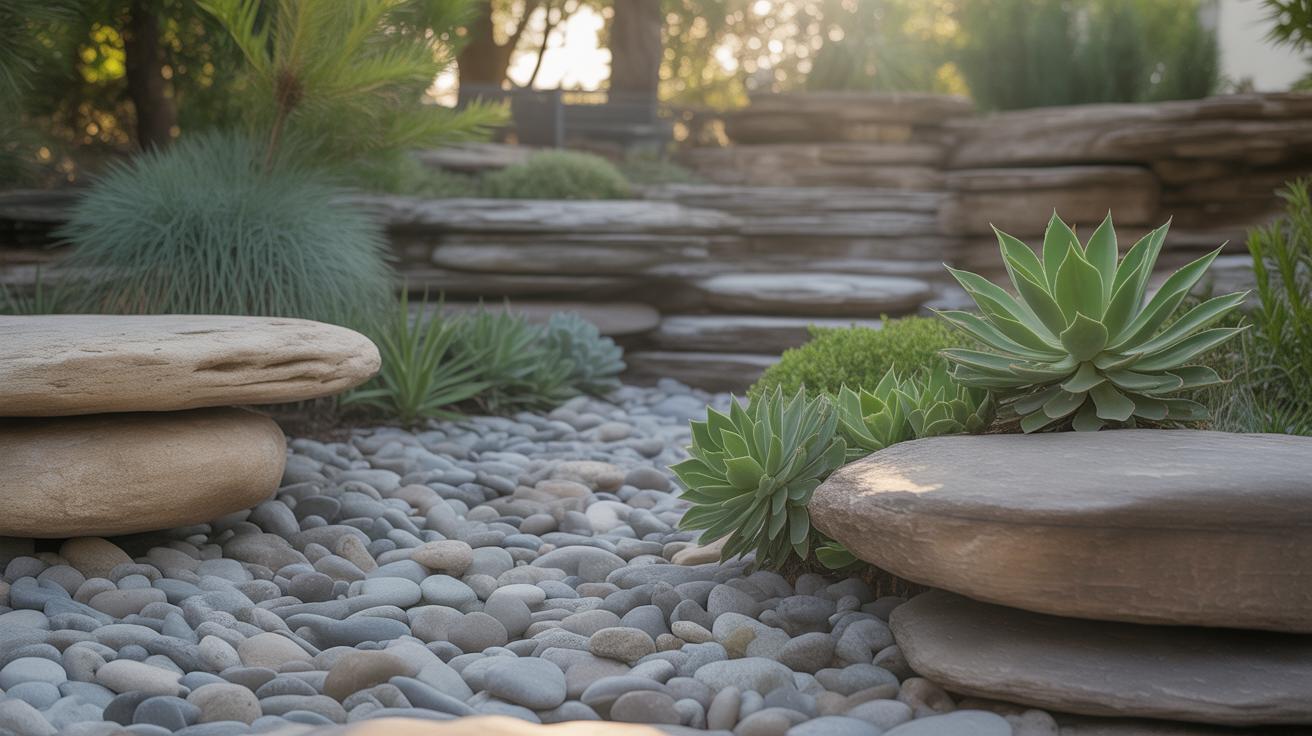
On the other hand, irregular natural stones offer a rugged, organic look. These work great in gardens leaning into a wild or naturalistic style, where the pathway blends almost invisibly with the earth and plants. I once saw a path made up of jagged slate pieces in a woodland garden—it felt less like a path and more like a natural trail.
Then there are modern, geometric stones—squares or rectangles with clean lines. These stand out, demanding attention. Perfect if your garden has a crisp, contemporary edge. They can create a striking contrast, especially set against smooth gravel or bright green grass.
Matching Stones With Your Garden Look
Choosing the right shape and color depends a lot on your garden’s style. Rustic gardens often call for warm, earthy shades and uneven shapes—think flagstone or sandstone. They blend with rough textures like wooden fences or old pots.
Formal gardens tend to favor polished, symmetrical stones, often lighter colors like pale limestone or marble. These give a neat, controlled feel, echoing the manicured hedges and structured flower beds.
Naturalistic gardens benefit from stones that don’t shout. Moss-covered or muted grey ones, with softer, curved edges, help maintain a quiet, organic flow through the space. Sometimes mixing a few stone types can work, but be cautious not to make it look like a patchwork rather than a path.
Using Stepping Stones To Create A Visual Path
Stepping stones don’t just guide feet—they guide eyes. When arranged with thought, they can draw attention to particular garden features or make a small space feel larger.
For example, stones placed progressively closer together can invite a slower pace, encouraging you to pause and look around. Conversely, wider gaps might suggest a brisk walk, leading your gaze quickly along the path. Curved or zigzag arrangements add mystery, making you curious about what’s around the bend.
Colors matter too. Lighter stones can brighten shaded areas, while darker ones anchor a sunny spot. Sometimes, your stepping stones become subtle visual cues that tell a story—where to go and what to see next. The path literally becomes part of the garden’s experience.
Selecting Materials For Stepping Stones
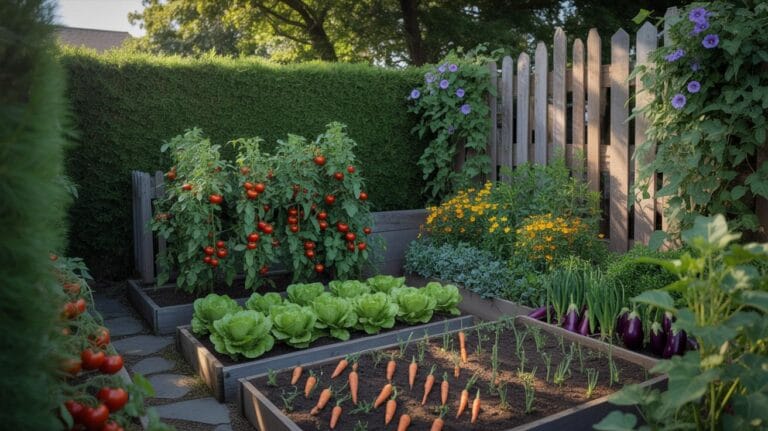
When it comes to choosing materials for your garden stepping stones, the options vary widely. Each material has its own character, maintenance needs, and durability. Natural stone, concrete, brick, and recycled materials all serve different purposes and aesthetics, so your choice depends a lot on how you want your garden to feel and function.
Natural Stones And Their Benefits
Natural stones like slate, granite, and flagstone offer a timeless look that pairs well with many garden styles. Granite is tough, able to withstand years of foot traffic without much wear, which is why it’s often used in high-traffic areas. Flagstone presents irregular shapes and softer edges, making your pathway feel organic and less formal. Slate’s rich hues can add subtle color contrast but may be a bit more delicate under heavy use. These stones age beautifully, but they do require occasional cleaning to keep moss or dirt from making them slippery.
Affordable And Creative Material Options
Concrete stepping stones provide a budget-friendly alternative and allow for customization like stamping or coloring. You might get creative by mixing dyes or embedding small tiles or glass—personal touches that make your path unique. Bricks are another option, offering a warm, classic look, though they might settle unevenly over time and need some leveling. Recycled materials, like broken concrete or repurposed wood slices, come with the bonus of sustainability. They can add rustic charm, but their durability can vary widely depending on the source and treatment.
Have you thought about blending materials? Sometimes, mixing natural stone with recycled pieces can create an interesting visual rhythm that feels both economical and elegant. It’s often a bit of a trial and error process, but finding a combination that suits your garden’s personality can be satisfying—and practical too.
Planning The Layout Of Your Garden Pathway

When you’re designing the layout for your garden pathway, start by really looking at your garden’s size and shape. You might have a small cozy space or a sprawling yard. Each calls for a different approach. For instance, a winding path works nicely in a larger garden, adding a bit of mystery. But tighter spaces often do better with straighter, simpler lines. I once tried a serpentine path in a narrow garden—it looked charming, though it felt a bit cramped walking through.
Plant placement heavily influences your path’s route. You don’t want to step over buds or block budding flowers, right? Take note of where tall or spreading plants grow and plan the stones so people pass comfortably without disturbing the garden’s flow. Think of the path as a gentle guide through your plants, not a barrier.
Spacing stones is also key. About 18 to 24 inches between stones feels right for most adults—you can step naturally without awkward reach. But if your garden has kids or elderly visitors, you might want smaller gaps. A good trick is to walk the proposed path barefoot or in your usual shoes to test spacing. Does it feel natural or a bit off? Trust those instincts.
Paths shouldn’t just be practical; they should connect focal points. Whether it’s a bench, a water feature, or even your back door, let your stones lead visitors without wandering aimlessly. Sometimes the straightest line isn’t the most engaging. So, consider where you want people to pause or admire the view. That pause itself becomes part of the design.
Alignment can be a little tricky—you might want stones evenly spaced in a grid, but a slightly irregular pattern often adds charm. Perfectly straight lines might feel too rigid in a garden setting. On the other hand, too random and your footing might become unsure. Finding some balance between order and natural flow is usually best.
Installing Stepping Stones Safely And Securely

Preparing The Ground And Base
Before placing your stepping stones, you need to get the ground just right. Start by clearing away any grass, roots, or debris where the stones will sit. Dig down about two to three inches to give the stones room to settle without sitting on loose dirt. I’ve found that a firm base really helps prevent stones from shifting later on—otherwise, your path might turn into a bit of a trip hazard.
Next, add a layer of sand or fine gravel to fill the dug-out space. This layer, around an inch thick, acts like a cushion and improves drainage. If the soil is very loose or clay-heavy, mixing in some crushed stone can stop the stones from sinking unevenly after some rainfall. Spend a little time leveling this base layer with a flat board or a small trowel. The goal is to create stable support before you set the stones down.
Leveling And Securing Stones
When it comes to placing the stones, check their stability from the start. Put a stone on your prepared base and press it down firmly. Then step on it carefully yourself—does it wobble? If so, you’ll want to lift it and add or remove sand under it until it feels solid. Sometimes, tapping the stone with a rubber mallet helps it settle better.

Use a level to check if the top surface is even. You don’t want stones tilting one way or another, especially in places where you’ll walk regularly. Uneven stones are not just annoying but could lead to accidents. If you notice a tilt, add a bit more sand under the low side and retest. It can be tempting to rush this, but patience makes a safer path.
Finally, to keep stones in place over time, you might press the soil tightly around their edges after setting. Some gardeners use a little mortar or adhesive if they expect heavy foot traffic, but that’s optional. Leaving a small gap for soil or ground cover between stones can also help them stay snug while retaining a natural look. It’s about balance—secure enough to last, yet not locked in too rigidly, because sometimes the ground shifts a bit, and your path should be able to handle that.
Adding Decorative Touches To Stepping Stones

Once your stepping stones are safely installed, adding personality to each piece can make your garden pathway truly stand out. Decorating stepping stones is a chance to combine creativity with function, and it’s easier than you might think. Even simple techniques like painting or carving can bring a fresh look that feels personal.
Painting And Stenciling Ideas
Outdoor paint is your friend here. It sticks well to stones and can handle moisture without fading too fast. You can try stencil designs for quick, clean shapes: leaves, flowers, or geometric patterns work well. Stencils help if you’re not confident in freehand painting, but mixing both can look charming—maybe a painted background with a stenciled motif on top.
Choosing colors that complement your garden plants or contrast nicely with soil or grass makes a visual impact. Don’t worry about perfection. Sometimes, a slightly worn or imperfect look adds more charm than slick, flawless paint. I’ve seen stones painted with cheerful dots or stripes that look great even after weathered a bit.
Creating Mosaic Patterns
Mosaics require a bit more patience but can turn a simple stepping stone into a small piece of art. Gather broken tiles, glass pebbles, or even natural stones of different colors. You’ll need a strong adhesive designed for outdoor use and grout to fill the gaps afterward.
The process itself is quite flexible—you can follow a pattern or just arrange pieces randomly for texture and color play. Some people create spirals or floral shapes that give a focal point on each stone. It can be time-consuming, but the results often feel worth it, with the stones catching light and adding interest even on dull days.
Decorating your stepping stones lets you express style and gives your pathway a story. What kind of details speak to your garden’s vibe or your personal touch? Experiment with styles you enjoy, and don’t be afraid to let some elements evolve over time.
Maintaining Your Garden Pathway

Keeping your stepping stone pathway looking fresh and safe takes some work, but it’s not too complicated. Dirt and moss can build up quickly, especially in shady or damp spots. A simple way to clean stones is to use a stiff brush paired with water—scrub gently but thoroughly. Sometimes, a mild detergent mixed in helps if the grime sticks stubbornly. Pressure washing might seem tempting, but it can damage softer stones or loosen grout if you’re dealing with mosaics, so take care.
When it comes to moss, applying a diluted vinegar solution or a commercial moss remover can slow its growth, but you’ll want to rinse well afterward. Let the stones dry completely before walking on them to avoid slipping.
If a stone cracks or shifts, don’t rush to replace it blindly. First, try repositioning it or filling small chips with outdoor-grade epoxy or mortar. For bigger damage, find a matching stone and carefully pry the damaged one out—using a trowel or flat tool works well—and lay the new piece in place, making sure it sits evenly. Sometimes the ground beneath settles unevenly and causes stones to rock; in those cases, lifting and resetting with fresh sand or gravel can help avoid future problems.
Keeping an eye on your pathway regularly saves you from bigger repairs later. Do you notice any stones loosening or tilting after rain? Addressing these quirks early keeps your path safe and inviting. Plus, it gives you a chance to appreciate how your garden evolves, stone by stone.
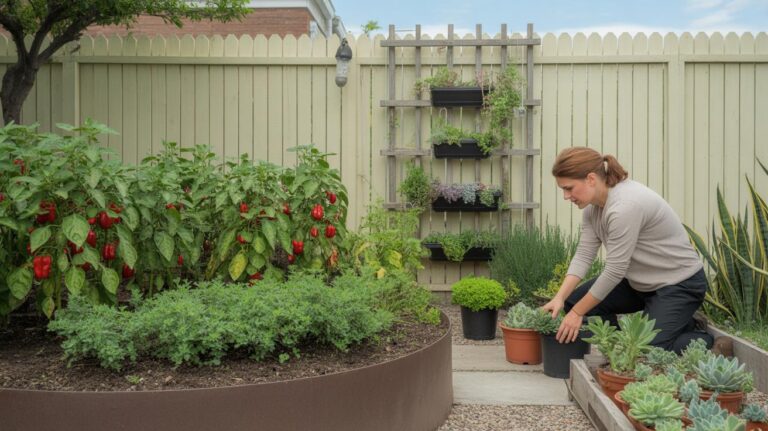
Integrating Garden Plants With Pathways

Walking through a garden path surrounded by plants feels different than a plain stone walkway. Combining stepping stones with nearby greenery can create a gentle balance between natural beauty and functional space. You want plants close enough to soften the edges, but not so close that they get trampled or block the way.
Some plants work better near stepping stones because they stay low or grow in clumps rather than sprawling wildly. I remember when I first tried big leafy plants near my path—it was frustrating to keep them from overtaking the stones. That taught me to pick more careful options.
Good candidates often include lavender, creeping thyme, or even dwarf mondo grass. These plants hug the ground and release subtle scents or texture, but don’t feel like an obstacle. Still, be cautious with varieties that spread fast; they might need regular trimming to keep the pathway clear.
Using ground covers and edging plants along the path helps define the edges without creating sharp barriers. For instance, using creeping Jenny or Irish moss along the sides adds softness and a splash of color that frames the stepping stones. It’s a simple way to highlight the path’s shape without overwhelming it.
Choosing the right combination depends on your garden’s climate, sunlight, and how much foot traffic the path sees. Do you want the planting to feel wild and natural? Or tidy and controlled? Sometimes, a mix works—small clusters of flowers here, steady ground covers there. It’s worth experimenting, though—what looks good on paper might need some tweaking once planted.
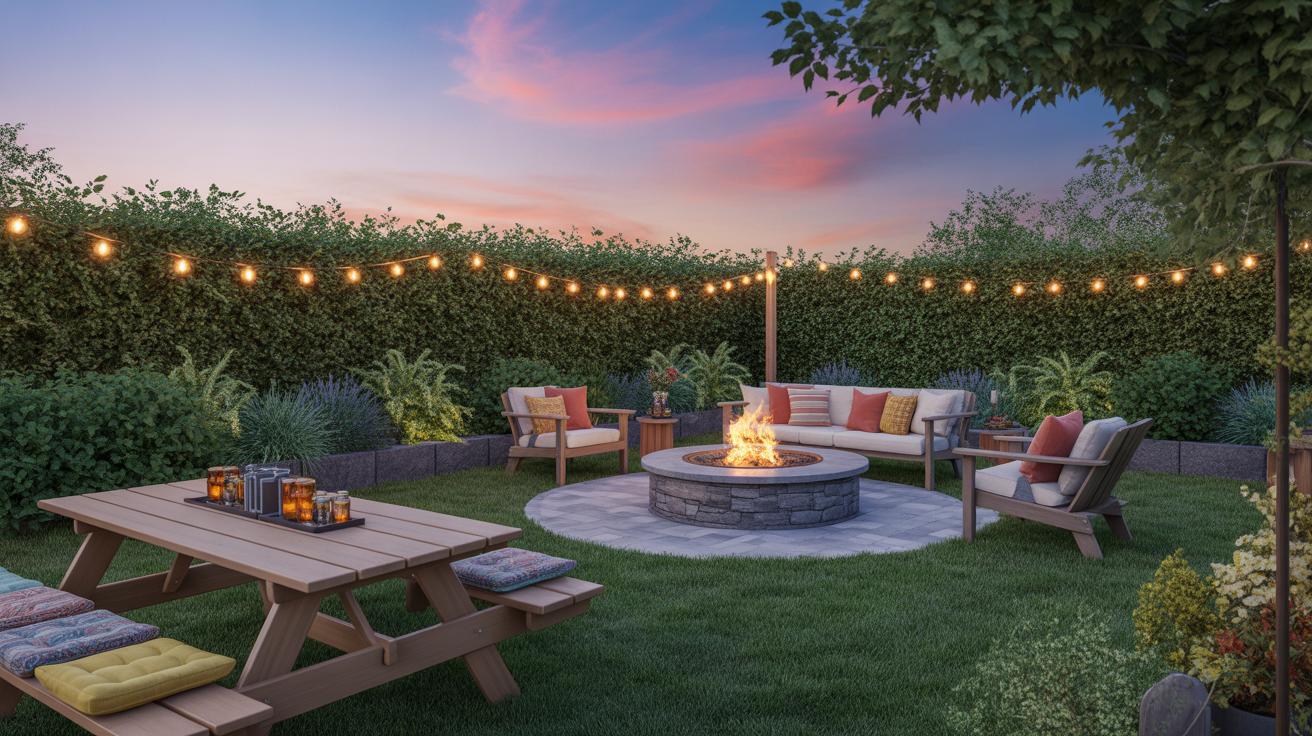
Lighting Your Garden Pathway
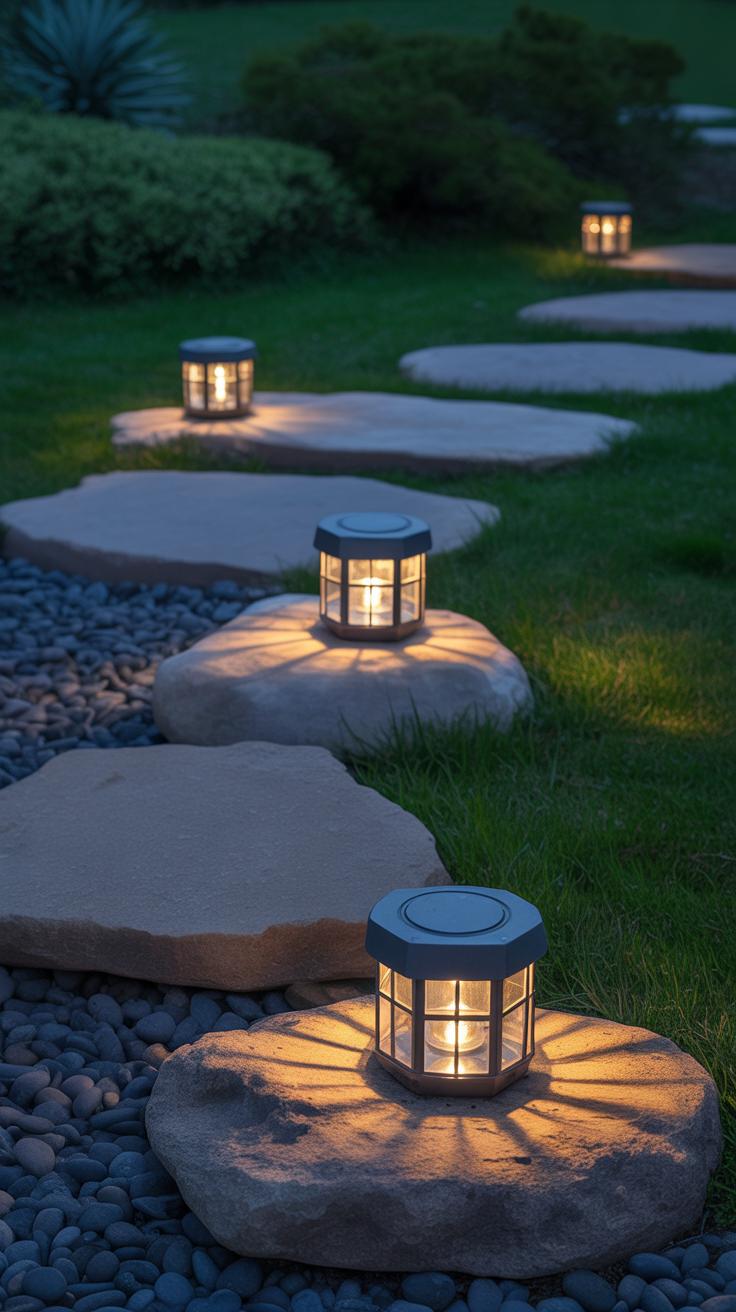
When evening falls, your stepping stone path doesn’t have to disappear into the dark. A bit of thoughtful lighting can turn it into a safe and inviting route—while also adding some charm. You might lean toward solar or low-voltage lights; these options are simple to install and don’t usually require any major rewiring. Solar lights, in particular, are pretty hassle-free. They soak up sunlight during the day and glow softly at night. But, of course, if your garden gets a lot of shade, they might not be reliable every evening.
Low-voltage path lights connect to a transformer and offer a steadier glow. They’re great if you want consistent illumination without fussing with wiring on a bigger scale. Placing them at regular intervals keeps the stones visible and guides every step. You don’t want harsh brightness—it’s about subtlety.
Now, about making things a little more interesting: light and shadow can shape the mood around your path. You can angle lights so bushes or trees cast gentle shadows onto the stones, creating patterns that change with the night breeze. String lights woven through nearby branches might sound a bit cliché, but done tastefully, they add a touch of magic without overwhelming the scene.

Or maybe you play with hidden fixtures tucked under stones that emit a soft upward glow. It can create a sense of mystery, inviting you to explore further. Still, there’s a small risk of overdoing it—too many effects threaten to distract from the simplicity stepping stones naturally offer. So it’s about striking a balance. How do you want your garden to feel once the sun sets? Cozy and functional or a little dramatic? Either way, lighting brings your stones to life after dark and can make all the difference.
Incorporating Themes Into Your Garden Pathways
Choosing a theme for your garden pathway can really shape how the whole space feels. It’s more than just picking stones and plants; it’s about setting a mood that connects with your garden’s personality. Take rustic and natural themes, for example. Using stones with rough textures, uneven edges, and earthy colors can give you that back-to-nature vibe.
Mix those stones with plants that seem effortless—grasses, ferns, or maybe wildflowers—and suddenly the pathway looks like it’s been part of the garden for years, not just laid out. It’s a bit like telling a story that feels a little unfinished on purpose, so everything blends without forcing perfection.
Rustic And Natural Themes
- Choose stones like flagstone or river rocks with natural shapes.
- Set stones irregularly to avoid too much order; let imperfections play in.
- Surround paths with greenery that grows freely rather than pruning all the way back.
- Consider moss or small ground covers between stones for added softness.
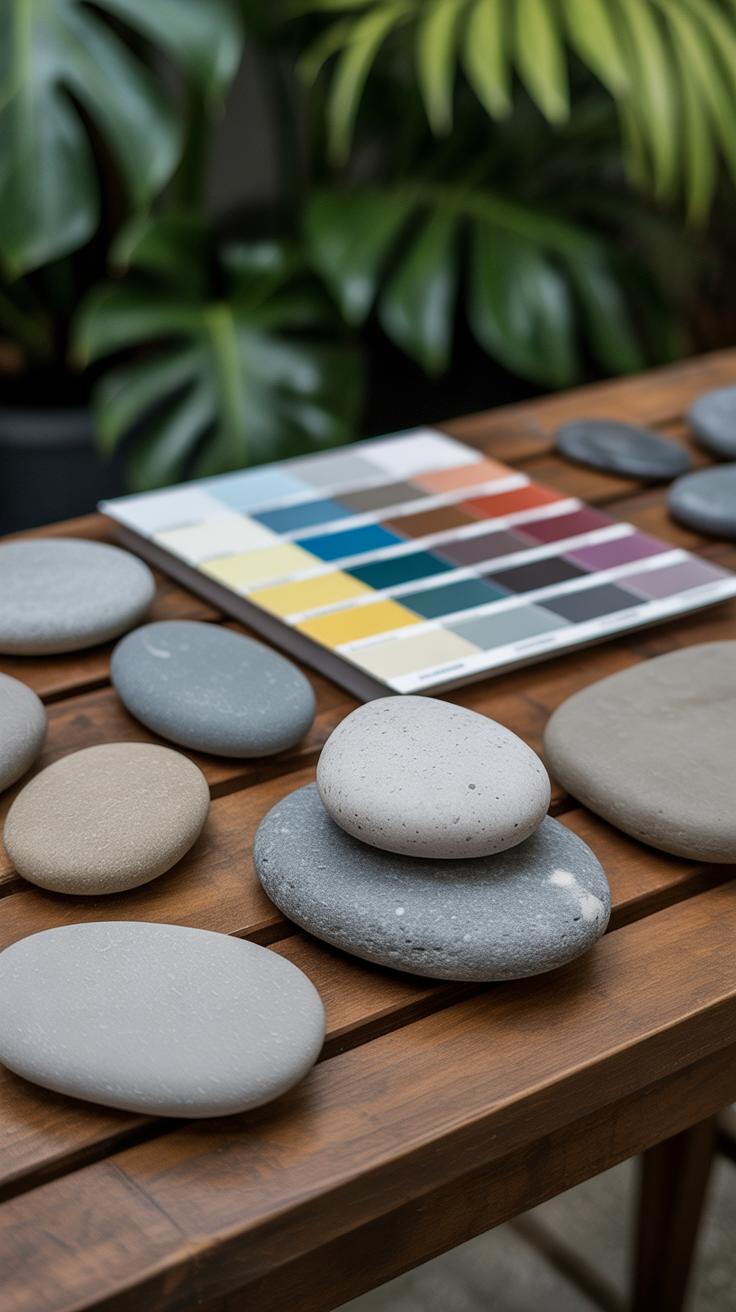
- Use colors pulled from the garden—browns, grays, greens—to keep a cohesive, earthy palette.
Now, if rustic speaks to tradition and those quiet moments in the garden, modern themes can feel like a whole different language. Think sharp lines, geometric shapes—square or rectangular stepping stones—and bold colors that catch the eye. It can feel striking but occasionally a bit cold if you’re not careful.
Modern And Artistic Themes
- Select stones cut with precision, often in squares, rectangles, or other geometric forms.
- Experiment with colors—black, white, or even painted stones—to create contrast and focal points.
- Arranging stones in unexpected patterns can give your path a gallery-like feel.
- Include minimalist plantings nearby, like low grasses or succulents, to keep the focus on the stones themselves.
- Consider mixing materials, for example, concrete slabs with colored glass inserts for an artistic effect.
It’s sometimes tricky to balance function and style with a bold modern look. You might wonder if the stones will fit the overall garden vibe or feel too stark. But that’s part of the challenge—and the fun—in choosing a theme that speaks to you. What do you want to experience every time you step outside?
Safety Considerations For Garden Pathways
When laying stepping stones, safety should quietly guide your choices. Stone placement matters—if the gaps between stones are uneven, you might catch a toe or twist an ankle without noticing until it happens. I’ve found that keeping stones fairly close and steady helps avoid that awkward moment when your foot hesitates mid-step. Try to keep them level with the ground around them to prevent any sudden lifts or drops.
Borders, though often overlooked, actually play a big role in safety. A clear, visible edge makes the path easier to follow, especially in dim light or when plants start to spill over. You might prefer edging with a contrasting material, like gravel or small bricks, so the boundary stands out just enough to catch your eye.
Surfaces that feel nice underfoot don’t always mean they’re safe. Smooth stones can get perilously slick when wet, something I learned the hard way one rainy afternoon. Textured stones or ones with natural roughness tend to grip better—even moss-covered stones can be tricky, so keeping your path clean matters.
Regularly sweeping away leaves or debris can make a surprising difference. It’s easy to forget, but that layer of grime can turn solid footing into a slip waiting to happen. And while you might like the look of shiny stones, they can reflect light in a way that masks puddles or slippery patches.
So, in choosing and placing your stepping stones, think about more than just looks. Imagine how you’ll move along the path, in all kinds of conditions. You want to invite a stroll, not a stumble.
Conclusions
Stepping stones offer a simple way to improve your garden pathways. With many choices in styles and materials, they can fit any garden and personal taste. By planning carefully, you can create a path that is both functional and pleasing to the eye.
Remember to consider your garden’s size, plants, and overall look when choosing stepping stones. Regular maintenance will help your pathway stay safe and attractive. With these ideas and tips, you can enjoy a charming walkway that invites you to explore your garden every day.